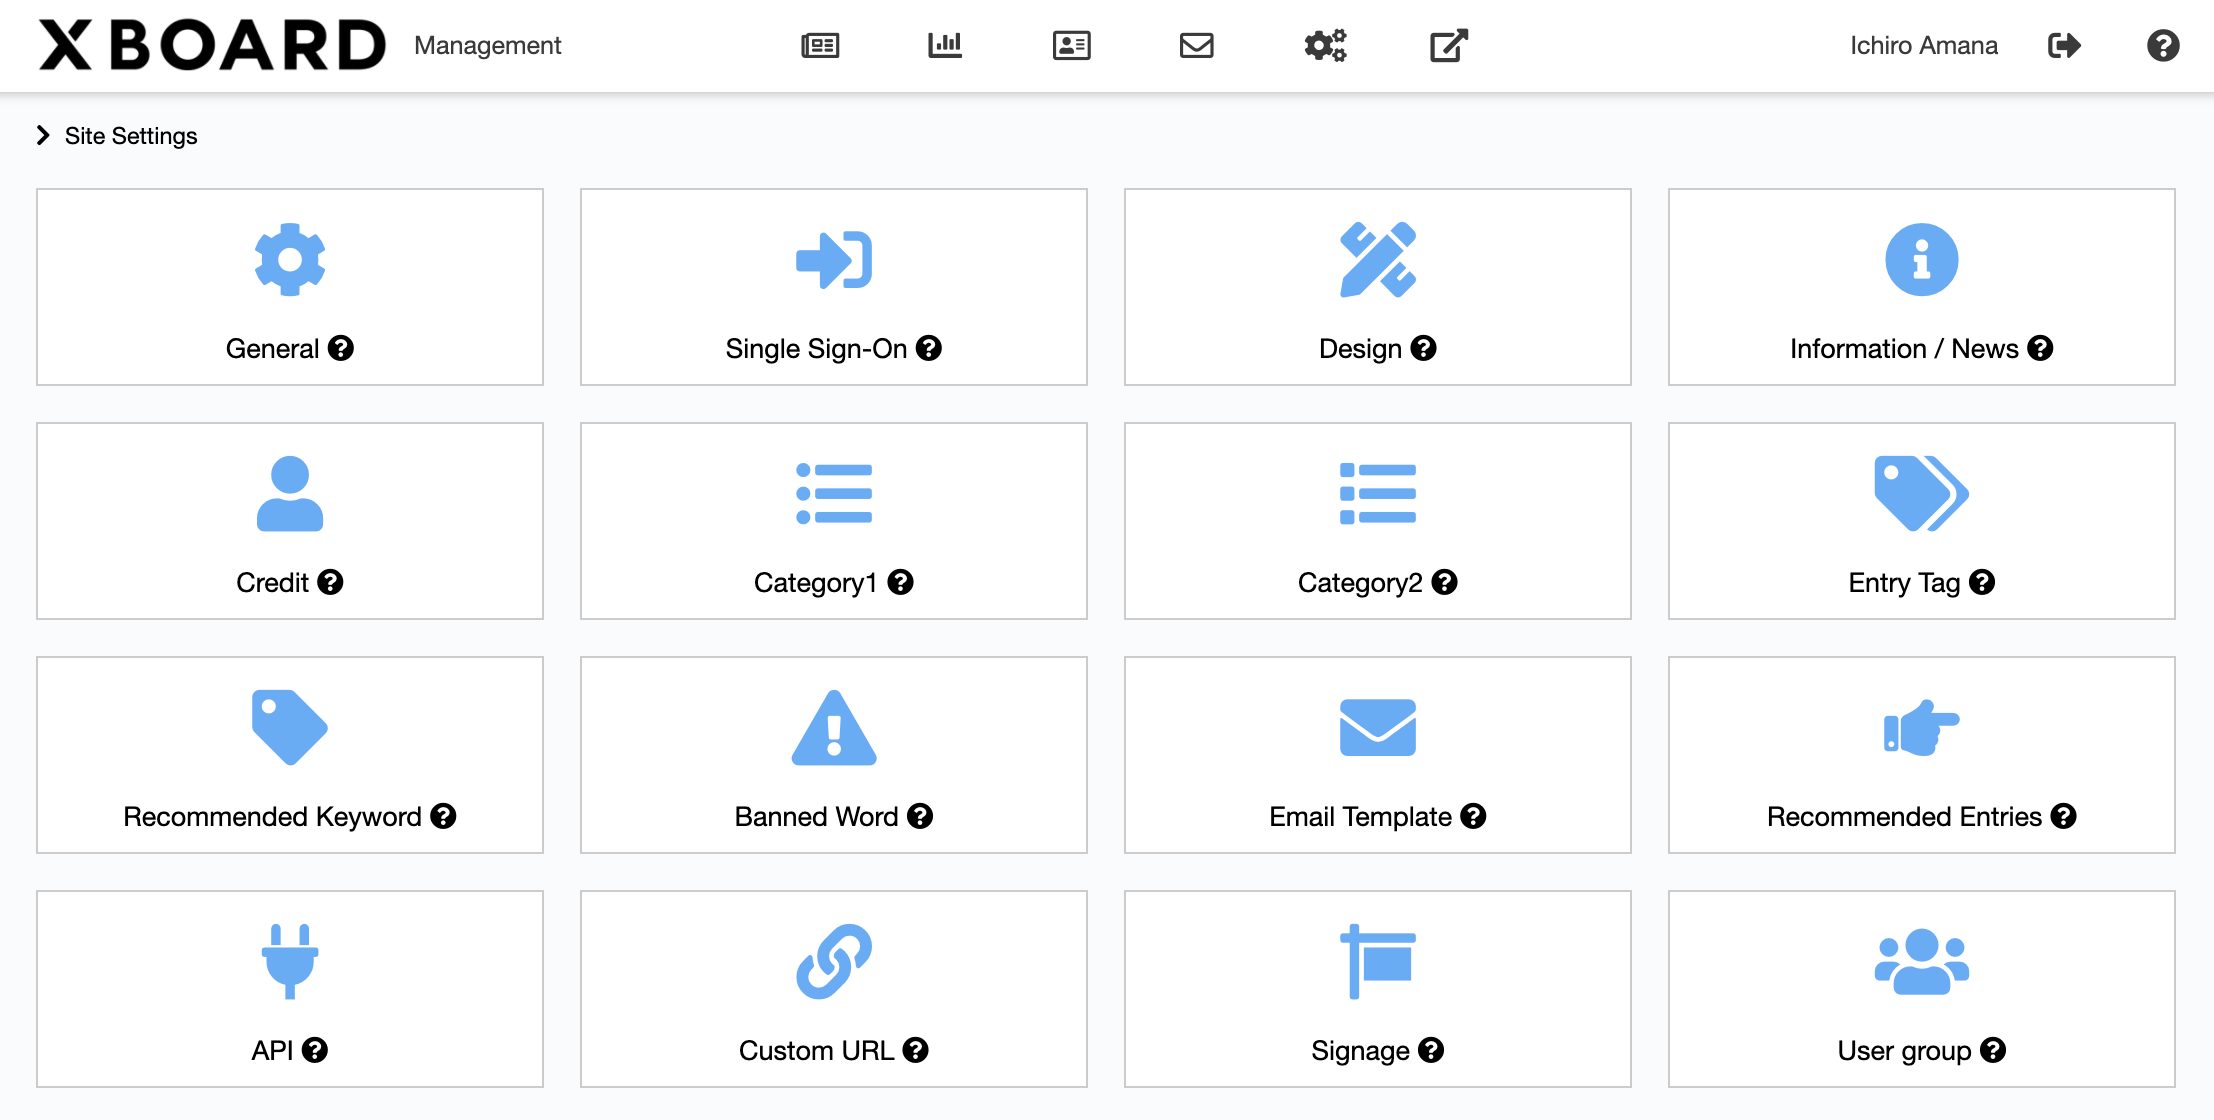
Settings
- General Settings
On the General Settings Page, you can confirm a contract information and set up optional functions and security items.
■How to Set Up
The setting items consist of “General”, “Options” and “Security” sections. Change the following items as appropriate.


・General Settings
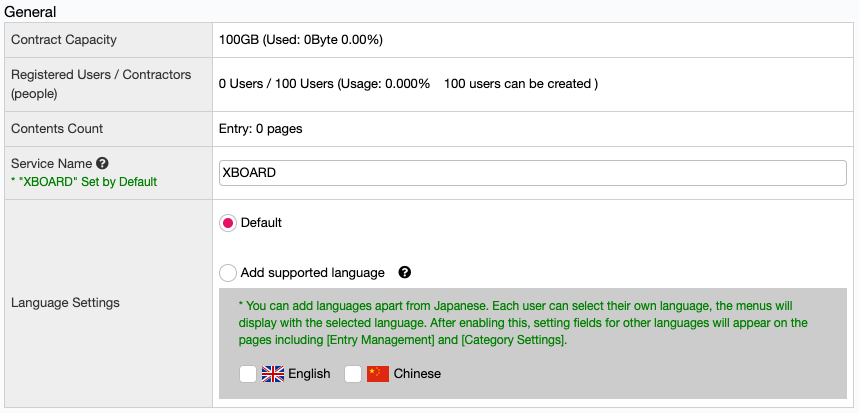
Contracted capacity
The contracted capacity for this service and the capacity already used are displayed.
Registered Users/Contractors (people)
The number of all users registered on your site and contractors are displayed.
Contents Count
The number of entries currently existed on the Entry Management is displayed.
Set up the name of your site. The service name will be used for a title bar and any kind of emails send from this service.
※ XBOARD set by default.
Language Setting
You can add languages other than Japanese to this service.
・Entry
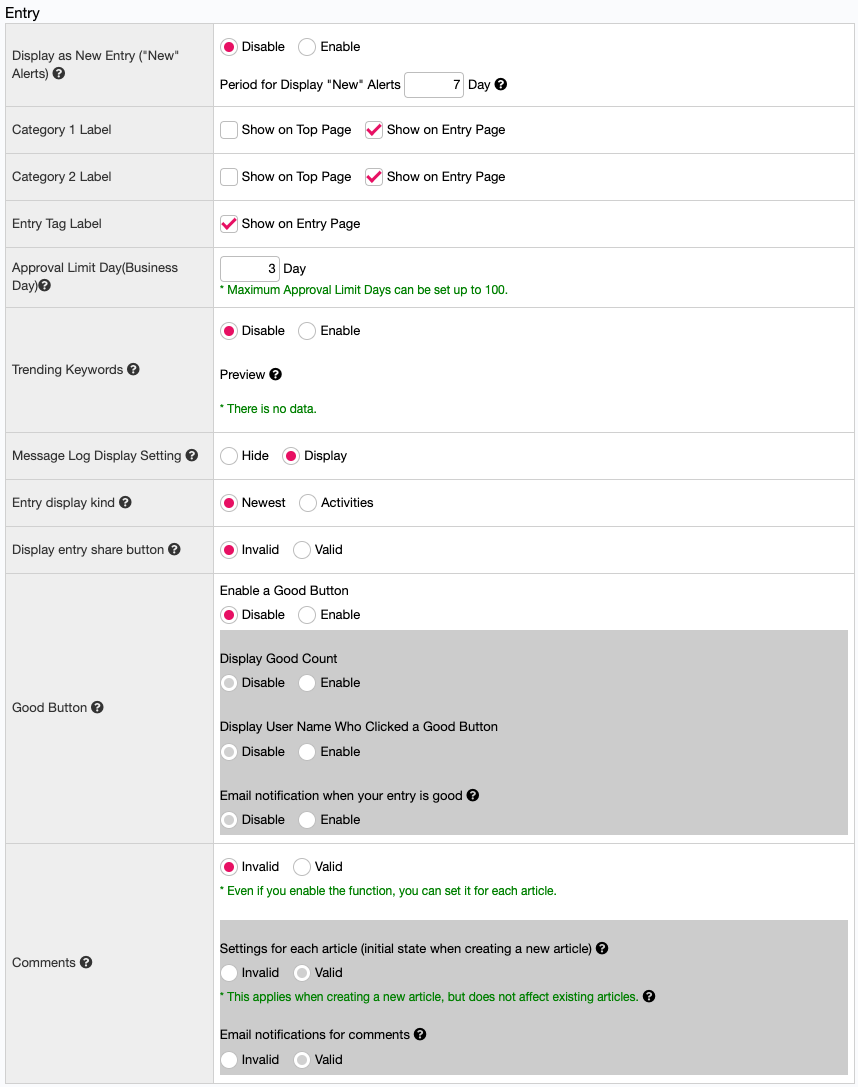
Display as New Entry (“New” Alerts)
If you set this, new entries on the Top page will be labeled “New”.
Set the period (counted from publish date) to show the “New” alerts.
※If you set blank or 0, “7” is set by default.Category 1 Label
You can choose whether show or hide “category 1 label” on top page/entry page.
Category 2 Label
You can choose whether show or hide “category 2 label” on top page/entry page.
Entry Tag Label
You can set whether or not to display the entry tags set for an article on the article details page.
Approval Limit Day (Business Day)
Sets the approval deadline value in the mail template of Confirmation Request.The set number of days must be business days (the number of days excluding Saturdays and Sundays).
※If you set blank or 0, indicates 3 days.
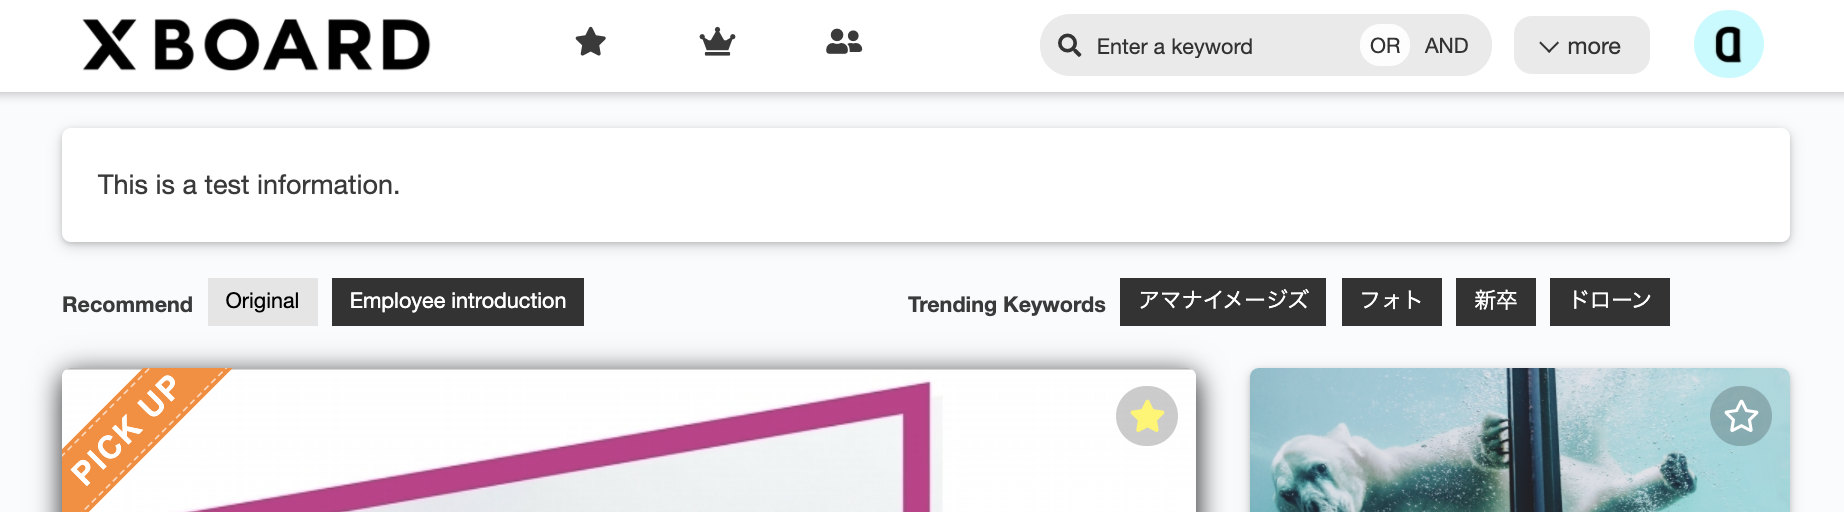
※The upper limit day is 100 days.Display the Recommended Keywords (set by administrators) on the Top page.
If you enable “Random Display”, keywords are picked up randomly regardless of the display order.
※Due to the limited space to display at once, better to enable this if you have got many keywords.[How to set recommend keywords]
Display the top keywords most searched by users in the recent seven days.
Showing the data as of 3 am today in preview.

FAQ:What is the condition appear “Trend Keywords”?
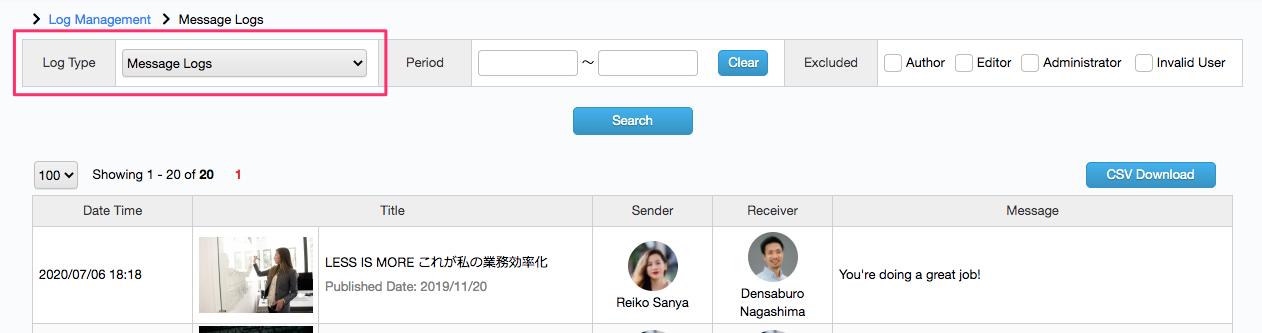
Set whether the users on the management screen can view a log of all interacted messages on this site. This setting applies regardless of roles.
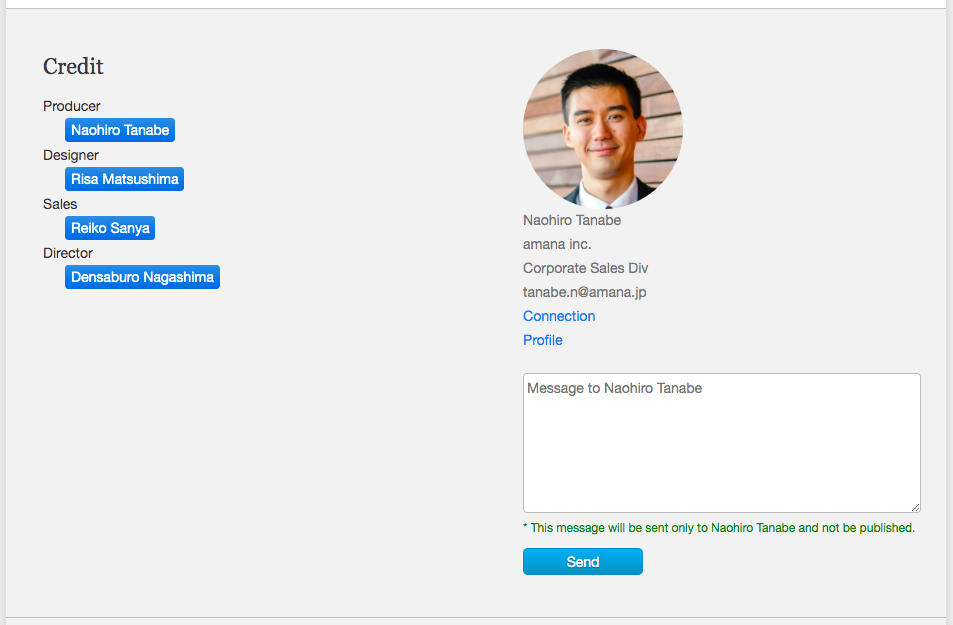
▼Readers can send a message from the credit area of each Entry Page.

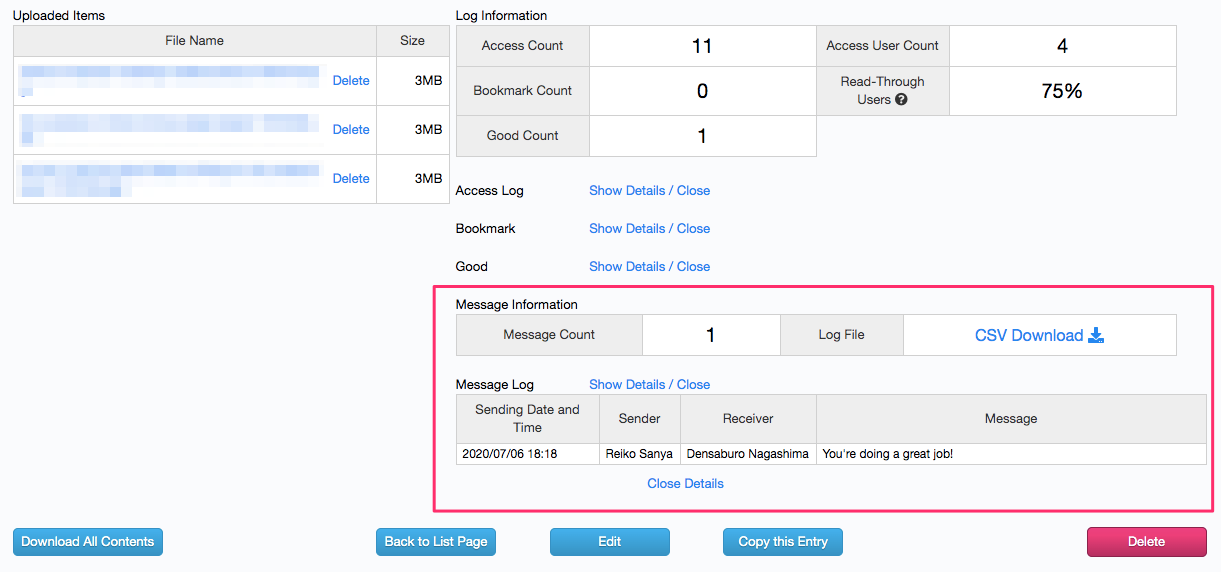
▼When this field set to “Display”, users can browse the message logs (red frame area) on the Entry Confirmation Page.

▼When this field set to “Display”, users can search for message logs on the Log Management Page.

You can set the display type for the entry list on the top page.
Newest: Posts are displayed in descending order of publication date.
Activities: Entry are displayed in order of publication date, bookmarks, comments, goods, and other activity.You can display a “Copy URL” button on the entry details page of the publication screen.
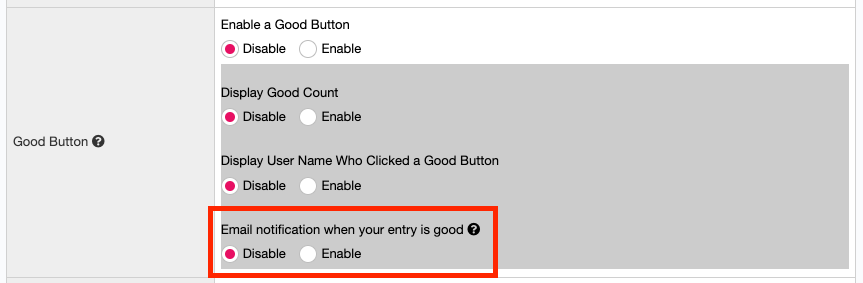
Enabling this function, you can have users evaluate the entries.
You have five choices of “not set (not display a Good Button)”, “enable a Good Button”, “enable a Good Button + display good counts“, “enable a Good Button + display good counts/user name who clicked a Good Button (without a link to user page)“, “enable a Good Button + display good counts/user name who clicked a Good Button (with a link to user page)“.
- Not set (not display a Good Button)
A “Good Button” is not displayed by default.
- Enable a Good Button
A “Good Button” is displayed on the entry page.
Although good counts are not displayed on the Publish Page, you can confirm on the Management System (Entry Edit Page).

- Enable a Good Button + Display Good Counts


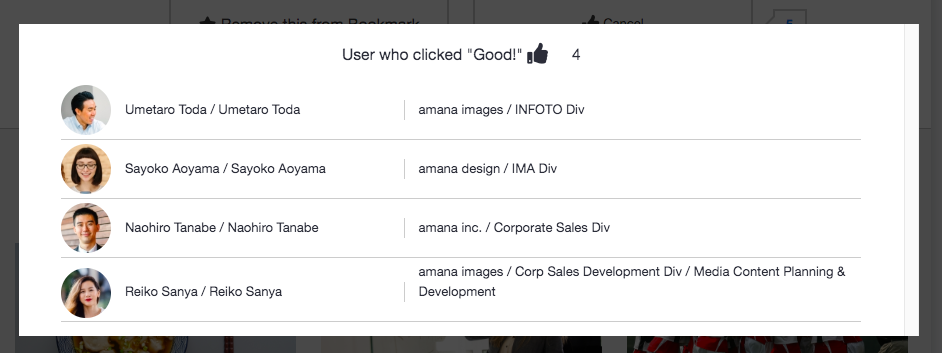
- Display User Name who Clicked a Good Button (without a link to user page)

※Click a link of Good Counts to display all users who evaluated the entry.

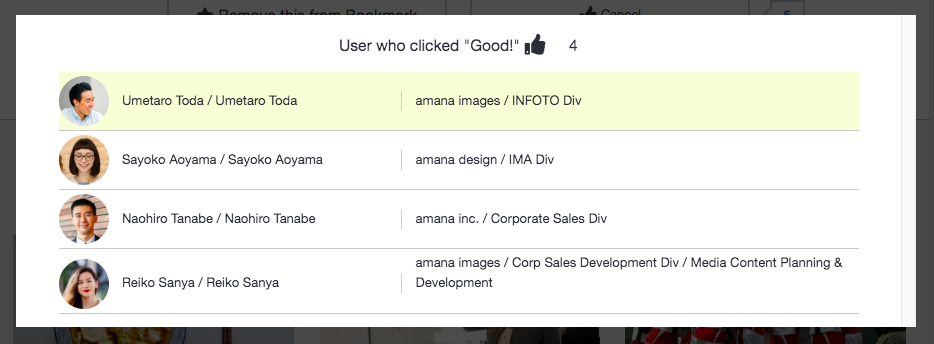
- Display User Name who Clicked a Good Button (with a link to user page)
If the User Search function is enabled, a link to the User Profile Page will be available.

Once a day (around 8:30 a.m.), the “editors” and “users credited in the article” of the article that was liked the previous day will be notified of the article by email. If there are multiple articles that match, they will be sent together in a single email.

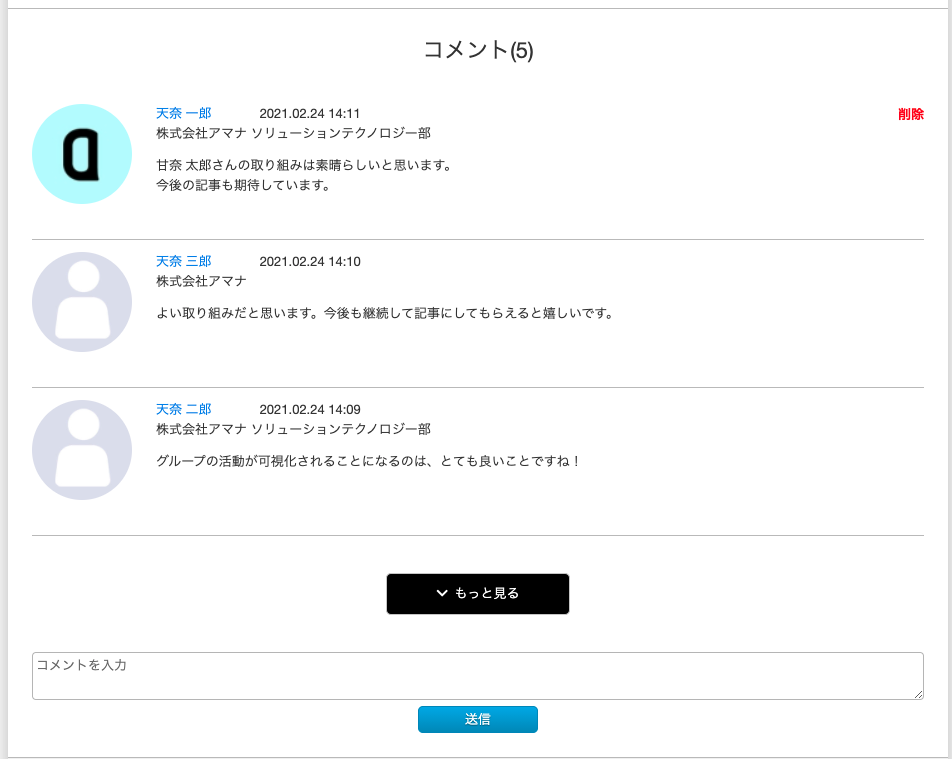
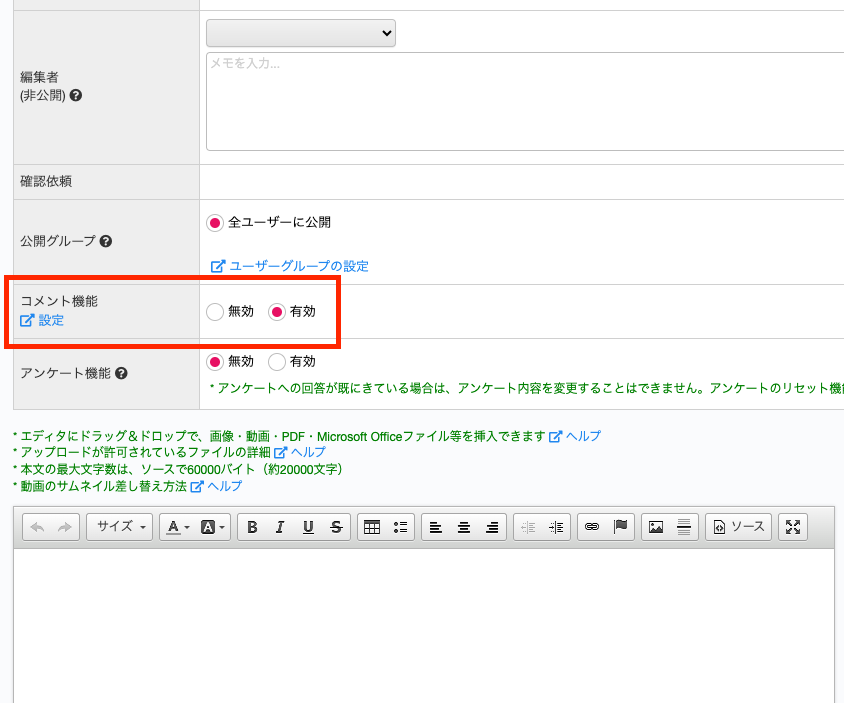
When you enable the comment function, a comment section will appear on the details page of the published article, and readers can post comments. You can also enable or disable comments for each article on the new article creation and editing screen.
- Viewing and Reading Comments
- The comments section will appear on the article details page.
- Up to the five most recent comments are displayed, and any further comments can be viewed by clicking the “See more” button.
- Comments posted will be published in real time.
- Administrator notification and management
- If administrator notifications and moderation settings are configured, editors will receive an email notification when a new comment is posted. The notification email will contain the comment content and a URL to the moderation page.
- On the administration page, you can view or hide comments.
- Exporting comments
- You can export comment data from the log management function.

You can set the initial state (enable/disable the comment function) of the editing screen (new creation).

Old articles created when the comment function was disabled will not be able to be commented on even if the comment function is enabled later, and each article must be updated individually to enable comments. If you would like to enable the comment function later and make all old articles commentable, please contact the XBOARD administrator (sales representative).
When a comment is posted, email notifications will be sent to the “editor of the article,” “people who have bookmarked the article,” “people who are credited in the article,” “people who have commented on the article,” and “people you have set as people you want to notify when they comment.” This setting allows you to disable these email notifications. If you disable it, you will no longer be able to set “people you want to notify when commenting.” For more information, please refer to the notification destination and log of the action.
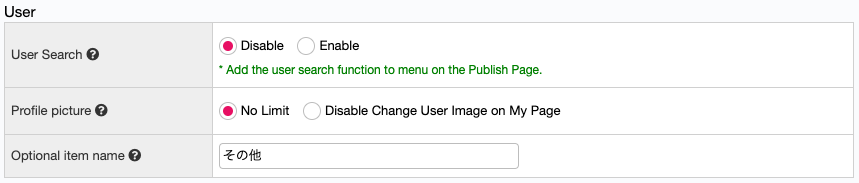
・User
User Search
Please refer to another page (User Search) for more details.
You can restrict whether users can change a profile photo on My Page or not.
Select from [No Limit] or [Disable Change Icon on My Page].
The “Other” field in user information is an optional field, and you can set its name.
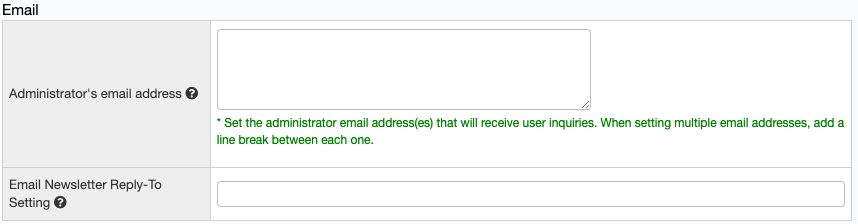
・Email
Administrator’s email addresses
Set the administrator’s email addresses that receive inquiries from users.
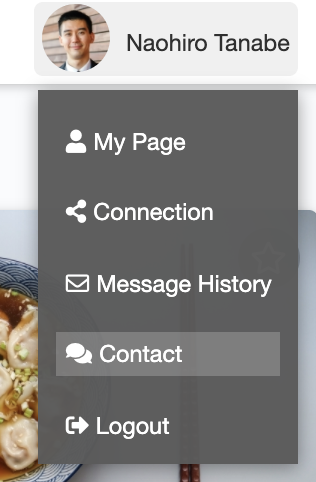
Setting an administrator email address will add “Contact” to the menu on the public page, allowing users to send inquiries to the administrator.▼Publish Page: link of contact

Email Newsletter Reply-To Setting
Email newsletters essentially do not receive a reply. However, if you set an email address for a reply, you can receive replies for email newsletters. This setting applies to all email newsletters.
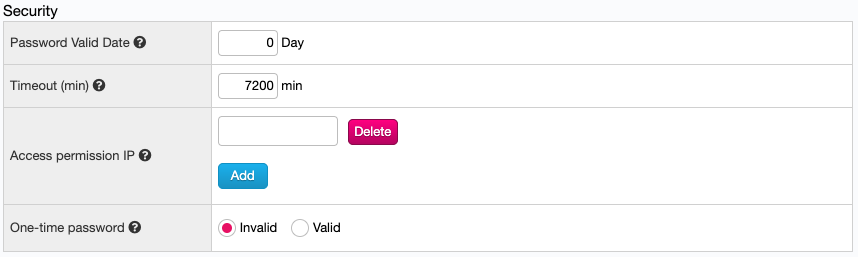
・Security
Set the valid date of passwords registered by each user.
※If you set blank or 0, indicates no expire.Specify the period until “Timeout”. If there is no access to the service within a predetermined time, logs the user out automatically.
※If you set blank or 0, indicates 7200 min(5 days).
※The upper limit time is 10080 min(7 days).If you specify accept IP address, restrict the access from any other place.
※ Due to this setting, enhance security against unauthorized access.※ If you set blank, any IP address can connect your site.
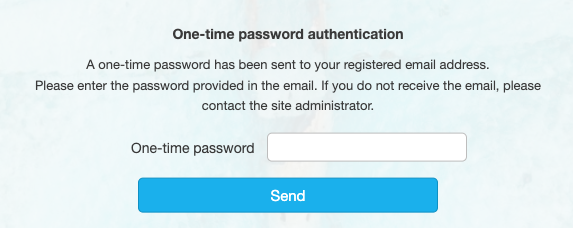
※ This setting will also apply to API.When the one-time password is enabled, a one-time password will be issued to the email address set for the user when logging in.
Security is strengthened because the login process cannot be completed unless the email of the set user can be seen.
*The one-time password function cannot be enabled unless email addresses have been set for all valid users.
Confirmation and Update of General Settings
If you edited/set items, please click the [Confirm] button and update the data on the confirmation screen.
When the update is completed, jump to the Site Settings Page.
If you need to change the settings on the General Settings Edit Page, click the [Back] button.
※To apply changes of the site information will take a few minutes.
※If you don’t click the [Confirm] button to update, changes to be discarded.
- Design Settings
On the Design Settings Page, you can customize the appearance of the Publish Page.
■How to Set Up
Display the setting fields of site design. Edit each item as appropriate.

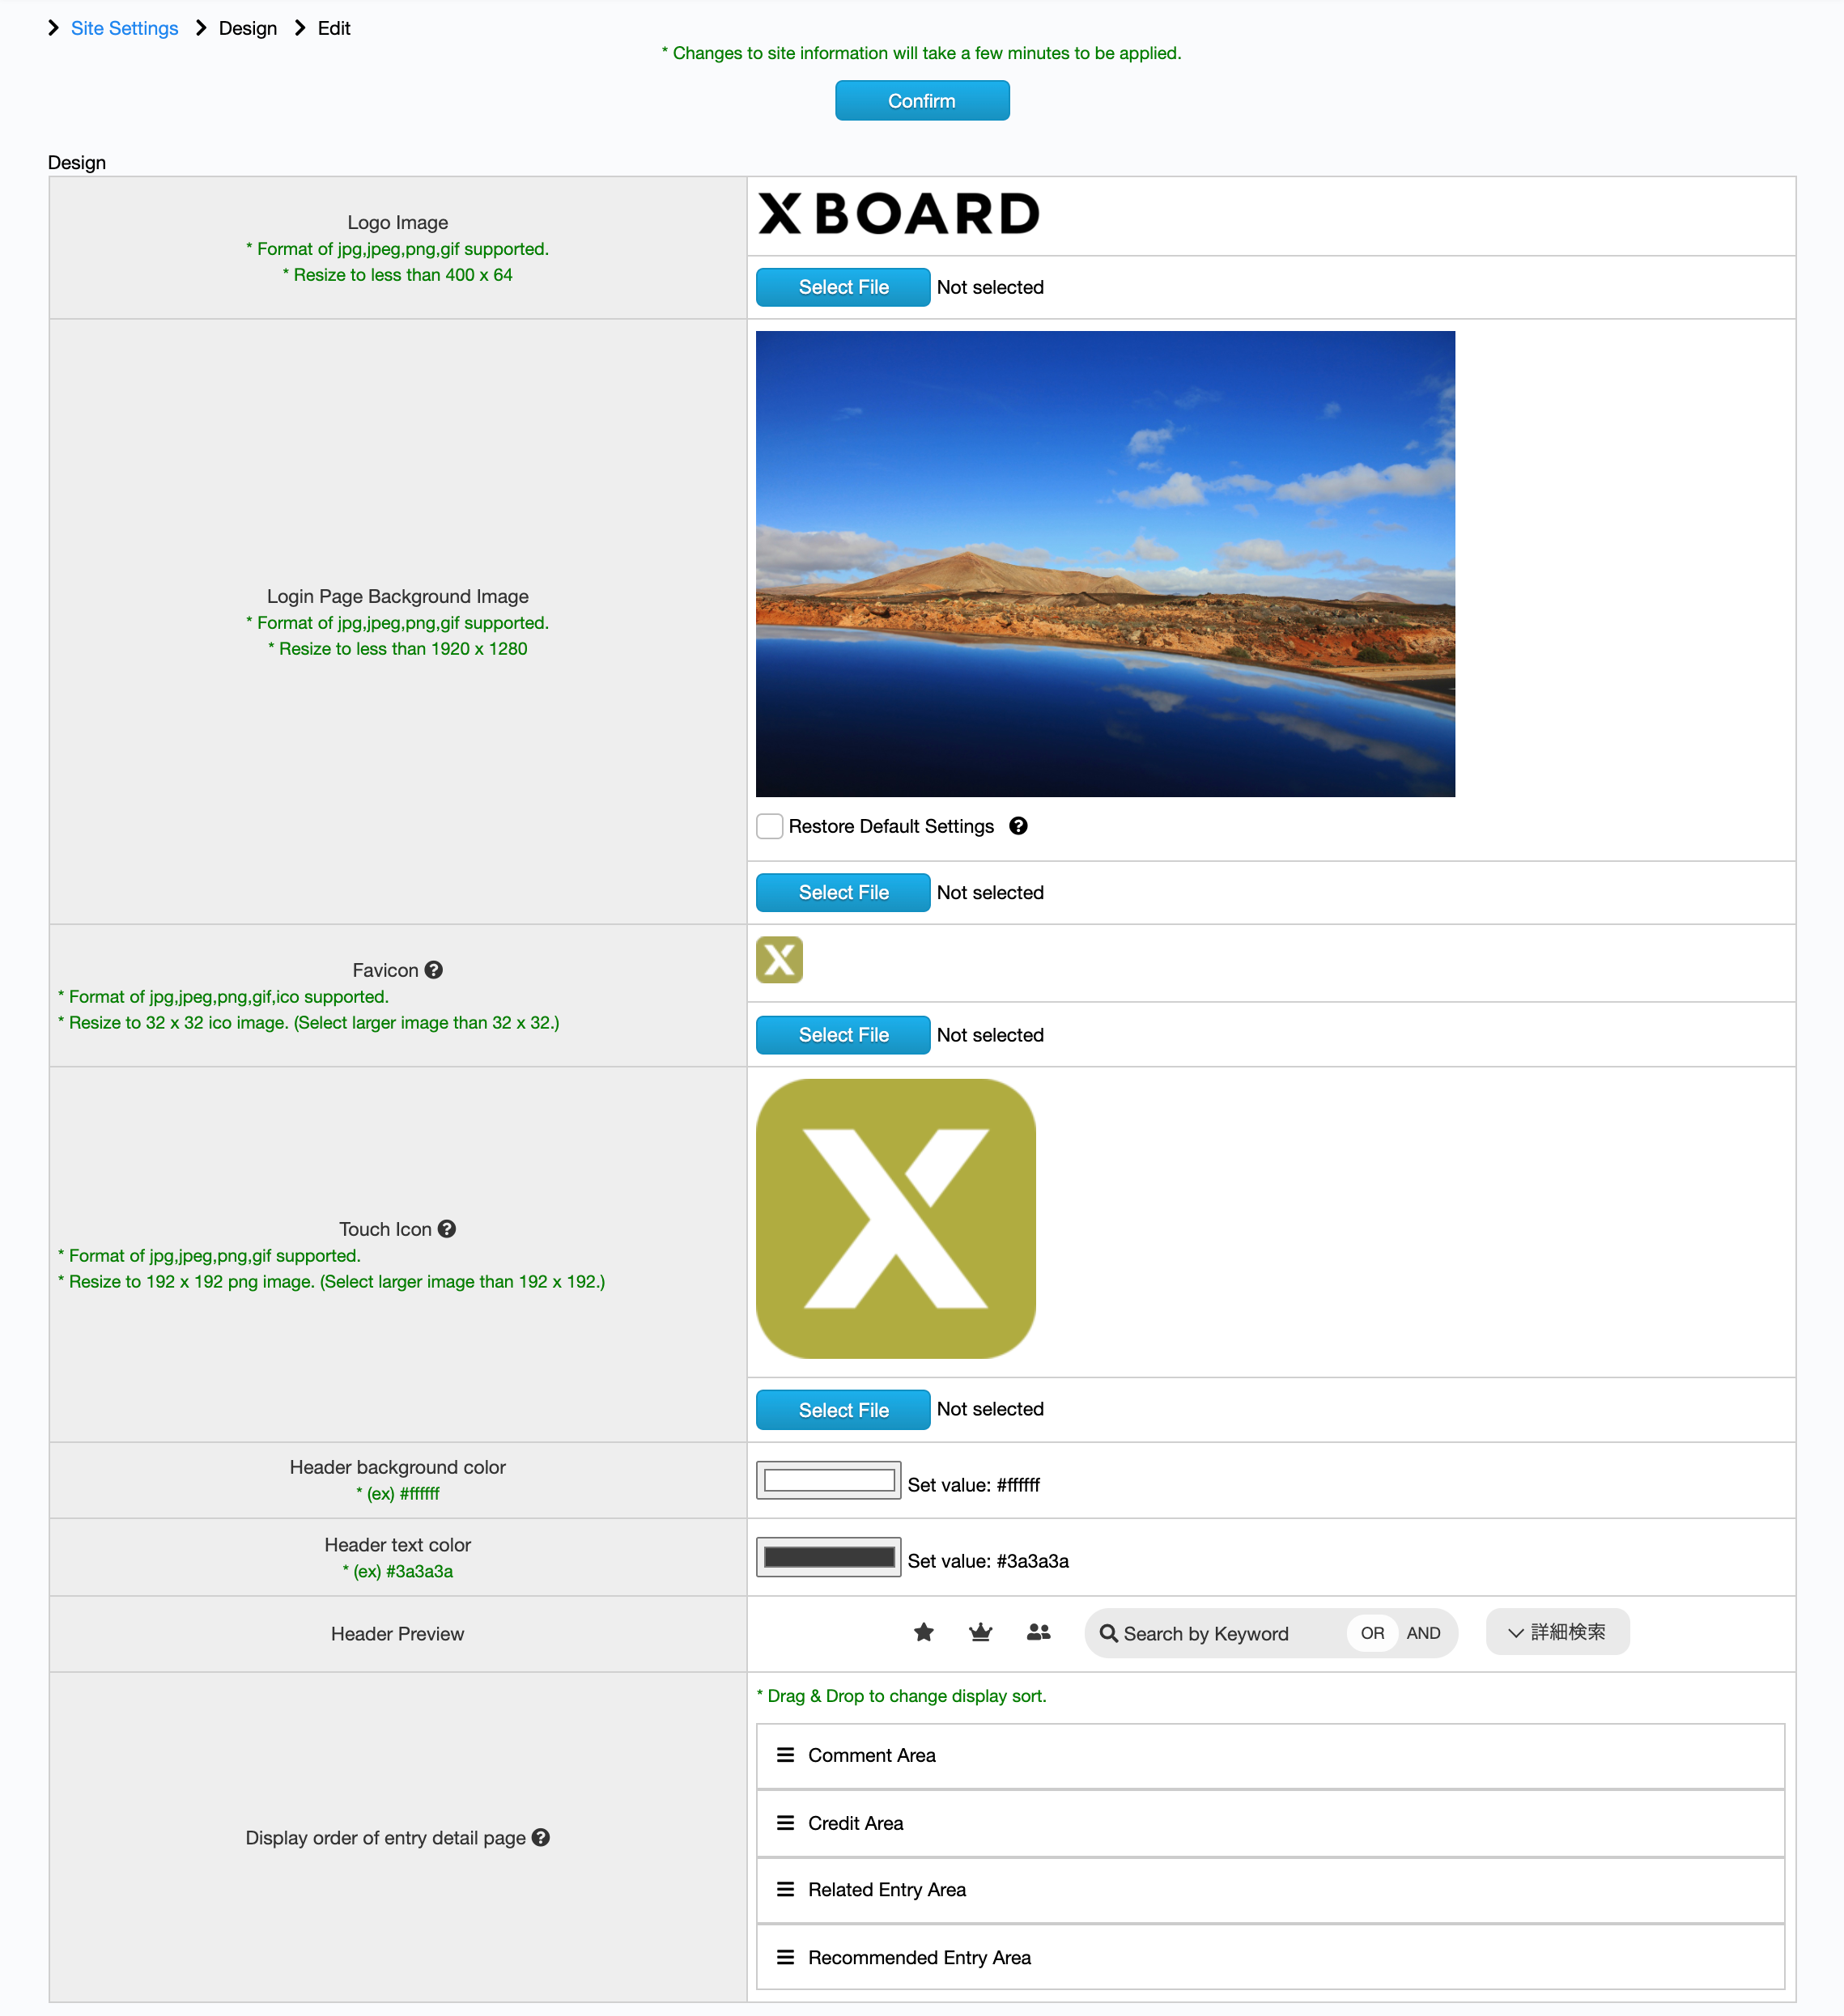
・Design
Logo Image
Select the image for Logo Image displayed on the header of the Publish Page.
Click the [Select File] button to upload an image.
The image will be trimmed to smaller than 400p x 64p. Please be sure to select larger image than 400 x 64 jpg/jpeg/png/gif file.
Login Background Image
Select the image for Login Background Image.
Click the [Select File] button to upload an image.
The image will be resized to smaller than a 1920p x 1280p jpeg file. Please be sure to select jpg/jpeg/png/gif file.
If you update with the [Restore Default Setting] checked, you can delete the updated image and reset to default image.
Select the icon for Favicon displayed on the browser tab or the address bar.
Click the [Select File] button to upload the image.
The image will be trimmed to smaller than 32p x 32p. Please be sure to select larger image than 32 x 32 jpg/jpeg/png/gif/ico file.
Select the icon for the app icon displayed on the Home Screen of Smart Phone.
Click the [Select File] button to upload the image.
The image will be trimmed to smaller than 192p x 192p png file. Please be sure to select larger image than 192 x 192 jpg/jpeg/png/gif file.
Header Background Color
Select the color for the header background of the Management System/Publish Page.
Header Text Color
Select the color for the header text of the Management System/Publish Page.
Header Preview
The setting contents of Header Background Color/Header Text Color can be confirmed on the Header Preview area.
You can change the order of contents displayed below the content of each Entry Page.
The contents are displayed in order of Comment Area, Credit Area, Related Entries Area, Recommended Entries Area by default.Drag
 to change the display sort.
 - Information Settings
On the Information Settings Page, you can create/edit information displayed on the top of the Top Page.
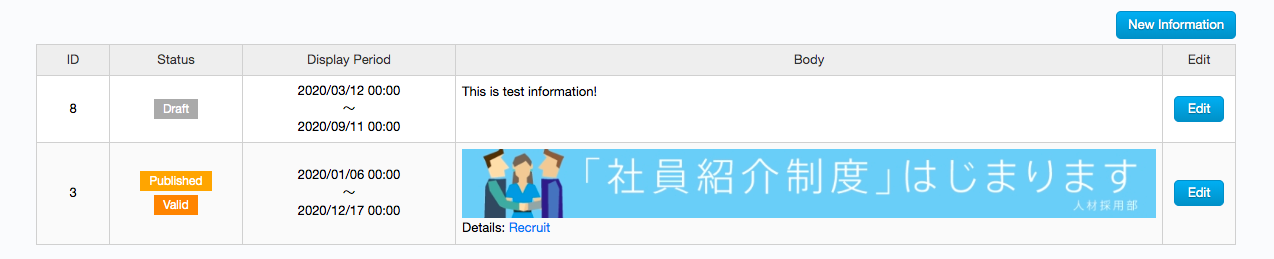
■Operation on Information List Page
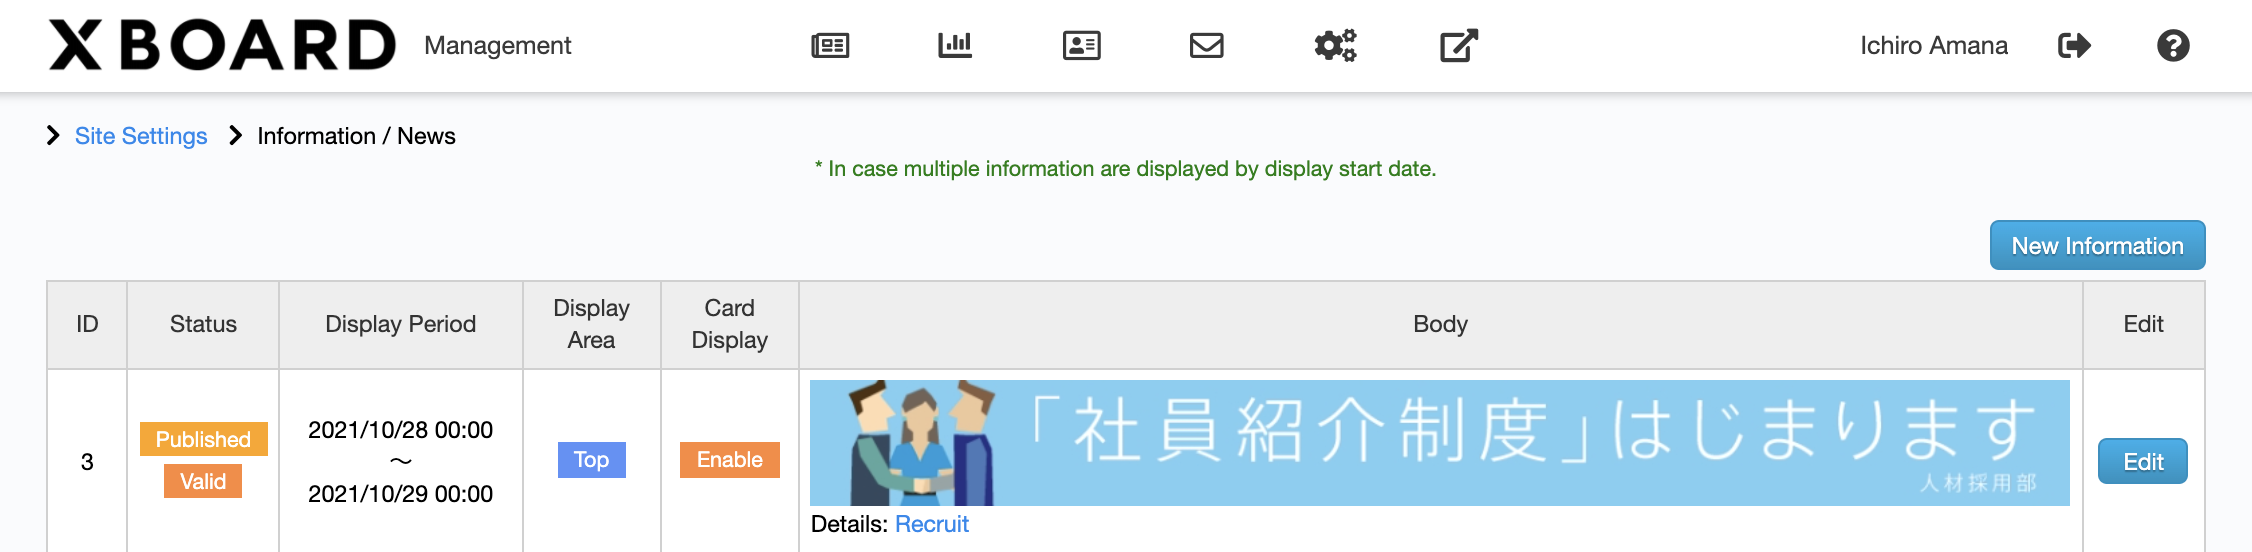
List all the information created so far. If you click each row, you can confirm/edit the contents.
※If there are multiple items of information, are listed in order of most recent ones.
ID:Numbering automatically when you create a new information
Status:Display the current progress
Display Period:Display the period showing the information
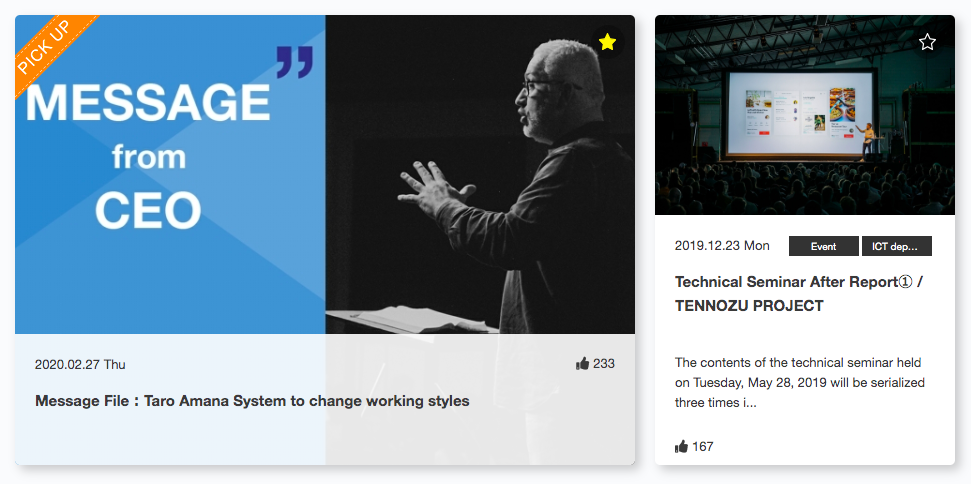
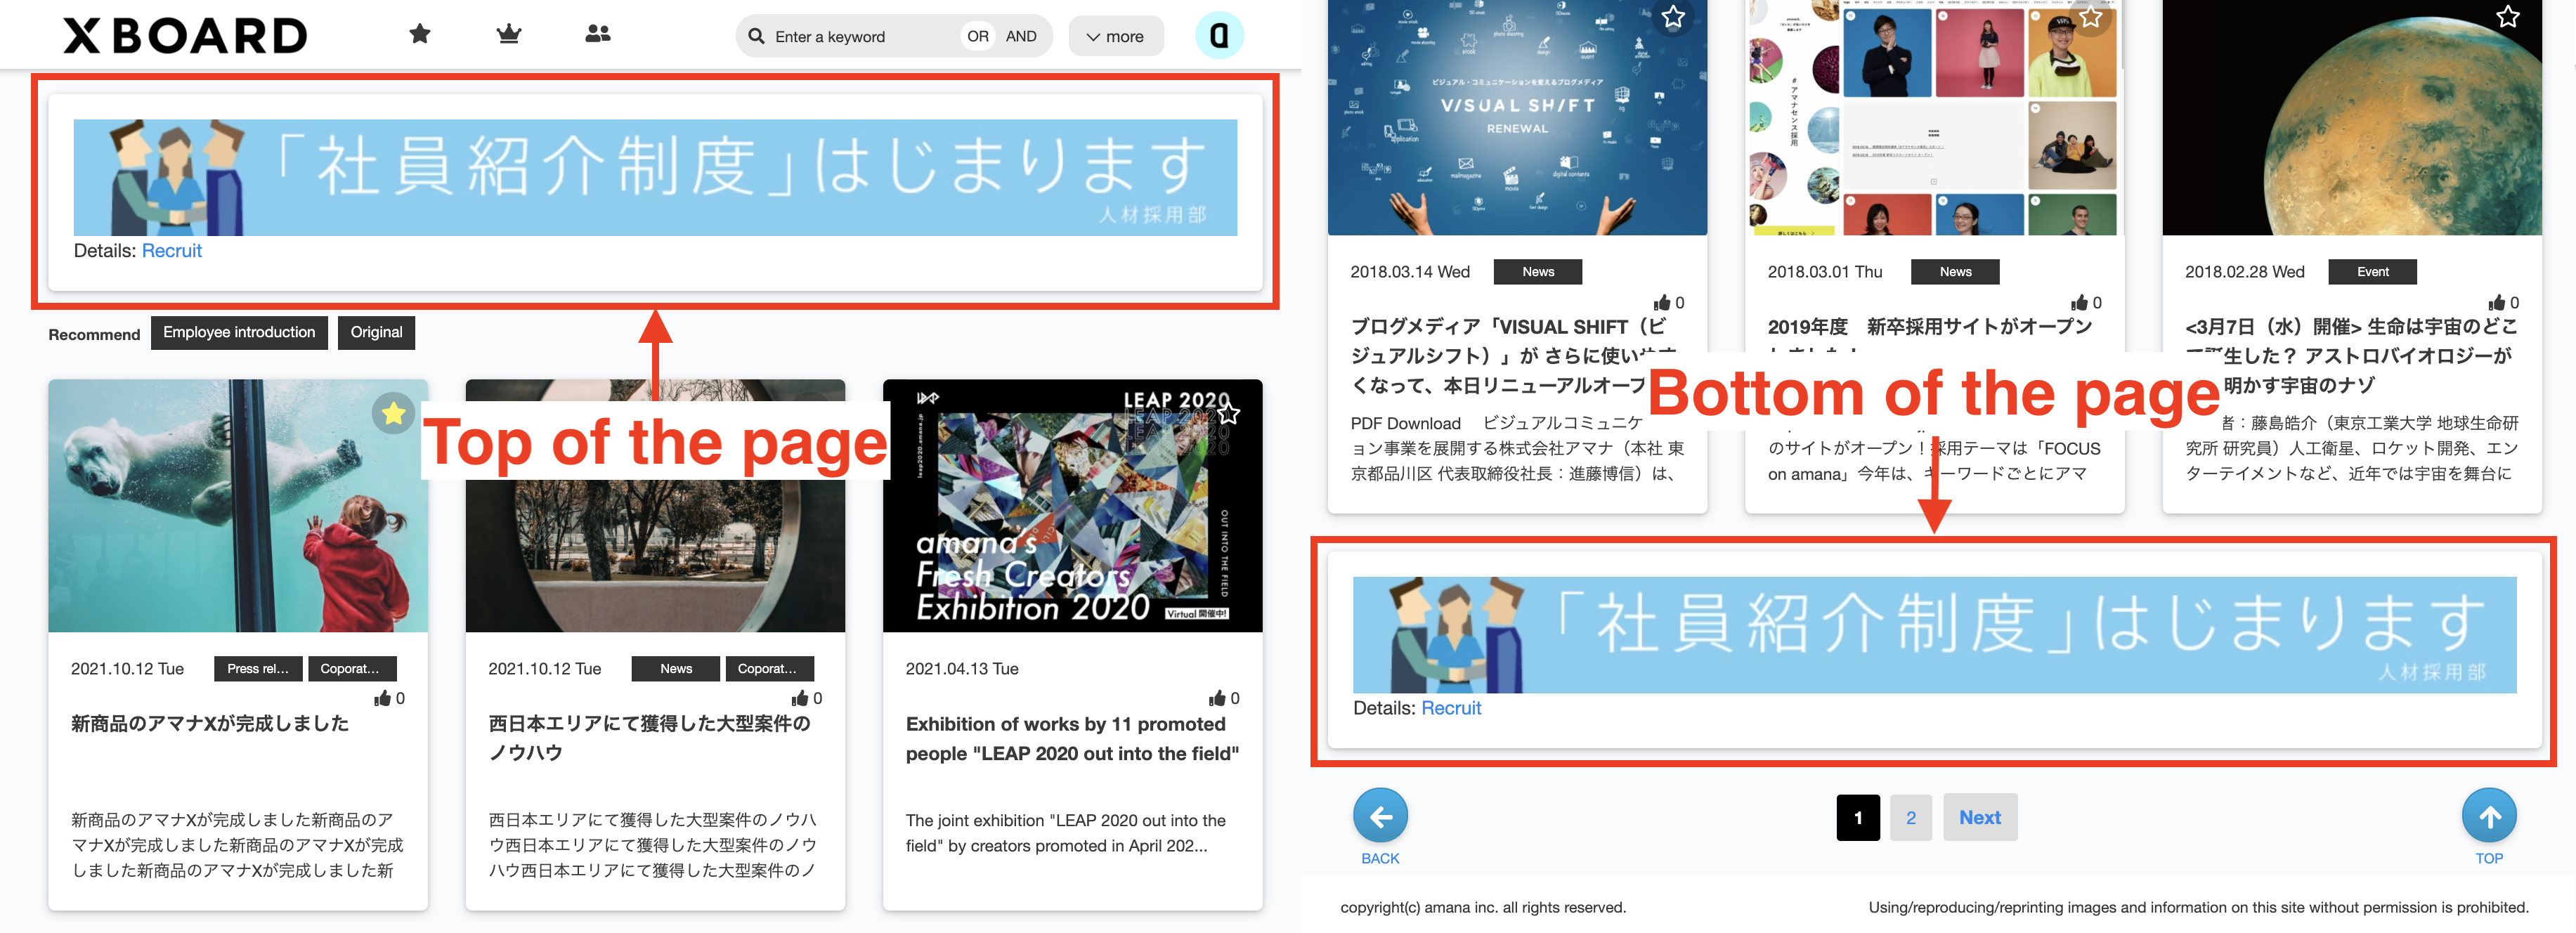
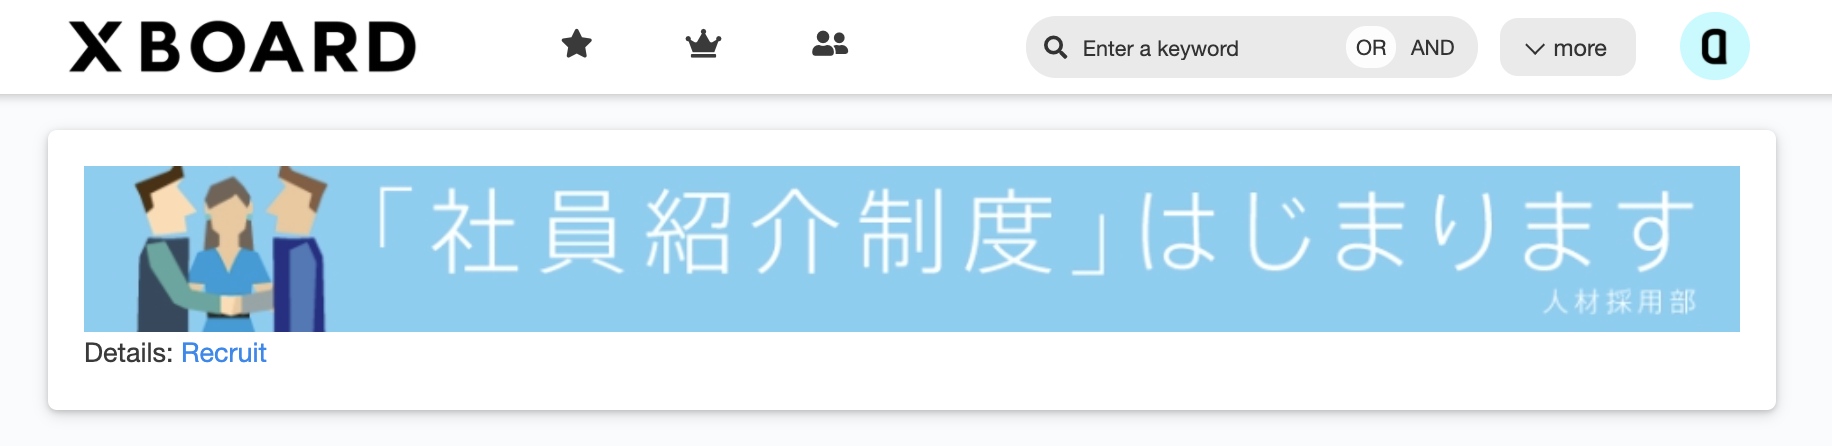
Specify the display position of the announcement on the top page from the top or bottom. If you select All Public Screens, it will be displayed on all public screens other than the top page, such as the article detail page.

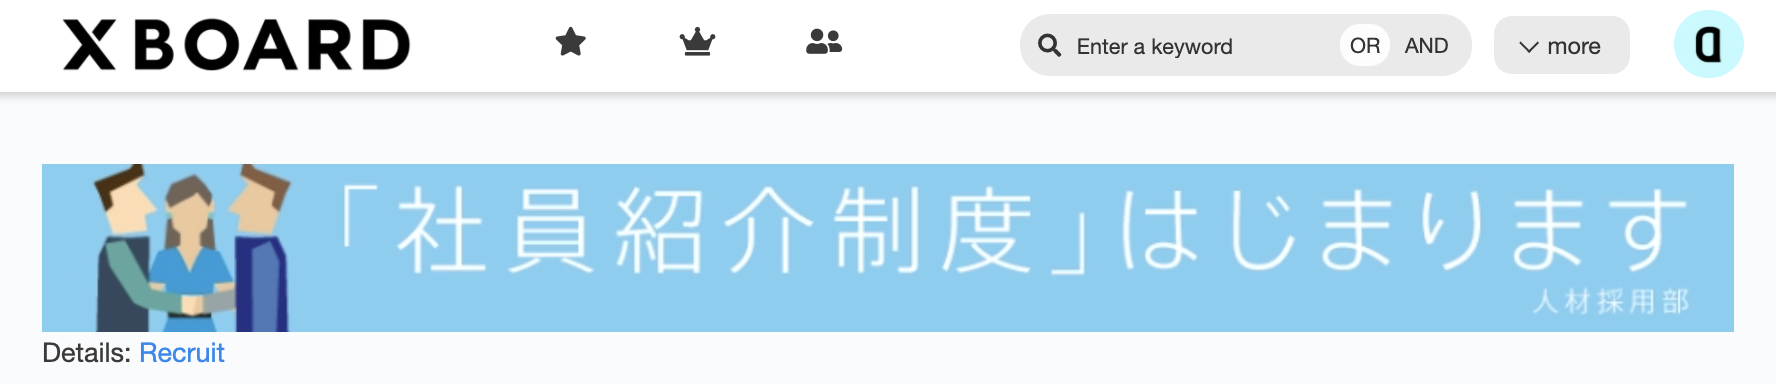
Card Display is a design that places content in a specific area in card format. If you disable card display, you can change the background color and border style of banners with HTML and CSS to make them more customizable.
▼When the card display is enabled

▼When the card display is disabled

Information Body:Display the content of information
Edit Information
Click the [Edit] button to edit information on the Information Edit Page.
Create New Information
Click the [Create] button to create new information on the Information Edit Page.
■How to create/edit an information
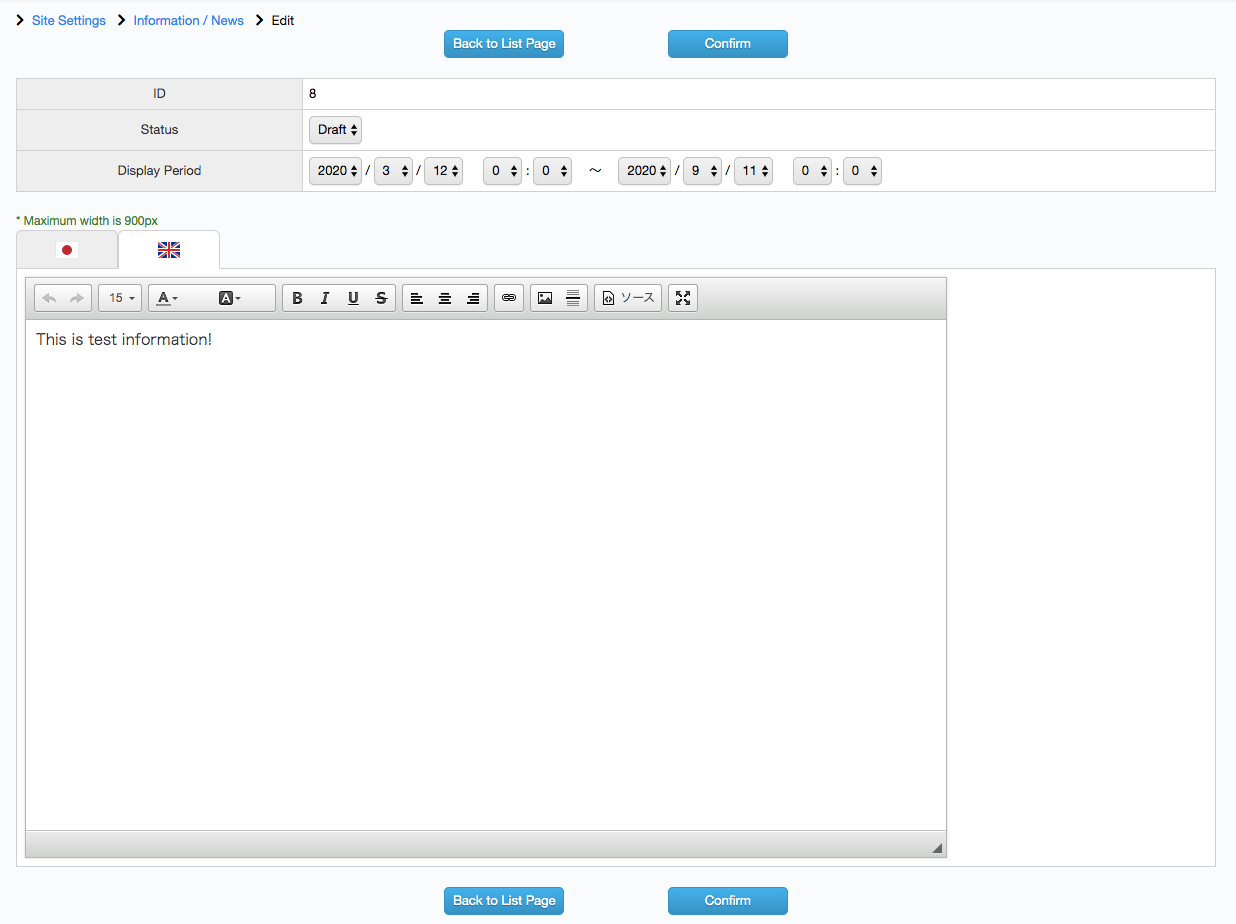
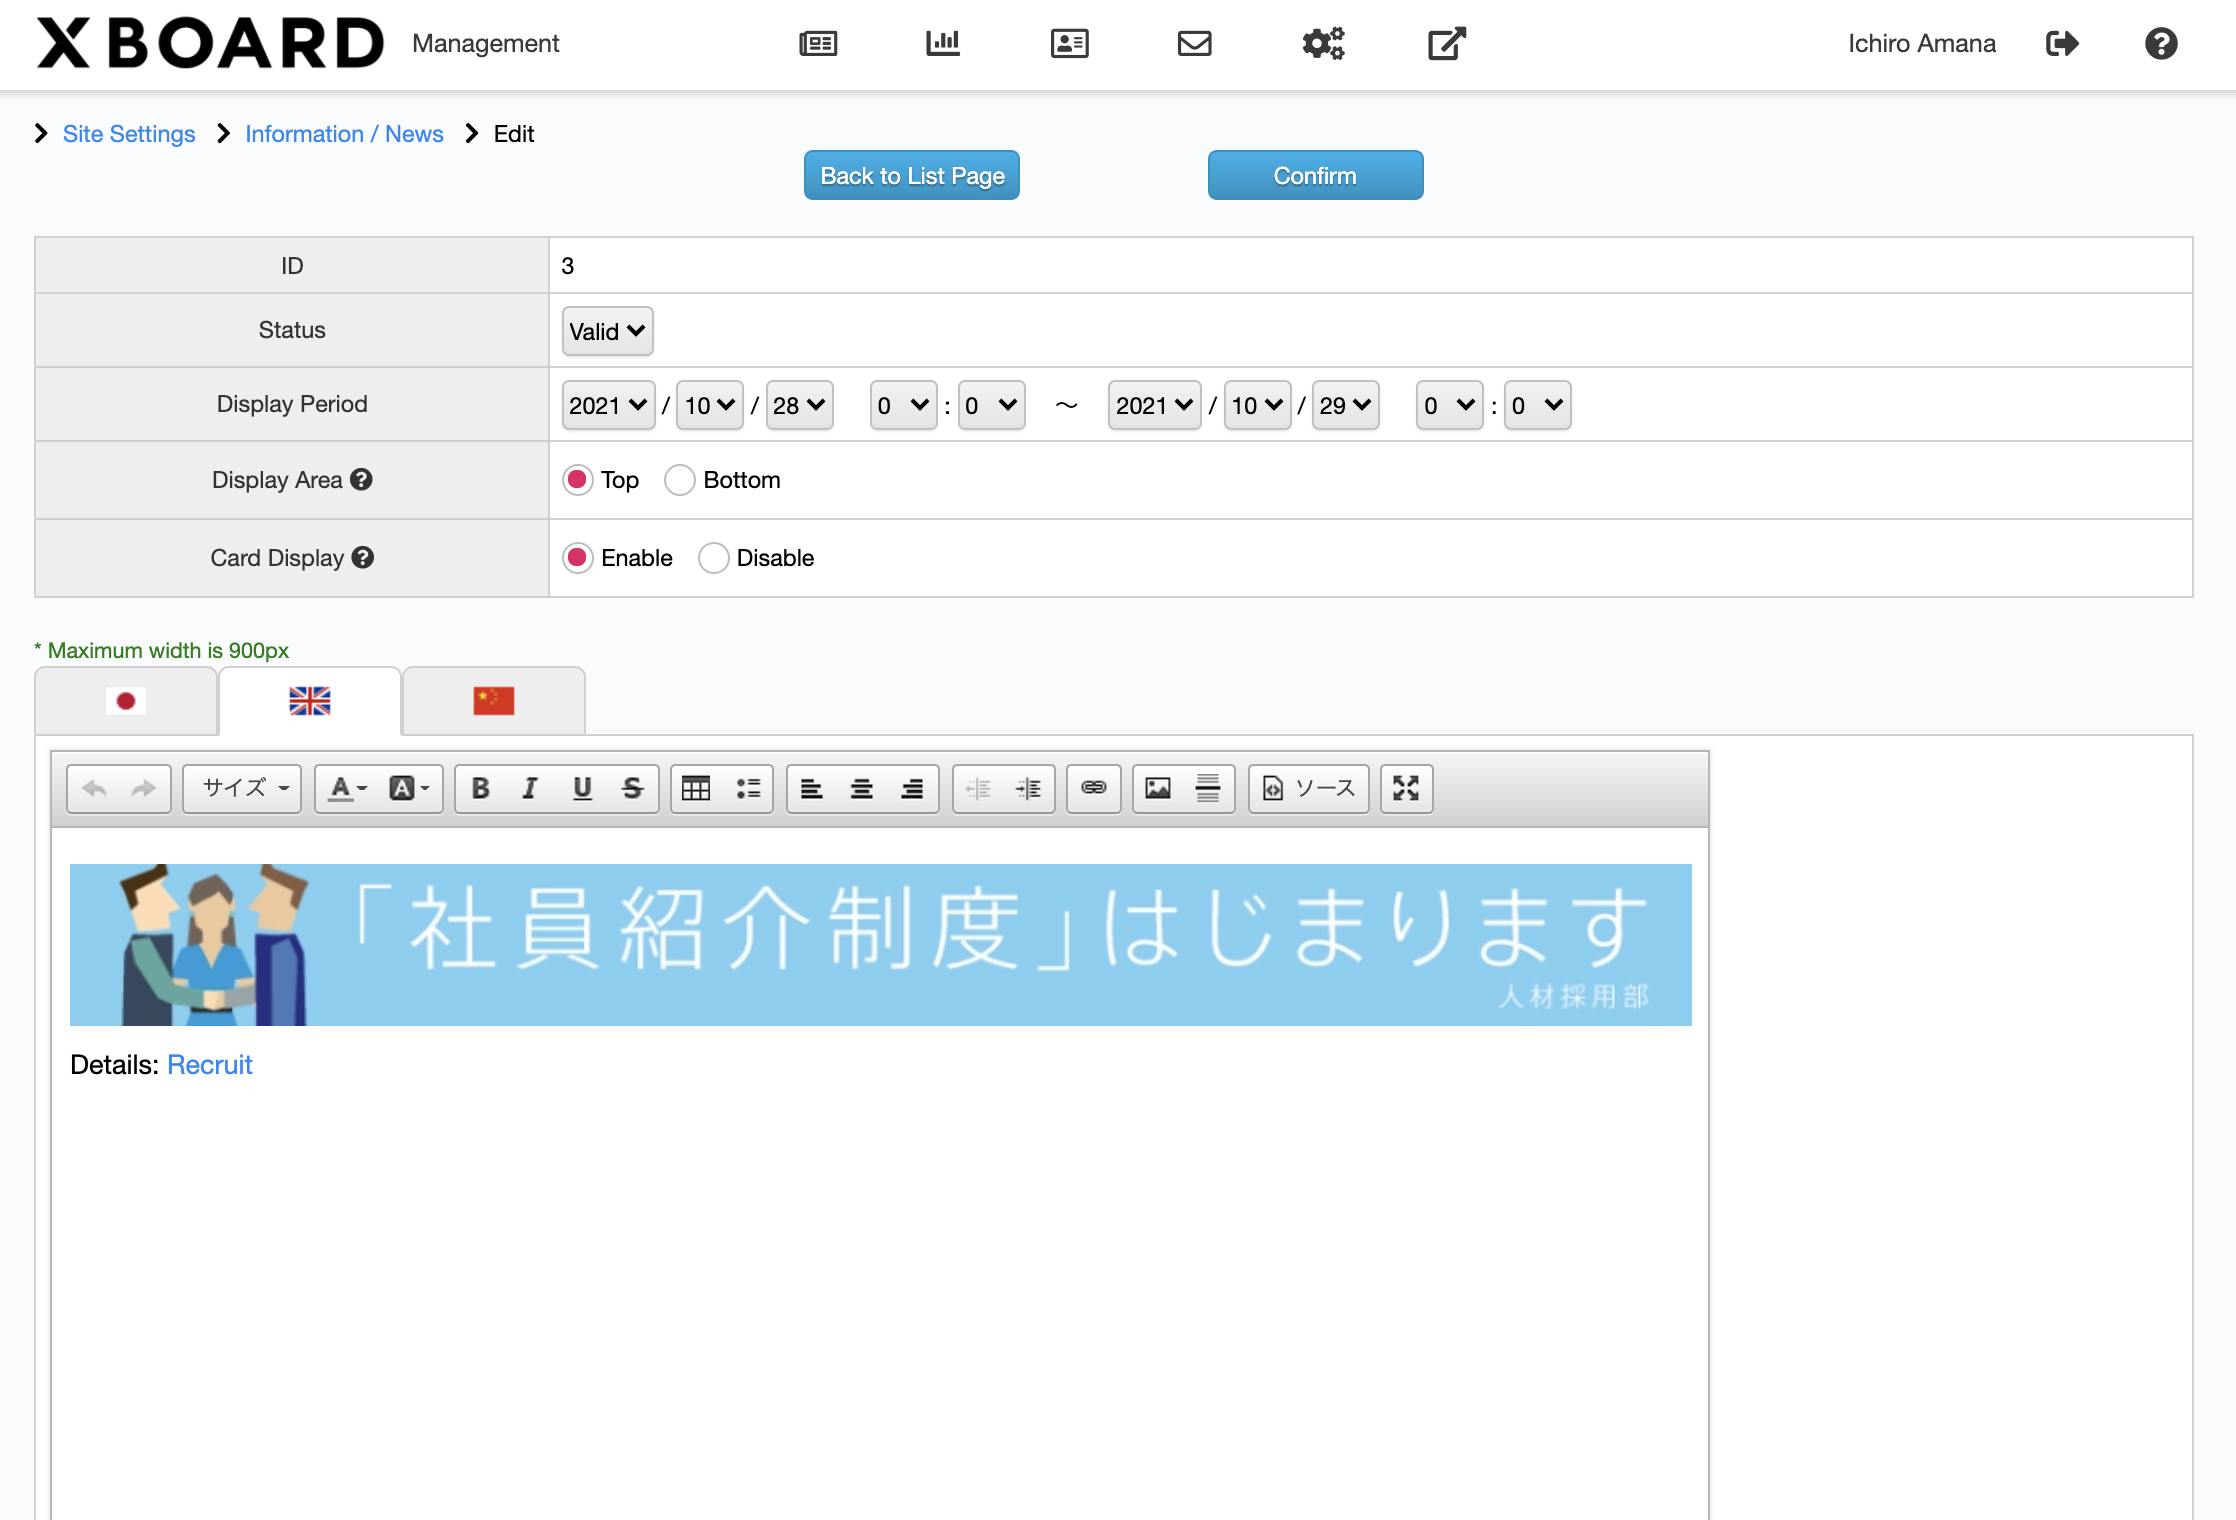
“ID”, “Status”, “Display Period” and WYSIWYG editor are on the Information Edit Page.

ID
ID is numbering automatically when the information created.
Status
Share the progress of the information. In the case of within the display period, once you select “Valid” then publish immediately.
Display Period
Set the period showing this information.
Create/Edit Information
Using the functions of the toolbar on WYSIWYG editor to create/edit information. Please refer to [Edit Entries] for more details.
Confirm/Update Information
Whenever you made any change contents, please make sure to click the [Confirm] button to update the item. Once the item updated, navigate to the Information Settings Page.
If you want to change the settings, click the [Back to Edit Page] button to navigate to Information Edit Page.
※ If you don’t click the [Confirm] button to update, input contents are discarded.Back to Information List screen
Click the [Back to List Page] button to navigate to the Information Settings Page.
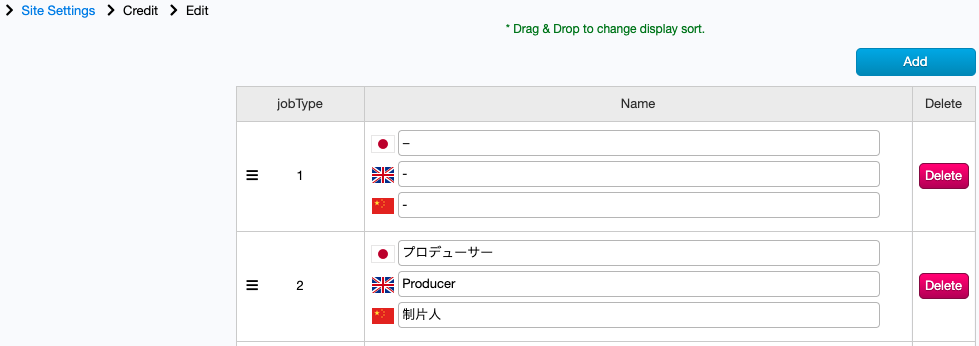
- Credit Settings
On the Credit Settings Page, you can add/edit/delete job types that appear in the Credit area of the Publish Page.
For details of how to set Credits to each entry, please refer to [Operation on Entry Edit Page].
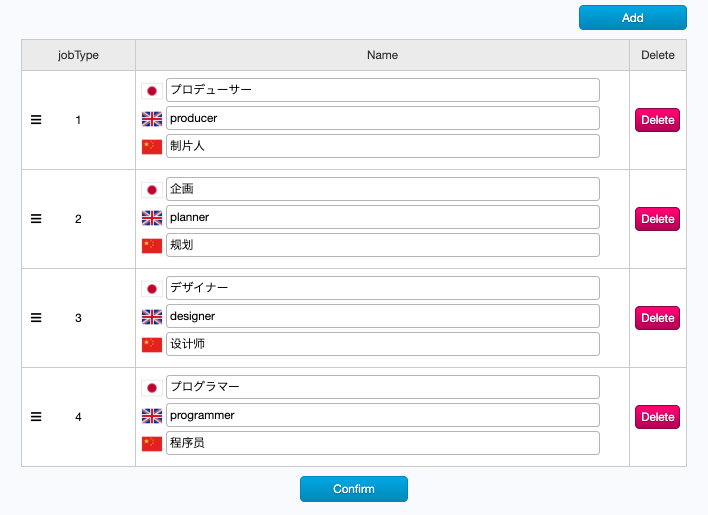
■ Operation on Credit Settings Page
The currently registered Credits are listed.

Name:The Credits that already registered are displayed.
Delete:If you want to delete registered Credit, click the [Delete] button of each row.
※ The Credit currently configured to any entries is not allowed to delete. [Operation on Entry Edit Page]
How to Edit Credits
Click on the registered Credit form to edit.
How to Add Credits
Click the [Add] button to show a new form and enter the contents.
How to change the display order
Click and drag the icon
of each row to change the display order.Confirm/Update Credits
If you edited or inputted contents, be sure to click the [Confirm] button, then navigated to the Credit Confirmation Page.
Please verify contents and if you want to change it, click the [Back to Edit Page] button. If you satisfied, click the [Update] button to commit changes.
When the update process is completed, navigate to the Site Settings Page.※ If you don’t click the [Confirm] button to update Credits, changes to be discarded.
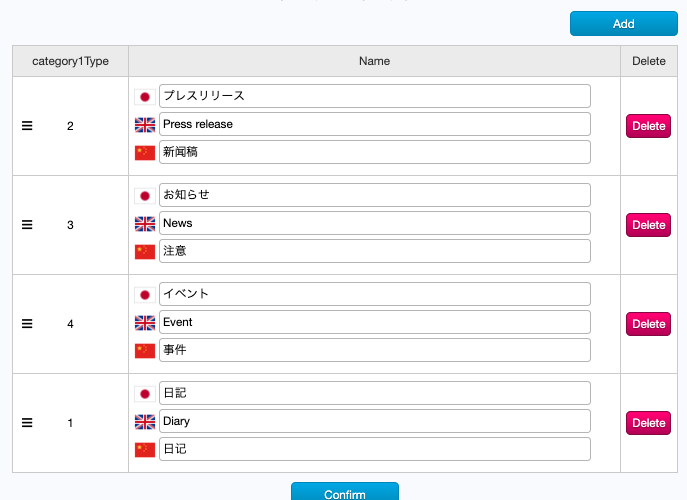
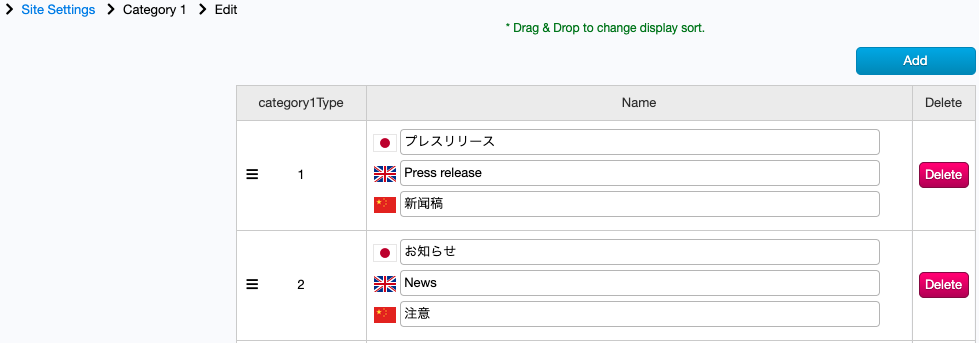
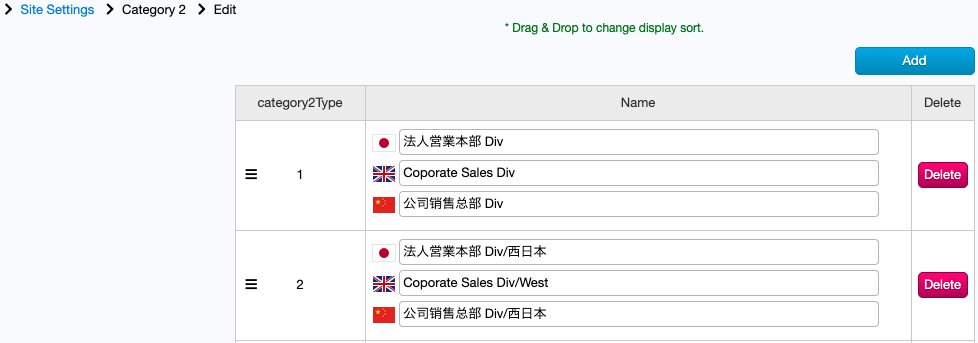
- Category Settings
On the Category 1/2 Settings Page, you can add/edit/delete Categories that used as search options on the Public Page.
For details of how to set Categories for each entry, please refer to [Operation on Entry Edit Page].
■ Operation on Category 1/2 Settings Page
The currently registered sets of Category 1/2 are listed. The operations for setting both categories are the same.
※ The Category 1/2 can be set arbitrarily. If unset, it is not displayed.

Name:The Categories that already registered are displayed.
Delete:If you want to delete registered Category 1/2, click the [Delete] button.
※The Category 1/2 currently set for any entries is not allowed to delete. [Operation on Entry Edit Page]
How to Edit Category 1/2
Click on the registered Category 1/2 form to edit.
How to Add Category 1/2
Click the [Add] button to show a new form and enter the contents.
How to change the display order
Click and drag the
icon of each row to change the display order.Confirm/Update Category 1/2
If you edited or inputted contents, be sure to click the [Confirm] button, then navigated to Category 1/2 Confirmation Page.
Please verify contents and if you want to change it, click the [Back to Edit Page] button. If you satisfied, click the [Update] button to commit changes.
When the update process is completed, navigate to the Site Settings Page.※ If you don’t click the [Confirm] button to update Category 1/2, changes to be discarded.
- Recommended Keyword Settings
On the Recommended Keyword Settings Page, you can add/edit/delete keywords used as search landmark on the Publish Page.
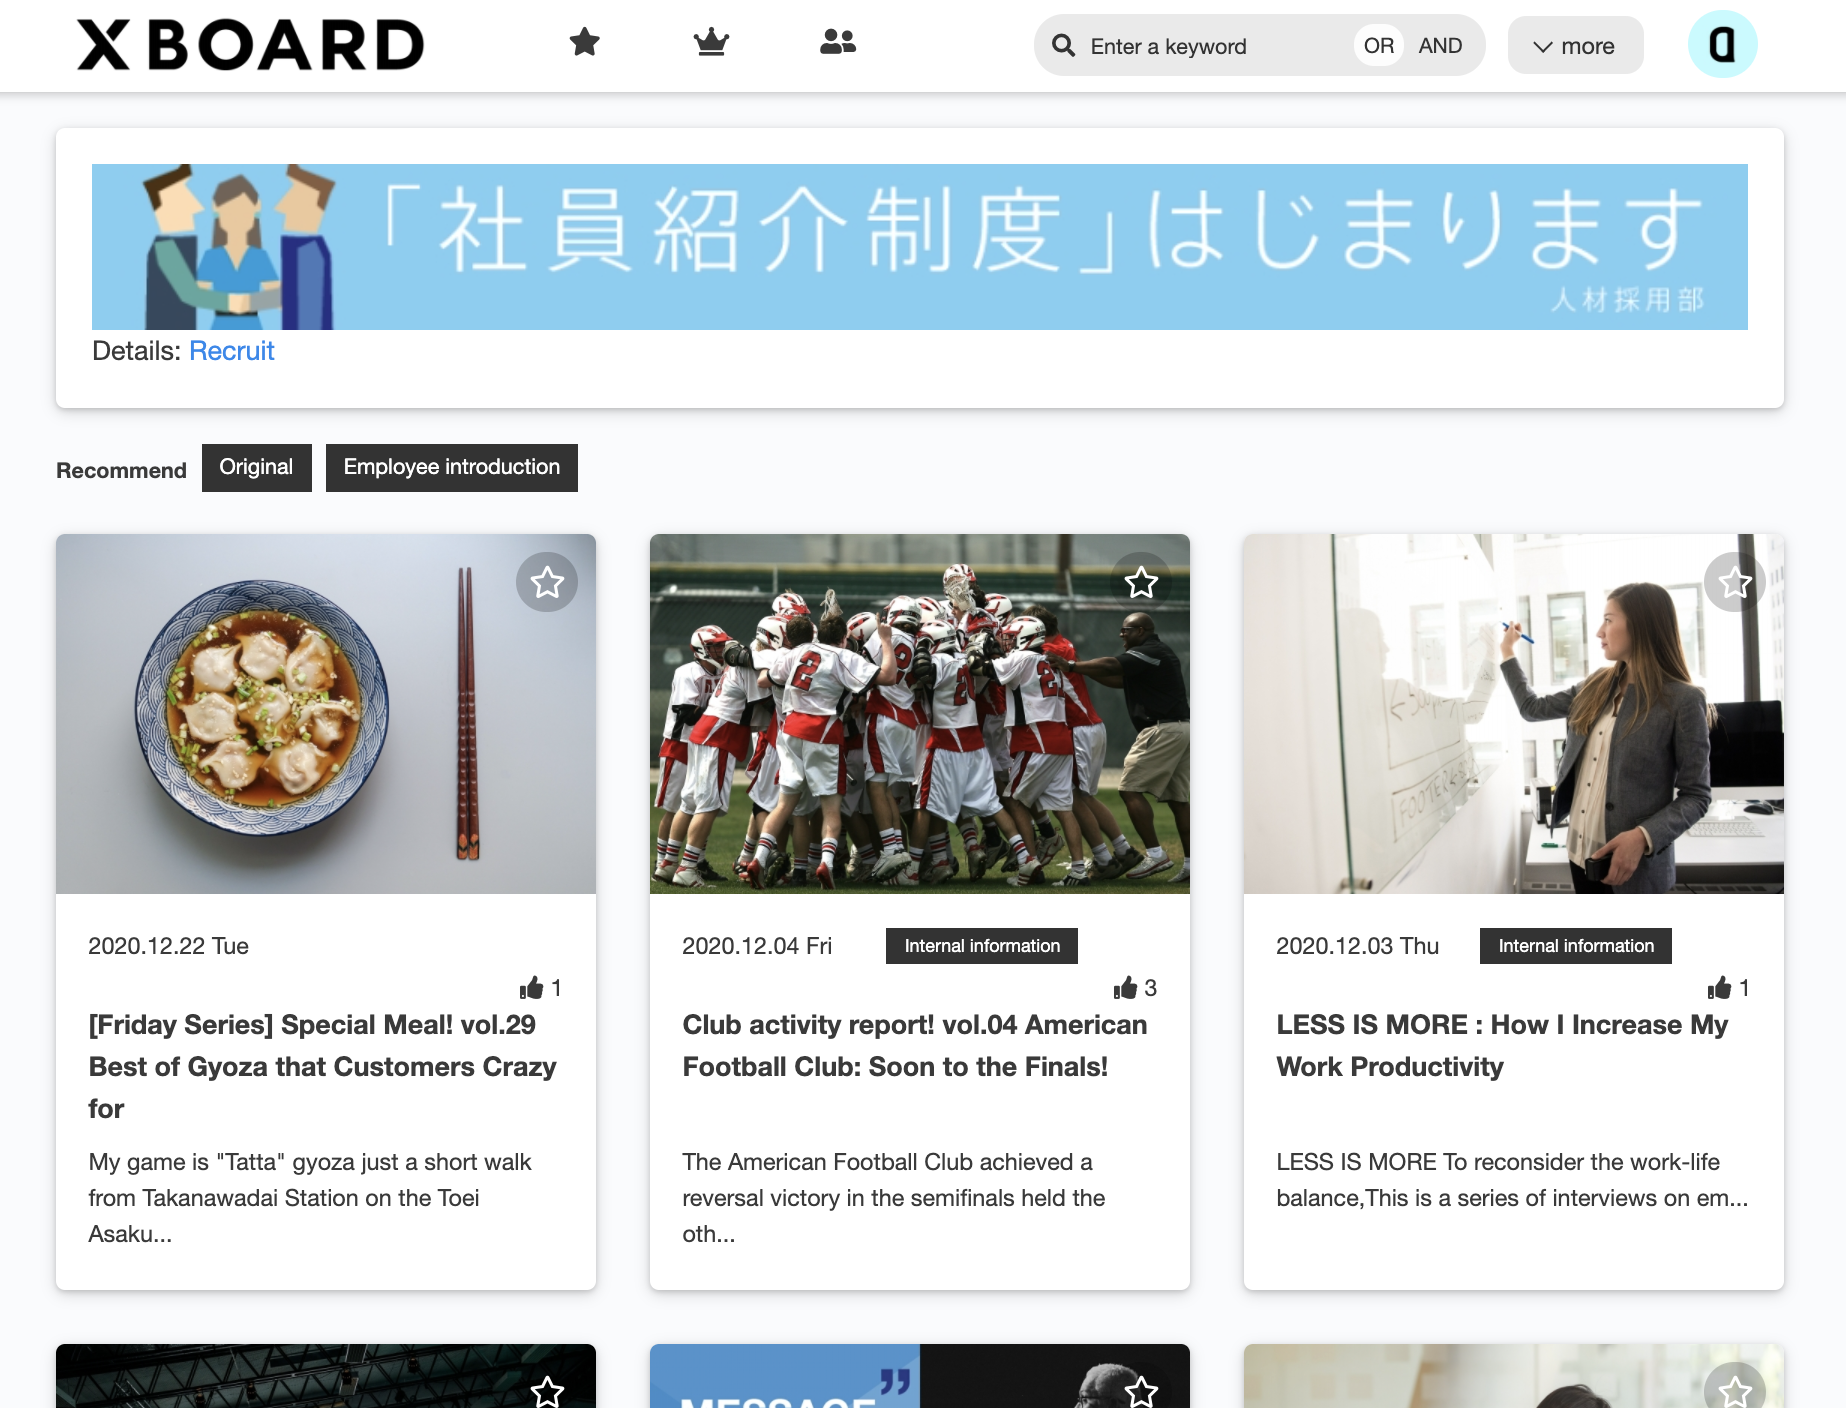
The registered Recommended Keywords are going to be displayed on the top of the Top Page.
■Operation on Recommended Keyword Settings Page
The currently registered Recommended Keywords are listed.

Display Name:The screen name of Recommended Keywords is displayed.
Search Keywords:The keywords internally used for search are displayed. When clicking on a single of the display name, but actually the combination of keywords is used for search.
Delete:If you want to delete registered Recommended Keywords, click the [Delete] button of each row.
How to Edit Keywords
Click on the registered Recommended Keywords form to edit.
How to Add Keywords
Click the [Add] button to show a new form. Please enter the contents.
How to change the display order
Click and drag the
icon of each row to change the display order.Confirm/Update Keywords
If you edited or inputted contents, be sure to click the [Confirm] button, then navigated to the Credit Confirmation Page.
Please verify contents and if you want to change it, click the [Back to Edit Page] button. If you satisfied, click the [Update] button to commit changes.
When the update process is completed, navigate to the Site Settings Page.※ If you don’t click the [Confirm] button to update Recommended Keywords, changes to be discarded.
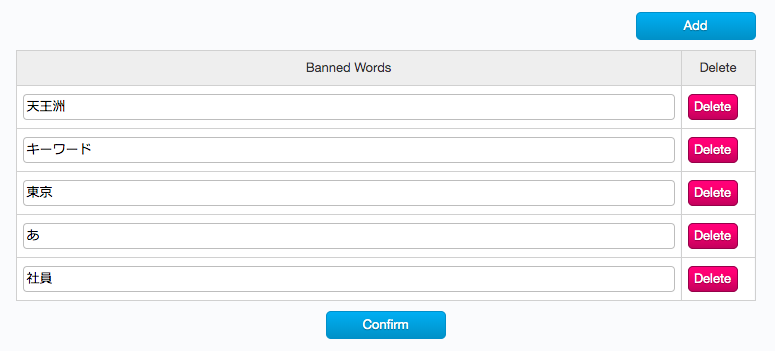
- Banned Word Settings
On the Banned Word Settings Page, you can set Banned Words to hide from Trending Keywords and Top Search Keyword of Log Management. For detail of Trending Keyword Settings, please refer to General Settings.
■Operation on Banned Word Settings Page
The currently registered Banned Words are listed.
※Banned Words are optional setting items. If unset, nothing to be shown.

Name:Registered Banned Words are listed.
Delete:If you want to delete registered Banned Words, click the [Delete] button of each row.
Edit Banned Word
Click on a registered Banned Word form to edit.
Add Banned Word
Click the [Add] button to show a new form. Please enter the contents.
Confirm/Update Banned Words
If you edited or inputted contents, be sure to click the [Confirm] button, then navigated to the Banned Word Confirmation Page.
Please verify contents and if you want to change it, click the [Back to Edit Page] button. If you satisfied, click the [Update] button to commit changes.
When the update process is completed, navigate to the Site Settings Page.※ If you don’t click the [Confirm] button to update Banned Words, changes to be discarded.
■After Updating Banned Words
When you update Banned Words, Trending Keywords are regenerated based on the settings.
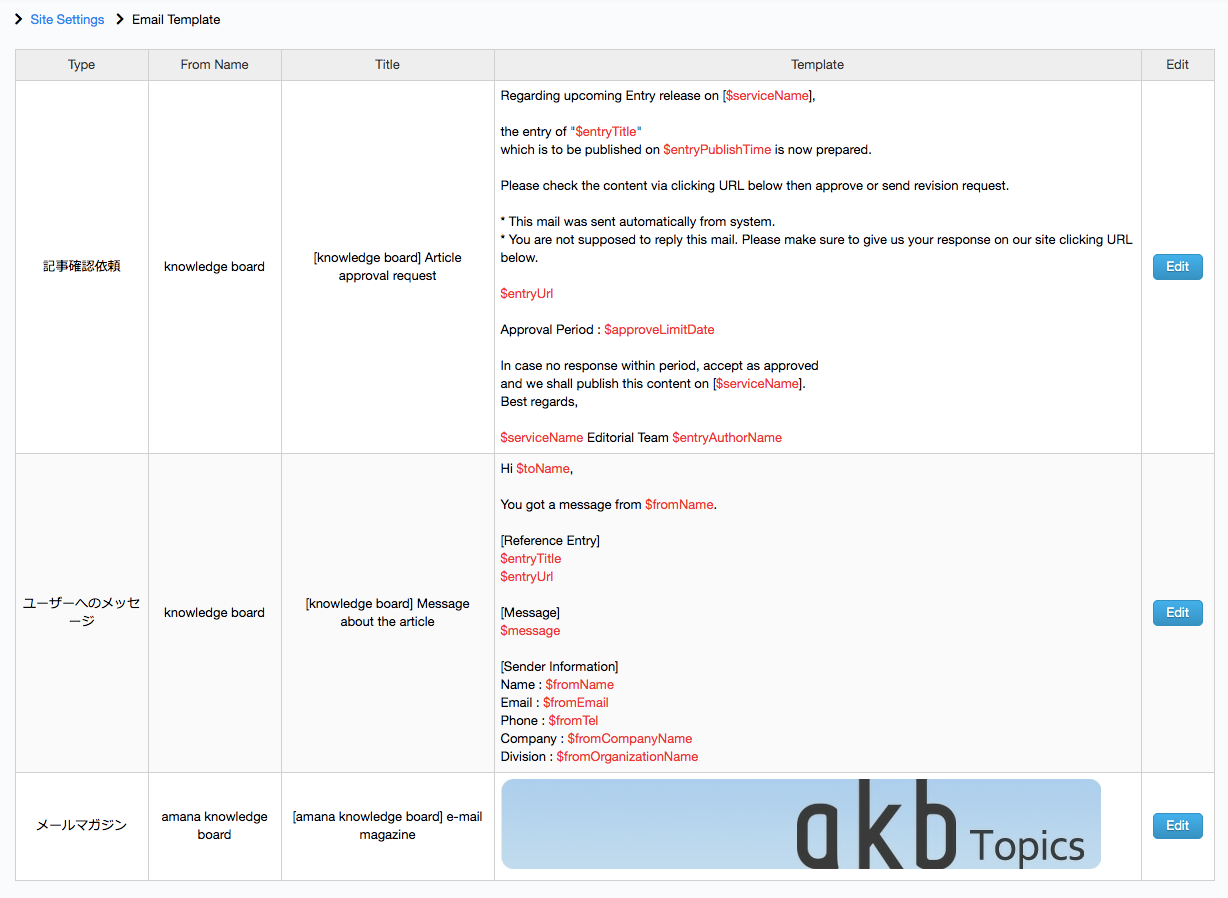
- Email Template Settings
On the Email Template Settings Page, you can edit default mail templates which send from the system.
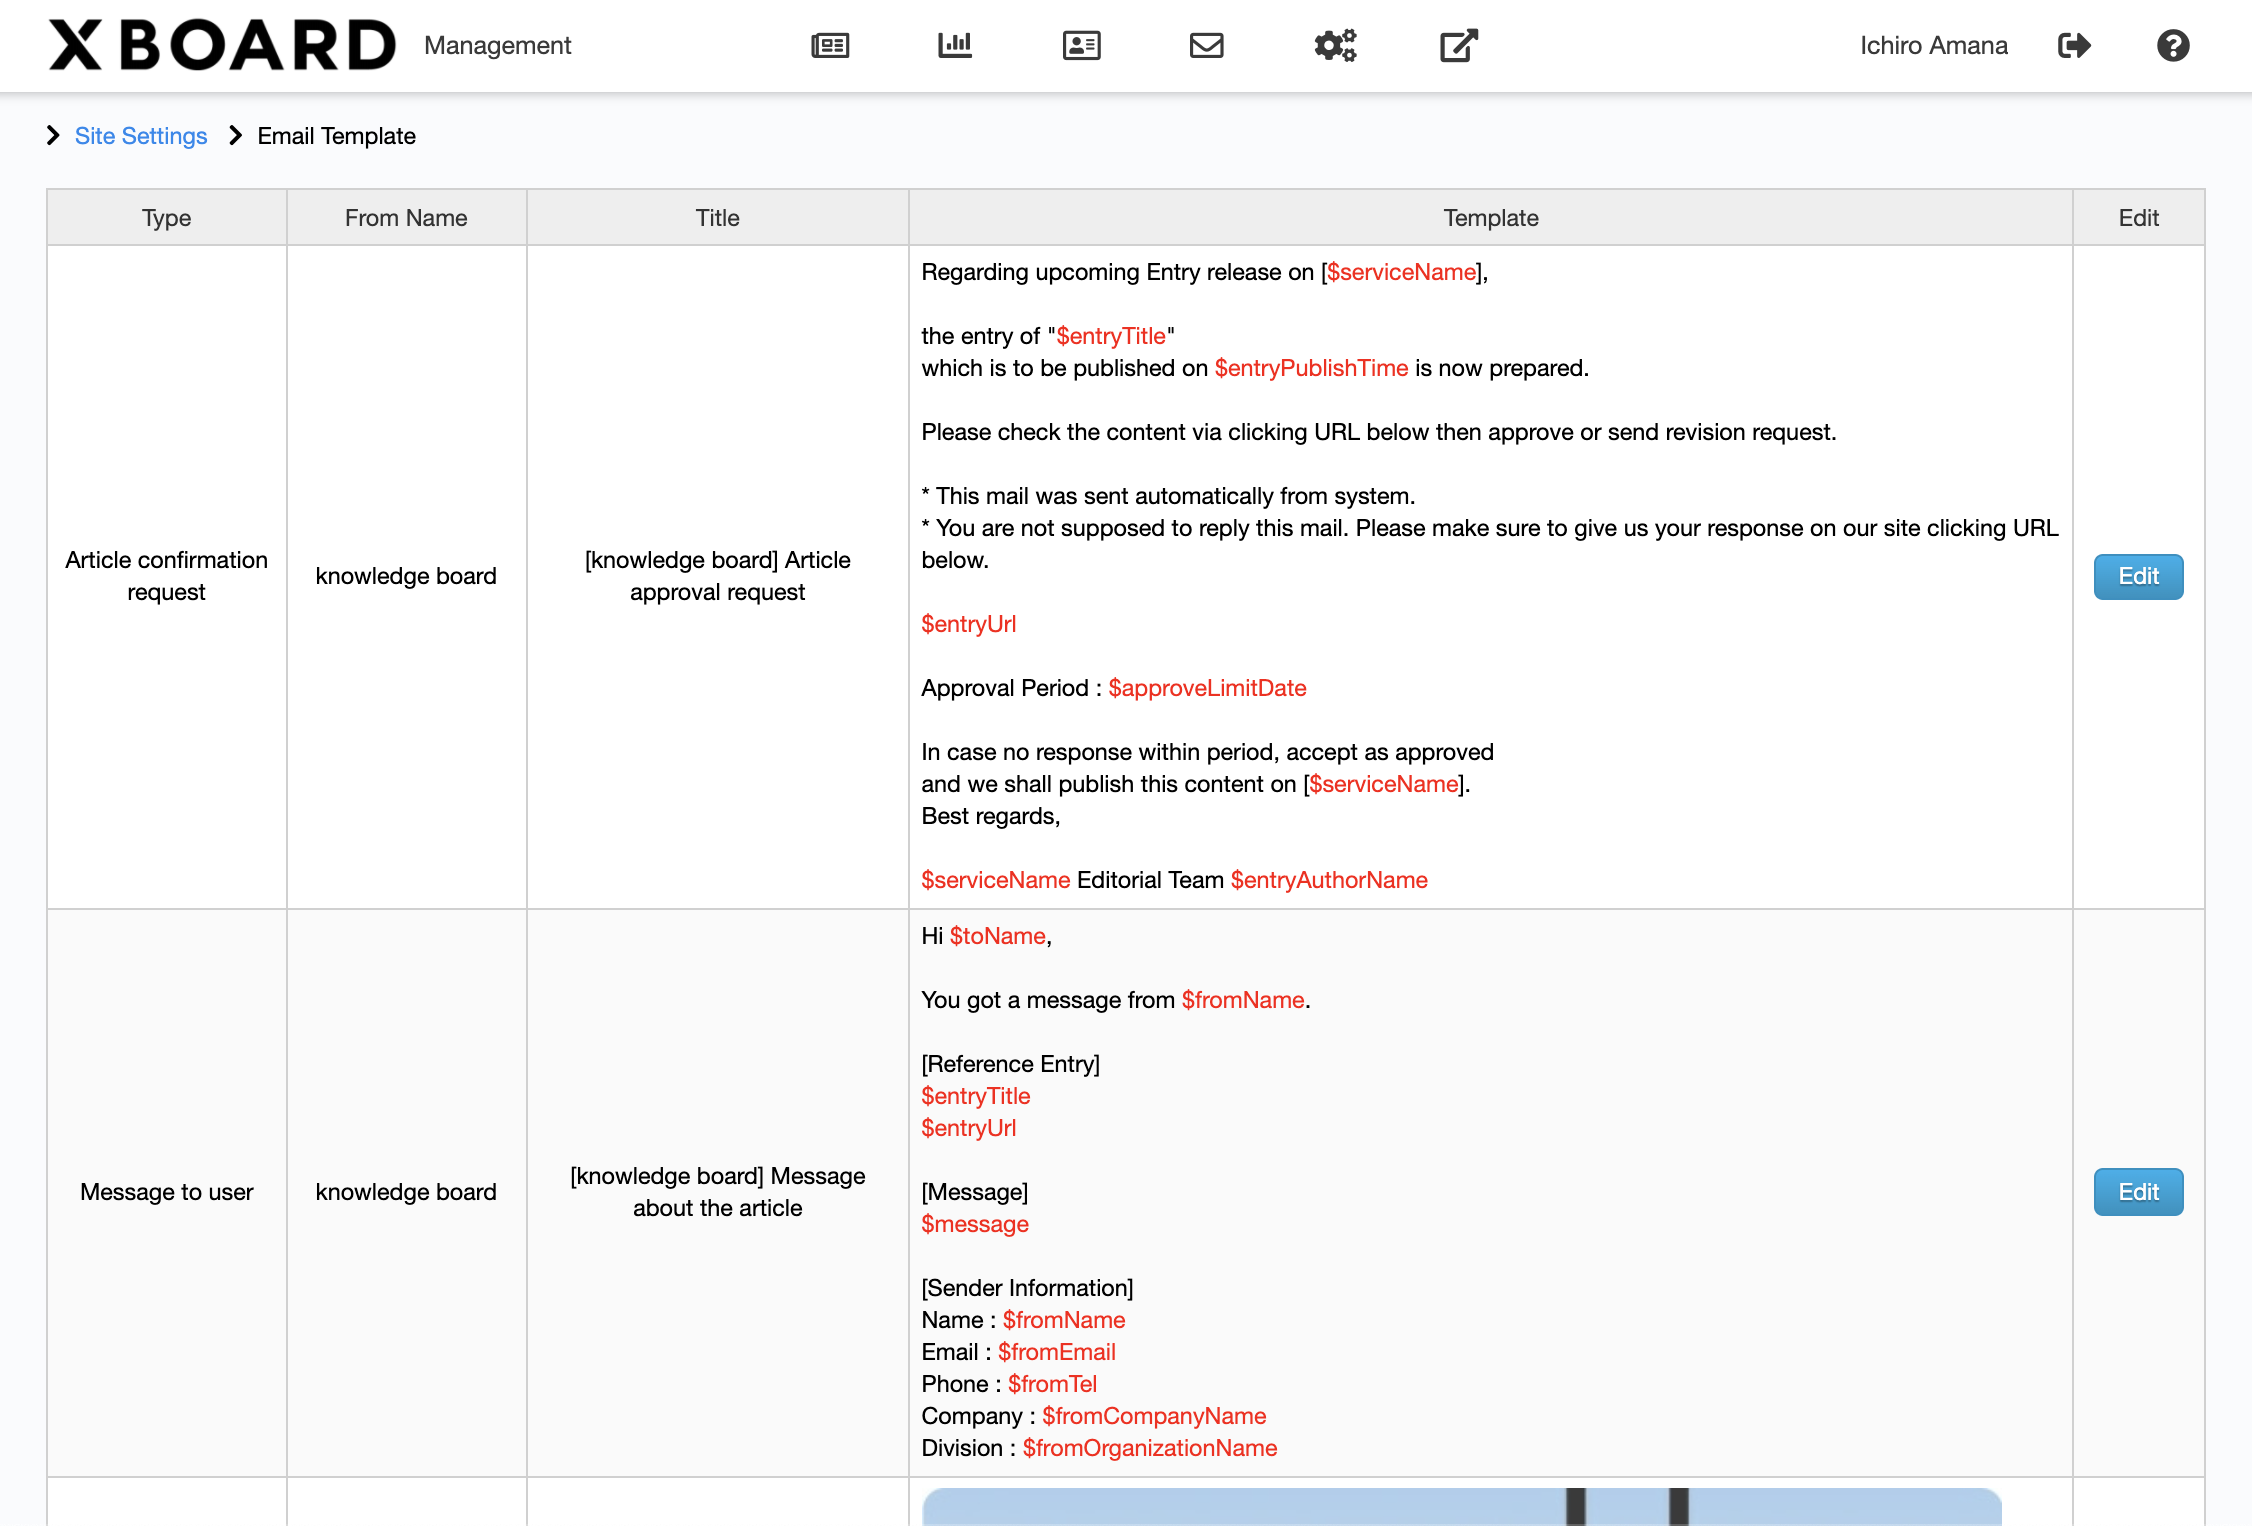
■ Operation on Email Template Settings Page
List all system mail templates.
If you click each row of the email template, you can verify the content and also edit content as appropriate.

Type:We have got templates for [Entry Confirmation Request] and [Message to User].
From Name:Display the name of the sender (From)
Title:Display the title of the mail
Template:Display the initial value of system mail template
Edit Templates
If you click the [Edit] button, you can edit the mail template on the Email Template Settings Page.
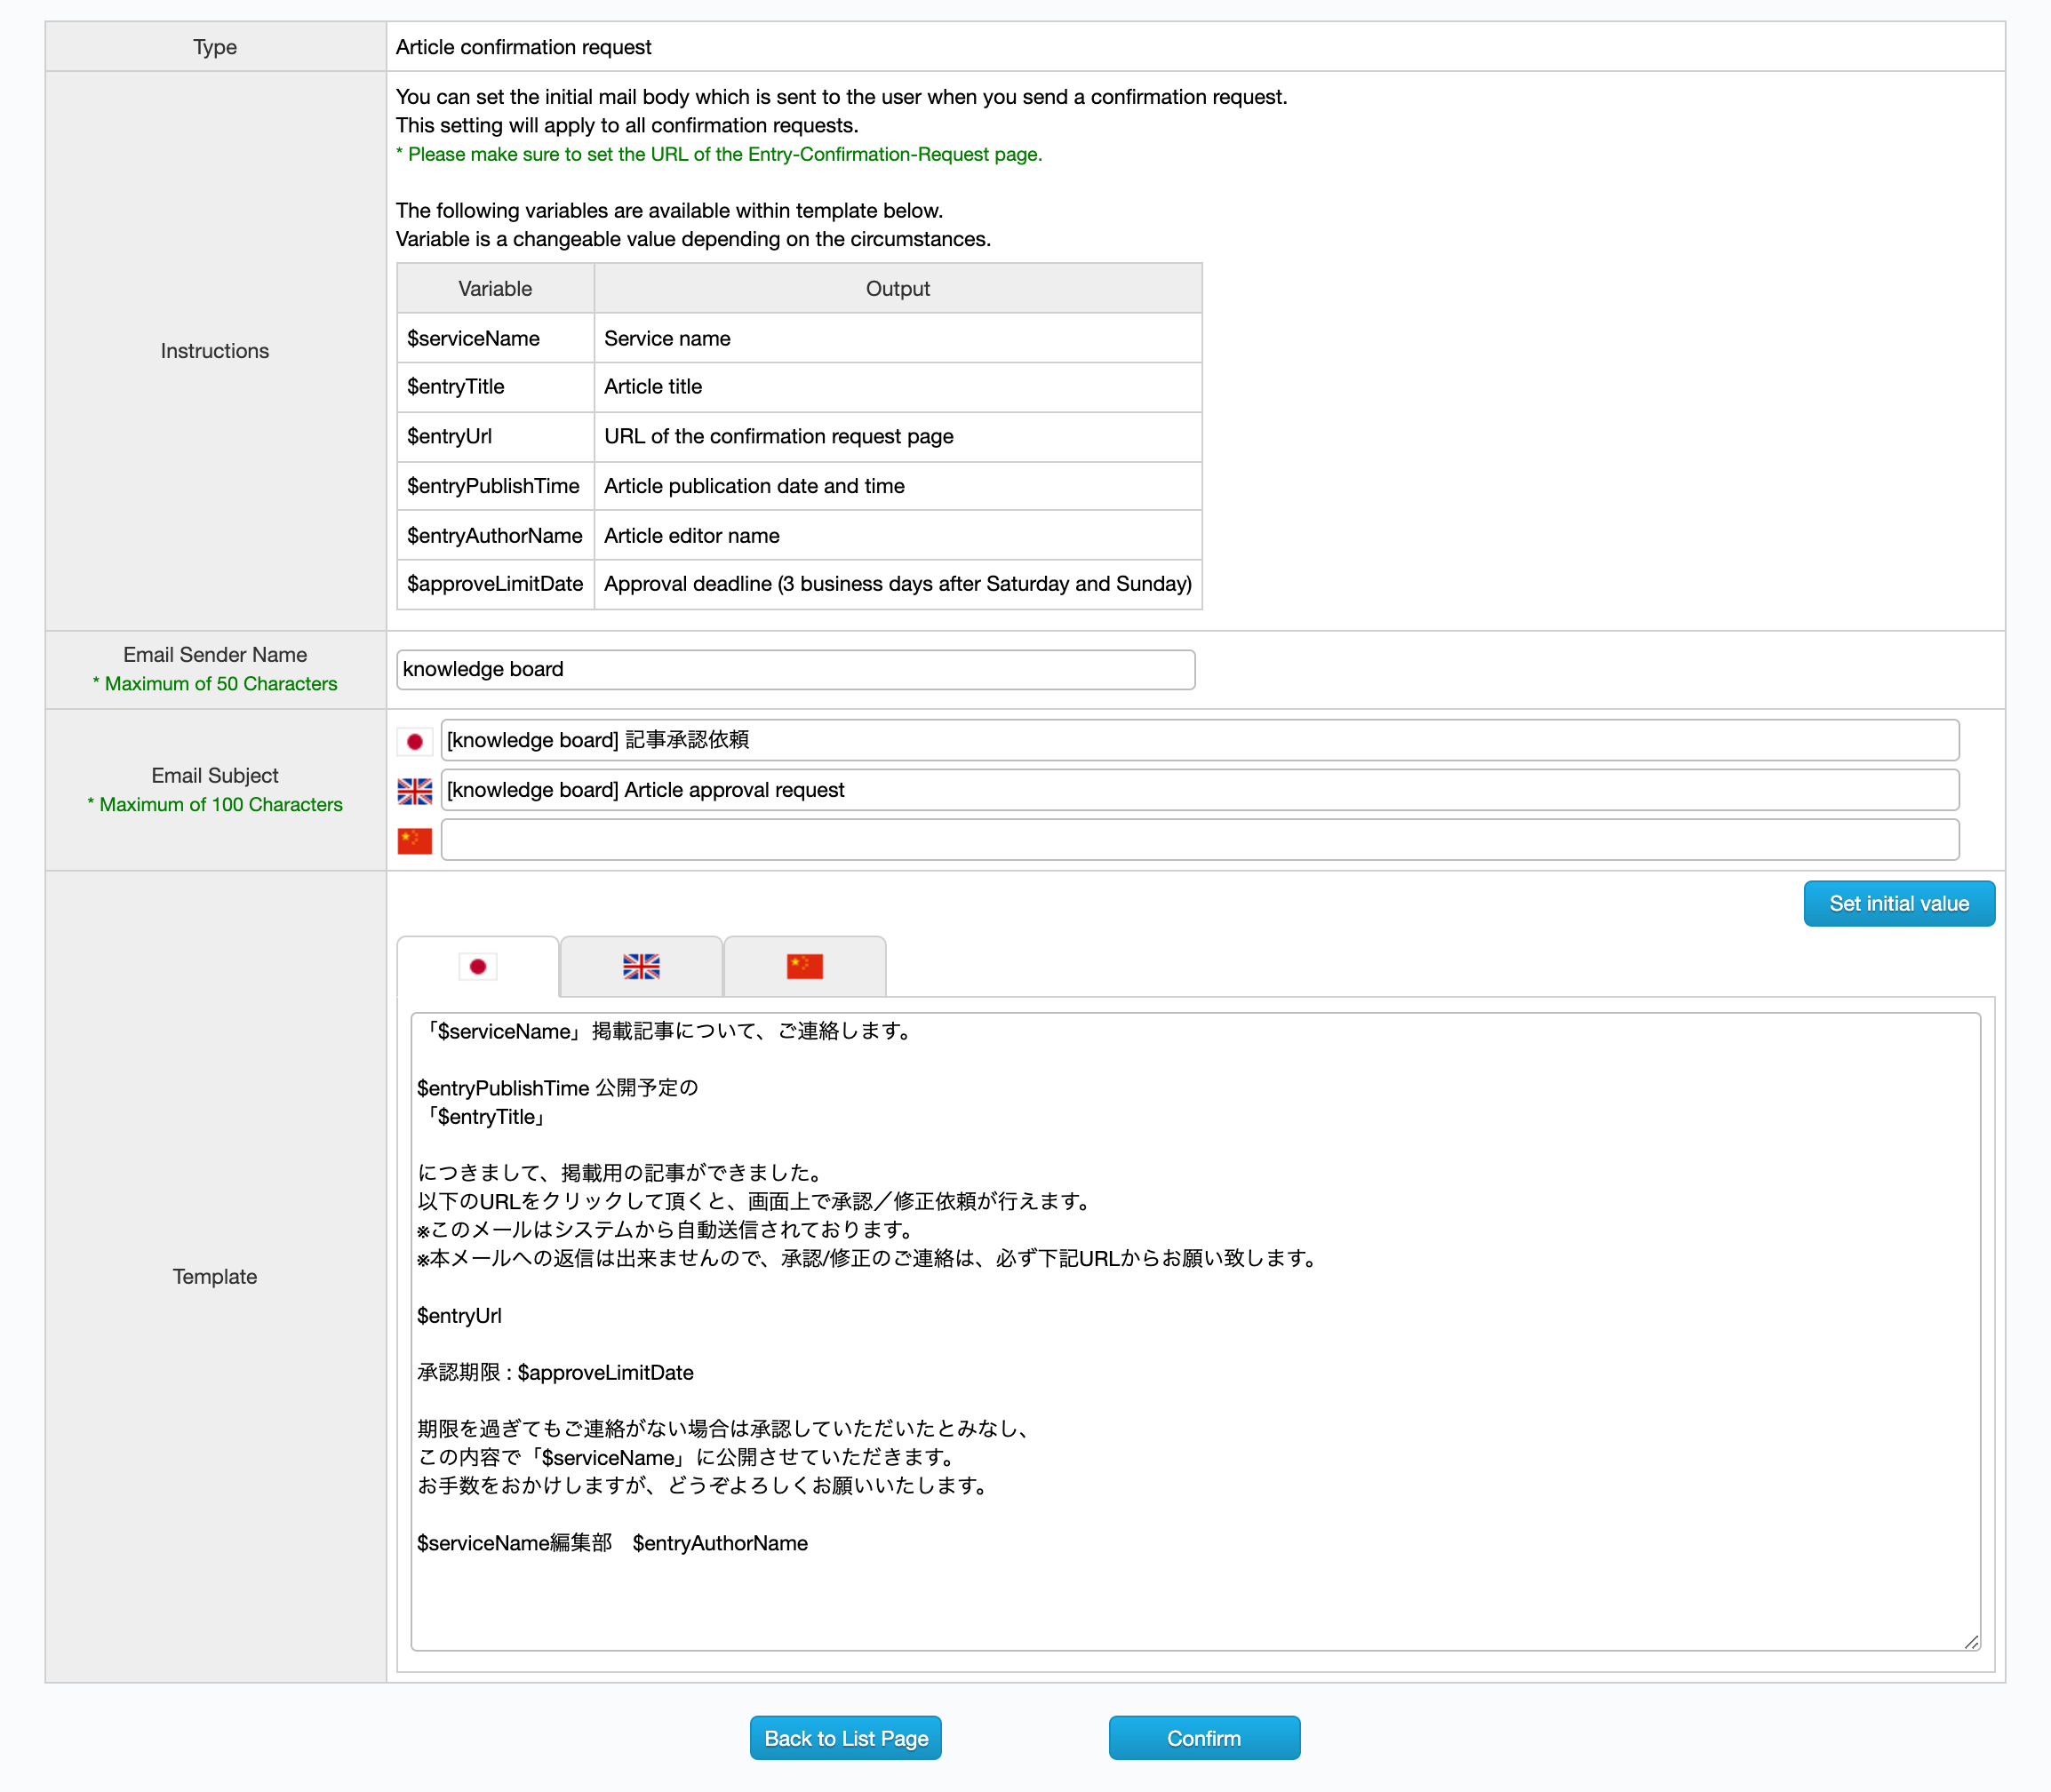
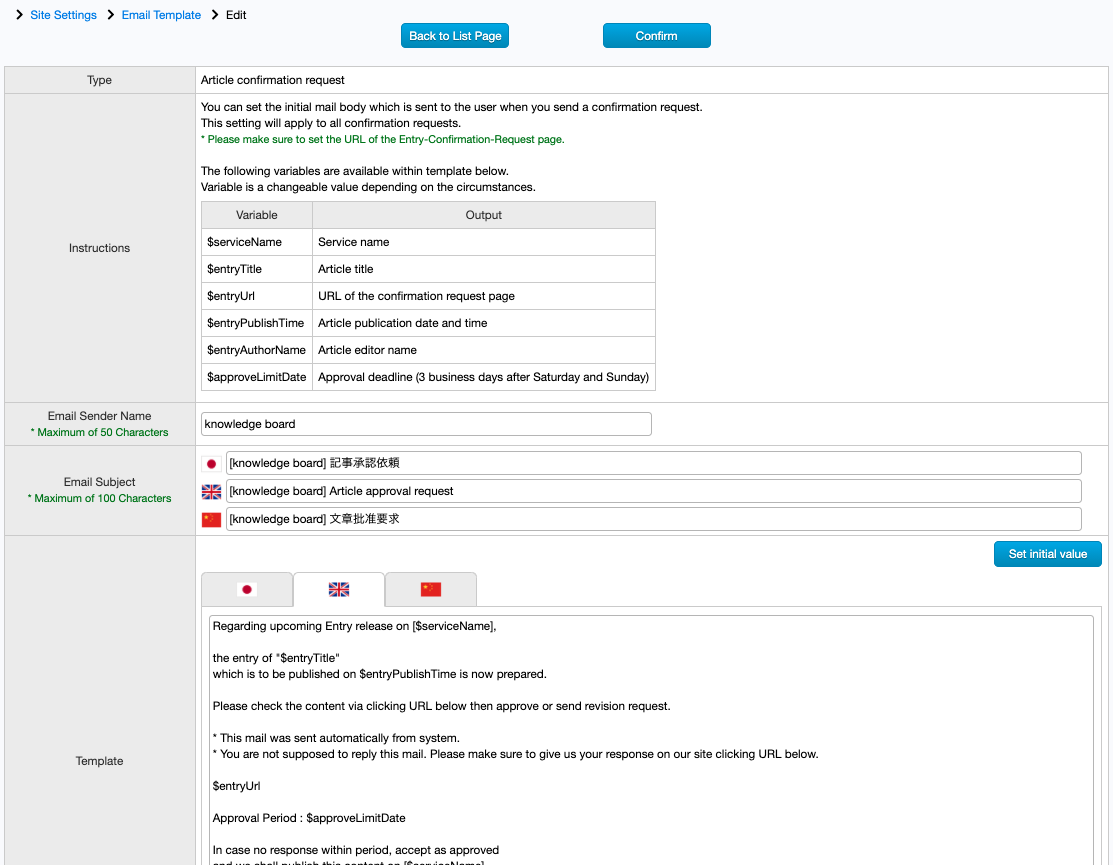
■ How to edit email templates
On the Email Template Edit Page, display the instruction of editing template and template edit form.
Edit each item as appropriate.

Type
Display the information of the template you selected. [Entry Confirmation Request]/[Message to User]
Instruction
Display the instruction of the editing mail template. Please be sure to review the procedures.
From Name
Set the name of the sender (From) within a maximum of 50 characters.
Title
Set the title of the mail within a maximum of 100 characters.
Template
Set the email body of the system mail. Some specific variables are available.
If you click the [Set initial value] button, fill in the form with system initial value.
Confirm/Update Templates
Whenever you made any change, please make sure to click the [Confirm] button to update the template. Once it updated, navigate to the Email Template Settings Page.
If you want to change the settings, click the [Back to Edit Page] button to navigate to Email Template Edit Page.※ If you don’t click the [Confirm] button to update, input contents are discarded.
Back to Email Template Settings Page
Click the [Back to List Page] button to navigate to the Email Template Settings Page.
※ If you return to the Email Template Settings Page in the middle of editing, the edited contents will be discarded. Please be sure to click the [Confirm] button to navigate to Email Template Confirmation Page, then update contents.
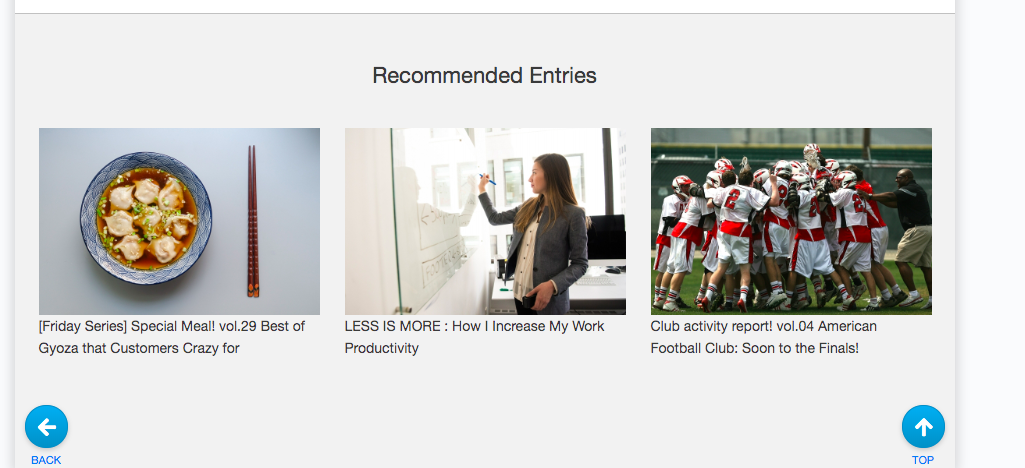
- Recommended Entry Settings
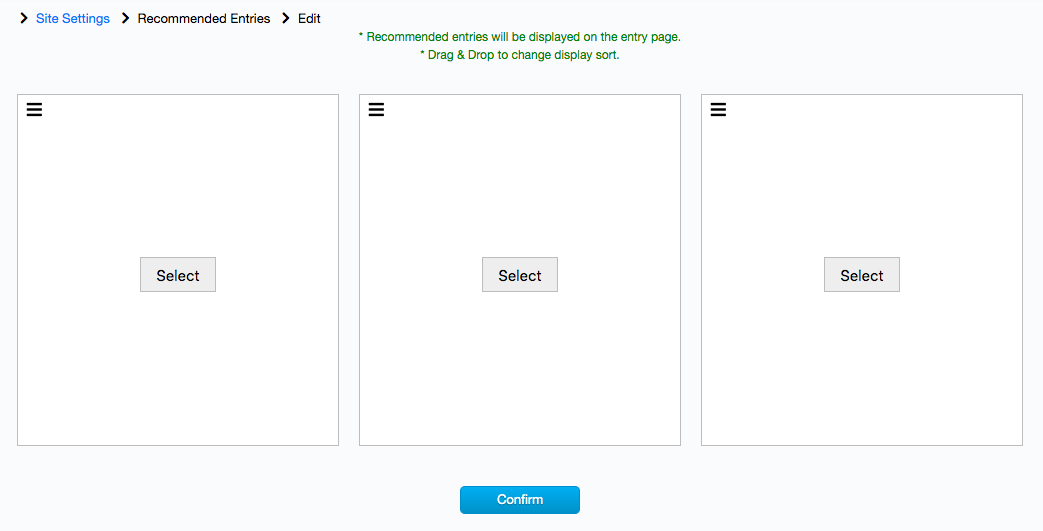
On the Recommended Entry Settings Page, you can set recommended posts to be displayed below the content of all entries.
■Operation on Recommended Entry Settings Page
The currently registered Recommended Entries are listed.

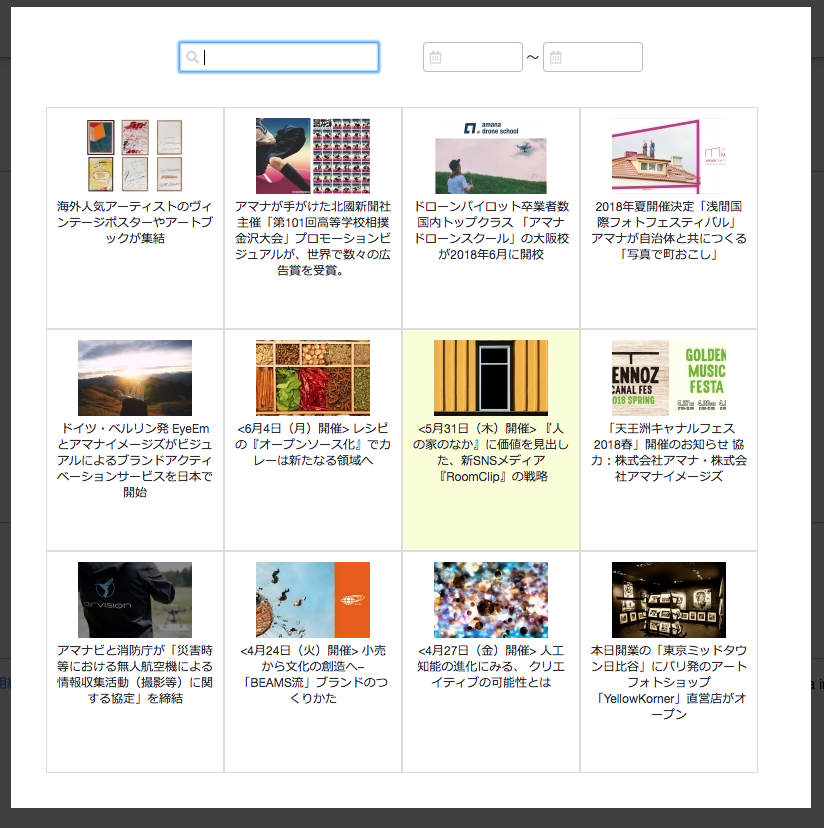
Click the [Select] button to display the entry selection screen modally.

Published articles are listed in descending order of the publish date.

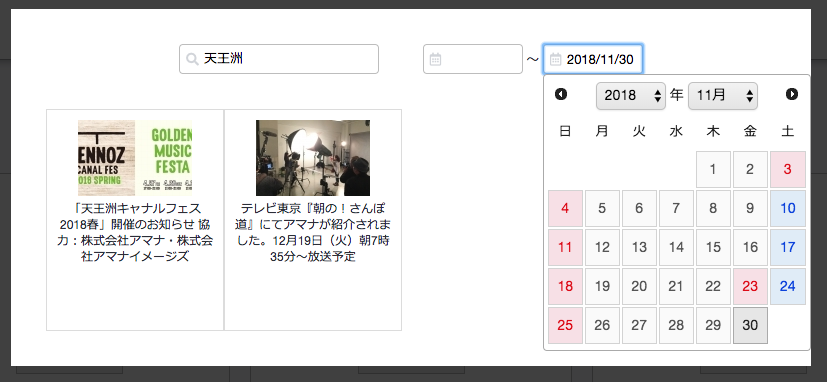
You can search for entries by “keyword” or “publish date”.
Click an entry from the list to select it.

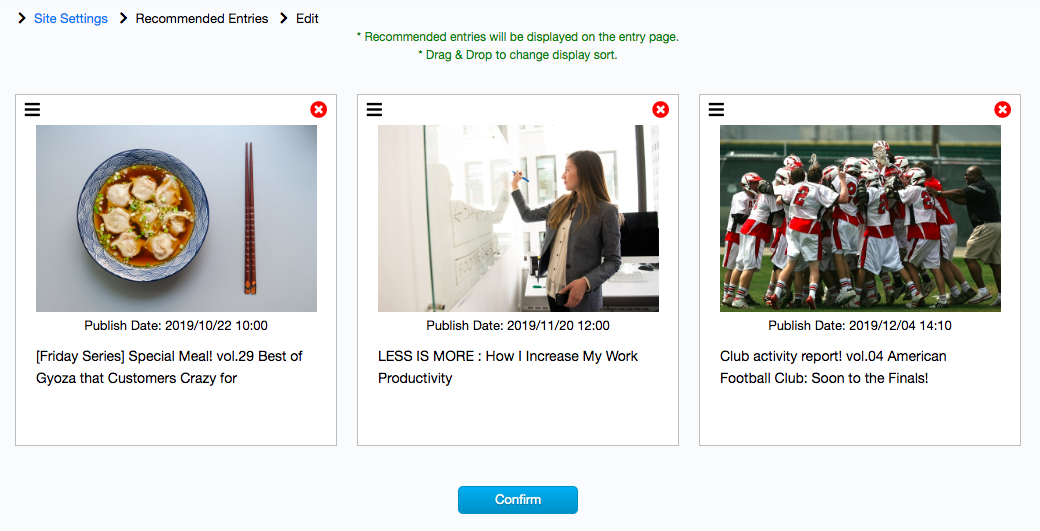
Up to three recommended entries can be set.
Click the [x] button on the top right to deselect the recommended entries. Then you can select another one.
Articles are displayed in the same order as this page. The display order can be switched by dragging an icon of each entry left or right.

“Recommended Entries” area will be displayed below the content of every entry.

You can also change the display order of “Credit Area”, “Related Entries Area” and “Recommended Entries Area” displayed below the content on the entry page from “Site Settings” → “General” on the Management System.
- API Settings
On the API Settings Page, you can verify API information.
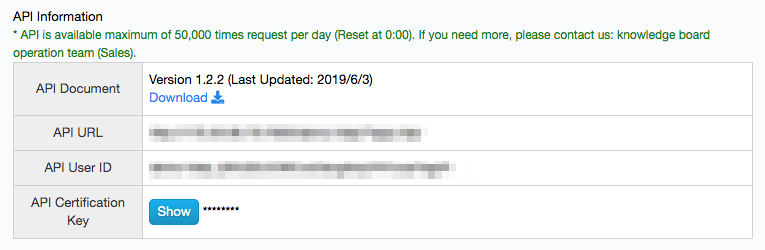
Verify API Information
API Document: Display the version of the API document. Click the [Download] link to download the latest API document.
API URL: Display API URL.
API User ID: Display API User ID.
API Certification Key: Display API Certification Key concealing with asterisks. Click the [Show] button to view the certification key. (Only displayed on sites that are under contract to use XBOARD API.)

※This setting section is only displayed on sites that are under contract to use XBOARD API.
On the Entry Category (for API) Settings, you can add/edit/delete Entry Categories that can be used when retrieving entry with API.
■ Operation of Entry Category (for API) Settings
The currently registered Entry Categories are listed.
※The Entry Categories can be set arbitrarily. If unset, it is not displayed.

apiKindType:Displays the unique numerical values that can be specified as a request parameter when using API.
Name:Display the registered Entry Category (for API).
Delete:If you want to delete registered Entry Category (for API), click the [Delete] button of each row.
※ Since the Entry Category which has already set for the entry is not allowed to delete, be sure to cancel the setting in advance.
How to Edit Entry Category (for API)
Click on the registered each Entry Category (for API) form to edit.
How to Add Entry Category (for API)
Click the [Add] button to show a new form. Please enter the contents.
How to Change the Display Order
Click and drag the icon
of each Entry Category’s row to change the display order.Confirm/Update Entry Category (for API)
If you edited or inputted contents, be sure to click the [Confirm] button, then navigated to the Entry Category(for API) Confirmation Page.
Please verify contents and if you want to change it, click the [Back to Edit Page] button. If you satisfied, click the [Update] button to commit changes.
When the update process is completed, navigate to the Site Settings Page.※ If you don’t click the [Confirm] button to update Entry Category (for API), changes to be discarded.
- Auto-Login Function
There are the following three ways to login to the XBOARD.
ID/PW login * Default
Auto-Login * Option
Single Sign-On (Google, Microsoft Azure) * Option
This page describes this Auto-Login.
Auto-Login is possible by linking the information of the XBOARD with the CSV or DB etc. of the customer (hereinafter referred to as “CSV etc.”).What is the Auto-Login function?
Auto-Login function is a single sign-on function provided optionally by the XBOARD.
Using the CSV etc. of the user information that you have, the data such as user name, company name, organization name, password, etc. can be linked by the user synchronization batch.
This function allows users who have already logged in to your internal portal site etc. seamlessly log in to the XBOARD.
* Automatically log in to the XBOARD using the ID of the logged-in user as a key.
Auto-Login Specifications
Users who can log in automatically
- A general user who has the same login ID as CSV and does not have any authority (author/editor/administrator).
User Type
(a) General users synchronized by CSV etc. (Auto-Login)
Users who are in CSV etc. and do not have the authority to log in to the management system.Information such as user names, company names, and organization names are linked to CSV, etc., and passwords are also linked.
(b) Administrator user synchronized by CSV etc. (ID/PW Login)
Users who are in CSV etc. and have the authority to log in to the management system.Information such as user names, company names, and organization names are linked to CSV, etc., but passwords are not linked.
(c)General users added manually (ID/PW Login)
Users who are not in CSV etc. and added manually in the management system and do not have any authority.Since not included in CSV etc., user information does not change even if the user synchronization batch runs.
(d)Administrator user who was added manually (ID/PW Login)
Users who are not in CSV etc. and added manually in the management system and have authority (author/editor/administrator).Since not included in CSV etc., user information does not change even if the user synchronization batch runs.
Operation Manual
[Auto-Login Function Operation Manual]
How to Add Users
(a) The case of general users synchronized by CSV etc.
Add the user information to CSV etc.
Thereafter, when the user synchronization batch is executed, the corresponding user is added to the XBOARD.
(b) The case of administrator user synchronized by CSV etc.
Add the user information to CSV etc.
Thereafter, when the user synchronization batch is executed, the corresponding user is added to the XBOARD.
* After that, log in to the XBOARD management system and grant the authority to the user.
(c) The case of general users added manually
Please add the user without authority from the XBOARD management system.
* Please be sure not to match the login ID already exists in CSV etc.
(d) The case of an administrator user who was added manually
Please add the user with authority from the XBOARD management system.
* Please be sure not to match the login ID already exists in CSV etc.
How to Change User Information
(a) The case of general users synchronized by CSV etc.
For information managed by CSV etc., please change CSV, etc.. For other information, please change it in the XBOARD management system.
* Even if the information managed in CSV etc. is changed on the management system, it will be overwritten with CSV, etc. data when the user synchronization batch runs.
(b) The case of administrator user synchronized by CSV etc.
For information managed by CSV etc., please change CSV, etc.. For another information, please change it in the XBOARD management system.
* Even if the information managed in CSV etc. is changed on the management system, it will be overwritten with CSV, etc. data when the user synchronization batch runs.
(c) The case of general users added manually
Please change it through the XBOARD management system.
(d) The case of an administrator user who was added manually
Please change it through the XBOARD management system.
How to Delete Users
(a) The case of general users synchronized by CSV etc.
Delete (or set invalid) the corresponding user information from CSV etc..
Thereafter, when the user synchronization batch is executed, the corresponding user is deleted (status invalid) from the XBOARD.
(b) The case of administrator user synchronized by CSV etc.
Please login to the XBOARD management system and remove the authority of the corresponding user.
Also, delete (or set invalid) the corresponding user information from CSV, etc..
Thereafter, when the user synchronization batch is executed, the corresponding user is deleted (status invalid) from the XBOARD.
(c) The case of general users added manually
Disable the status of the user from the XBOARD management system and save.
(d) The case of an administrator user who was added manually
Disable the status of the user from the XBOARD management system and save.
User Login Type
Two types of login can be seen on the user information screen of the user management of the management system, “Auto-Login” and “ID/PW login”.
Users with this type set to “Auto Login” can log in automatically using CSV etc., data.When the login type changes
- Grant authority (author/editor/administrator) to “(a) General users synchronized by CSV etc.” from the XBOARD management system.
→ The login type will be “ID/PW Login” and the user becomes “(b) Administrator user synchronized by CSV etc.”
- After deleting the authority of “(b) Administrator user synchronized by CSV etc.” from the XBOARD management system, the user synchronization batch is executed.
→ The login type will be “Auto-Login” and the user becomes “(a) General users synchronized by CSV etc.”
- The same login ID as “(c) General users added manually” is added to CSV etc., and user synchronization batch is executed.
→ Login type will be “Auto-Login” and the user becomes “(a) General users synchronized by CSV etc.”
* The login type does not change except for the above case.
- Language Settings
This function can make the whole site supported other languages than Japanese.
Enabling this function, users can select the site language from “Japanese” or “English” or “Chinese”, and pages will be displayed in a specified language.
Administrators need to register each language master data in advance.■Add Supported Language

Language Settings can be set from “Site Settings” → “General”.

Specify the language from “Add supported language” in the language setting area and update. After that, additional fields for other languages appear on entry management and category setting, etc.
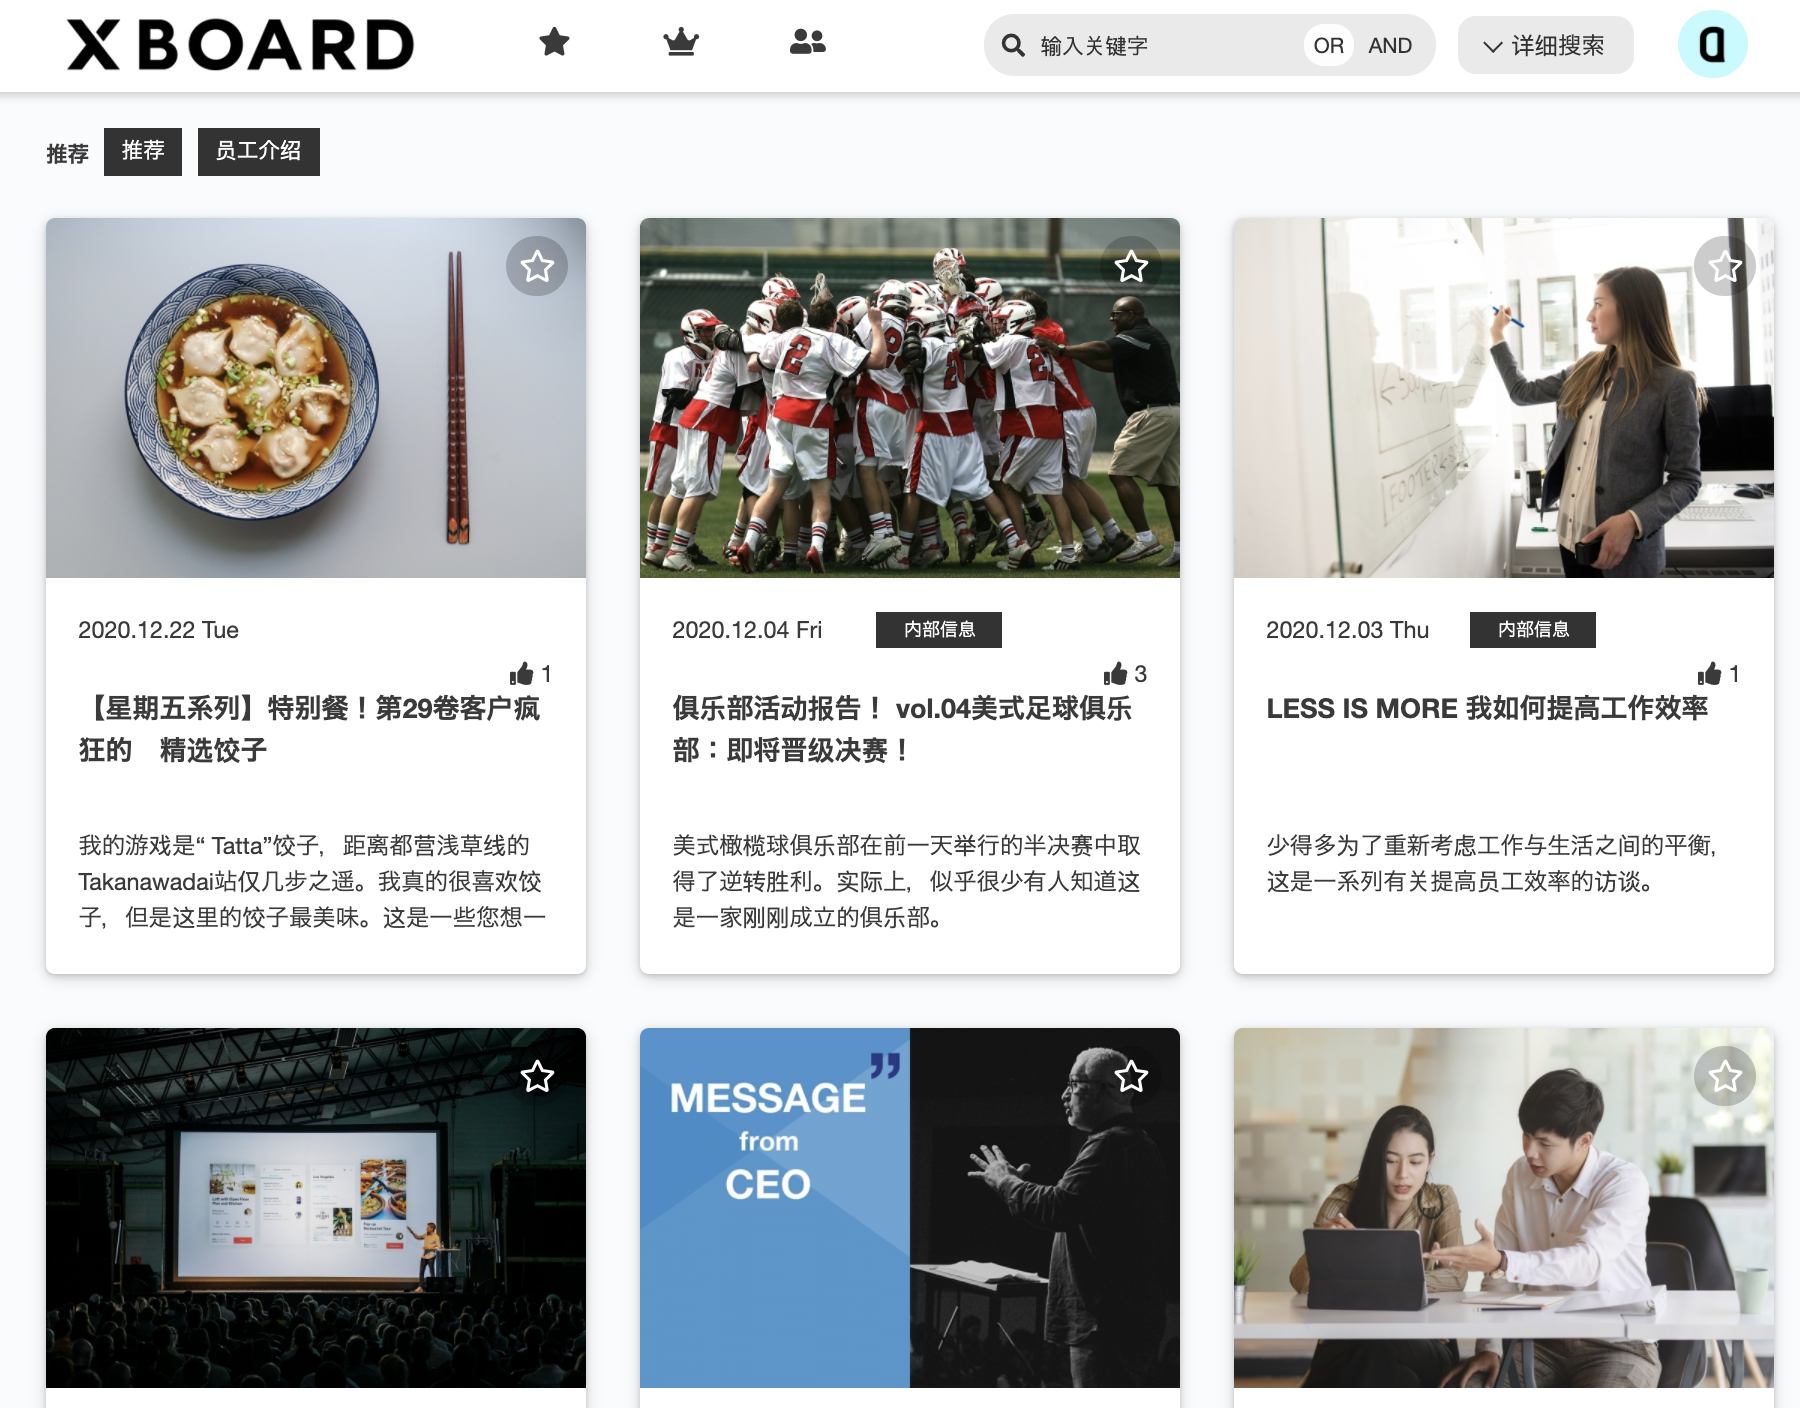
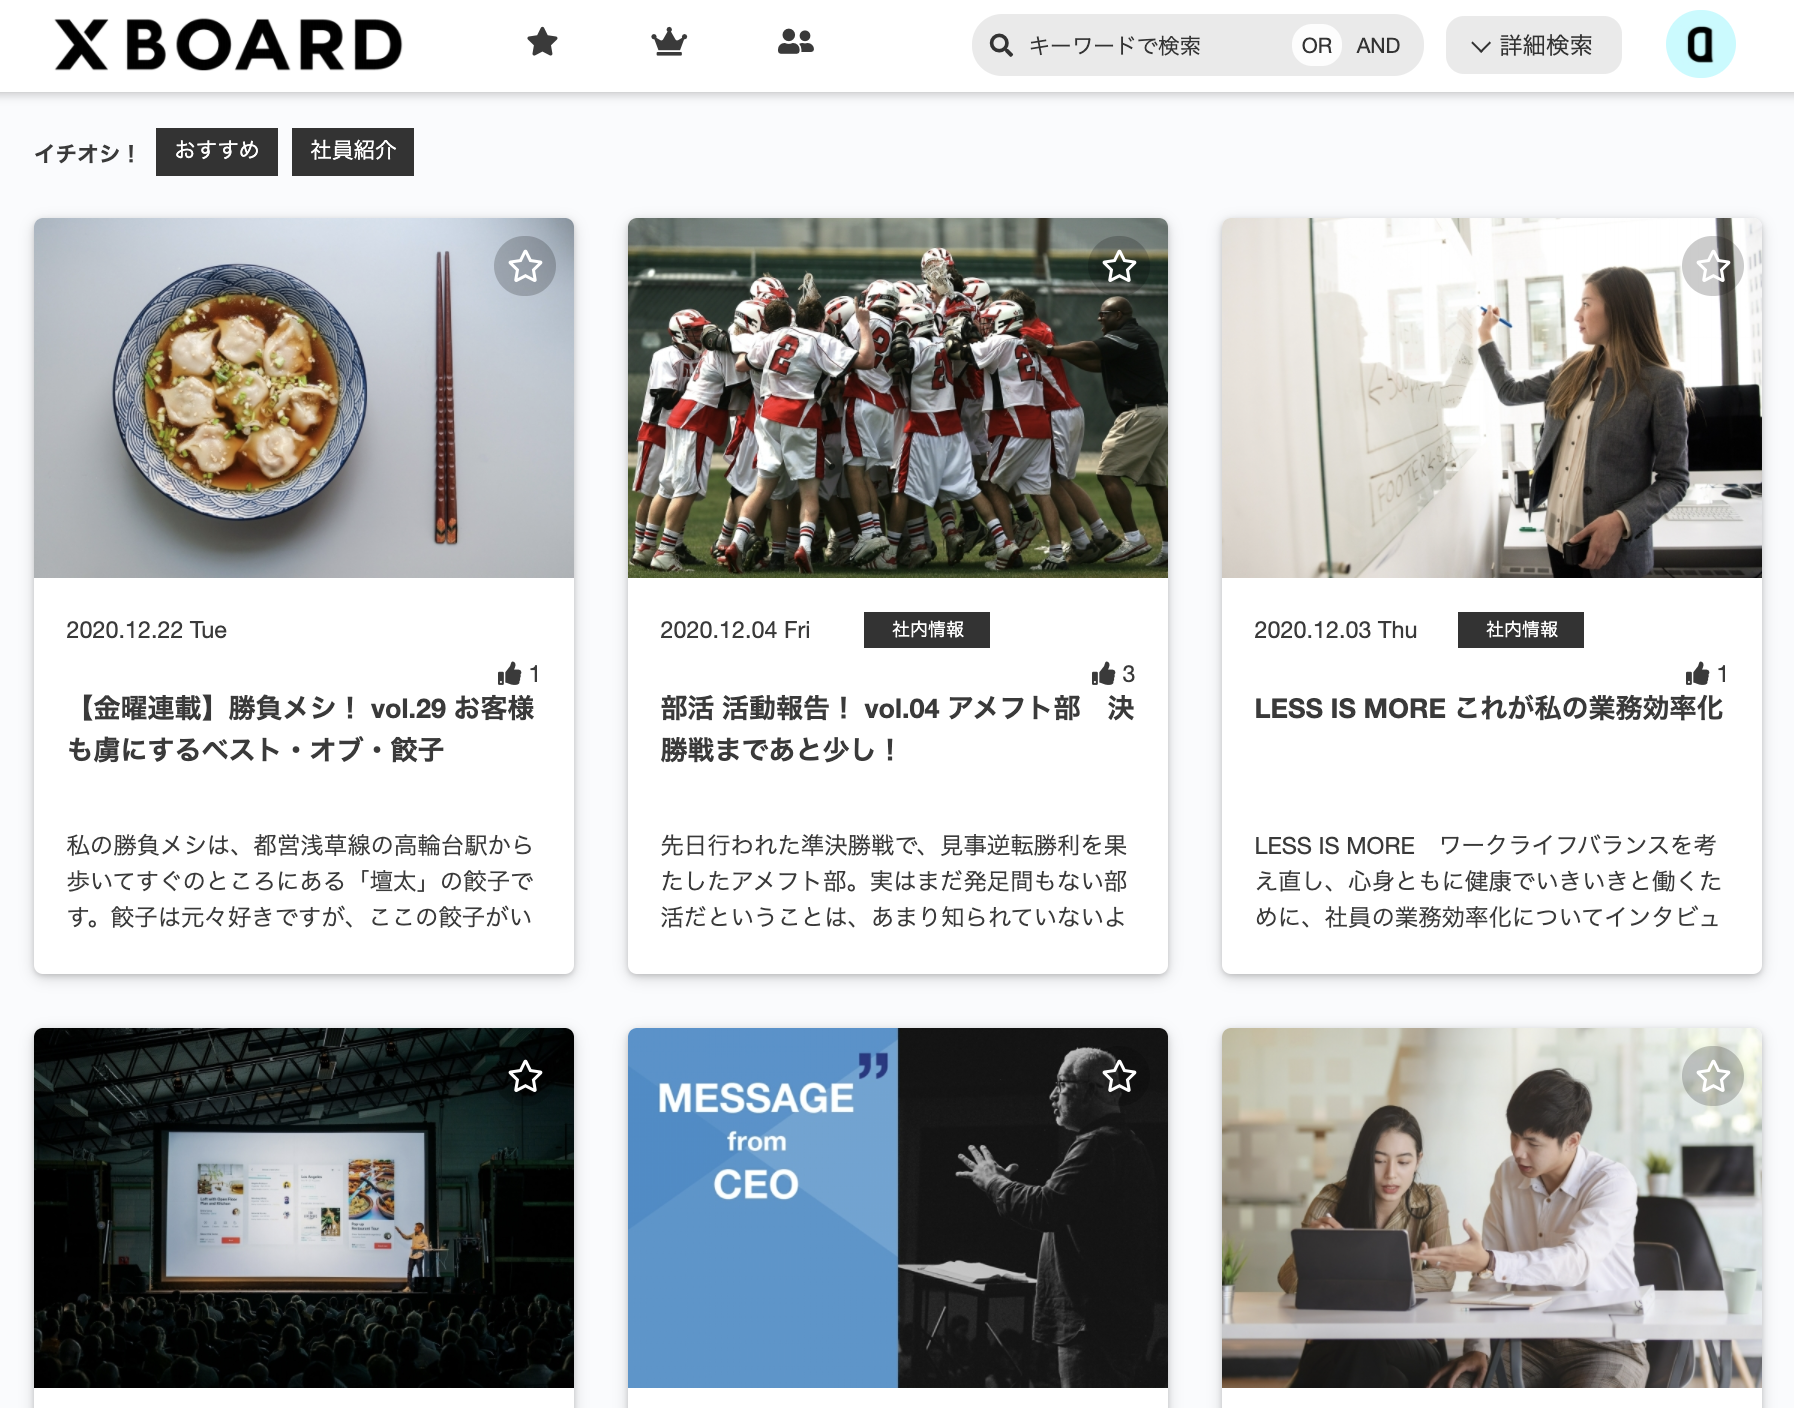
Users can select a language from the pull-down and display entries etc. in the specified language.
Check “Add supported language” and update it.
Once the settings are applied, you can set the master data for other languages.
* It takes a few minutes to apply this setting.

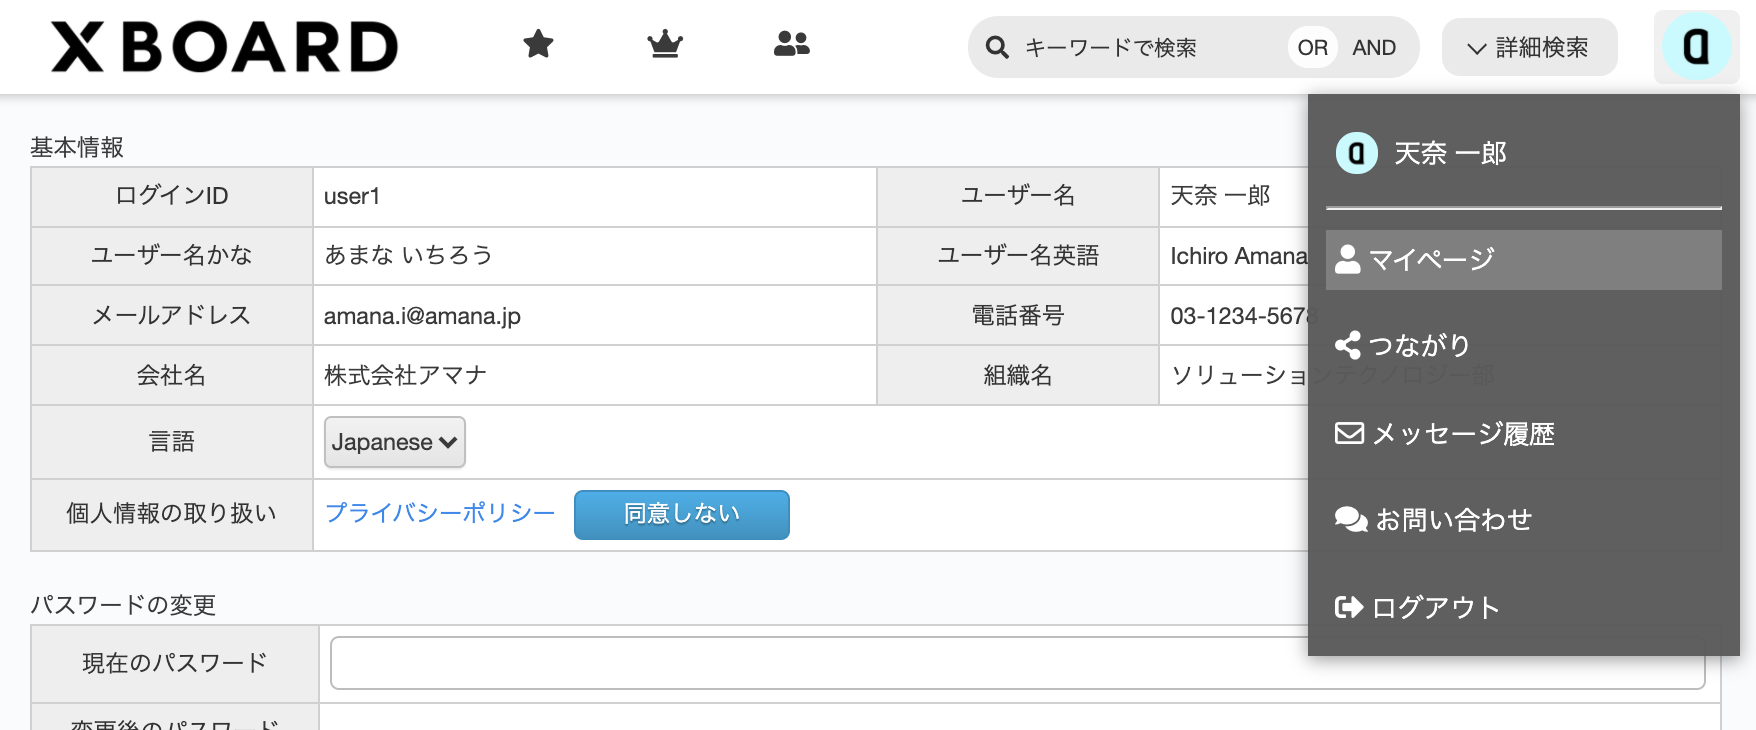
The language setting pull-down list will be displayed at the top right of the login page.

The language setting pull-down list is also added to My Page of the Publish Page.
■User Language Settings

If you select the language to English, all labels and buttons, etc. will be displayed in English.
If English data is also set for content data such as entries, information, etc. the English data will be displayed.
If English data is not set, Japanese data will be displayed.
The same applies to Chinese.
■English/Chinese Custom Category Data Settings
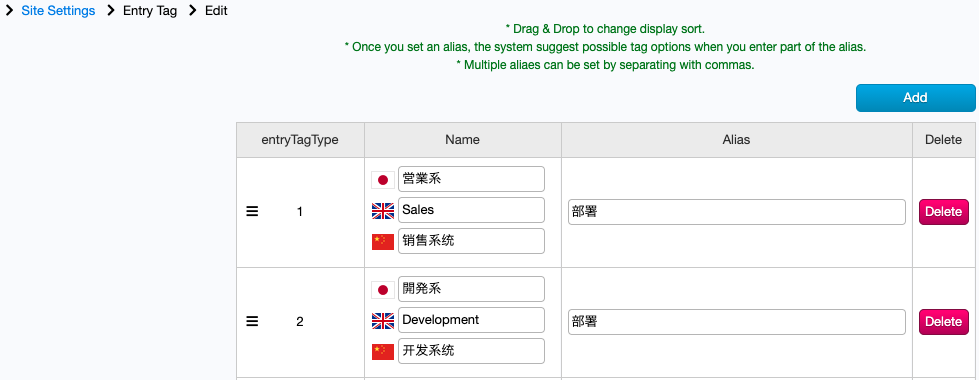
English and Chinese setting fields appear in each custom category settings such as “Credit”, “Category 1”, “Category 2”, “Entry Tag” etc.


Please set the data in each field as appropriate.
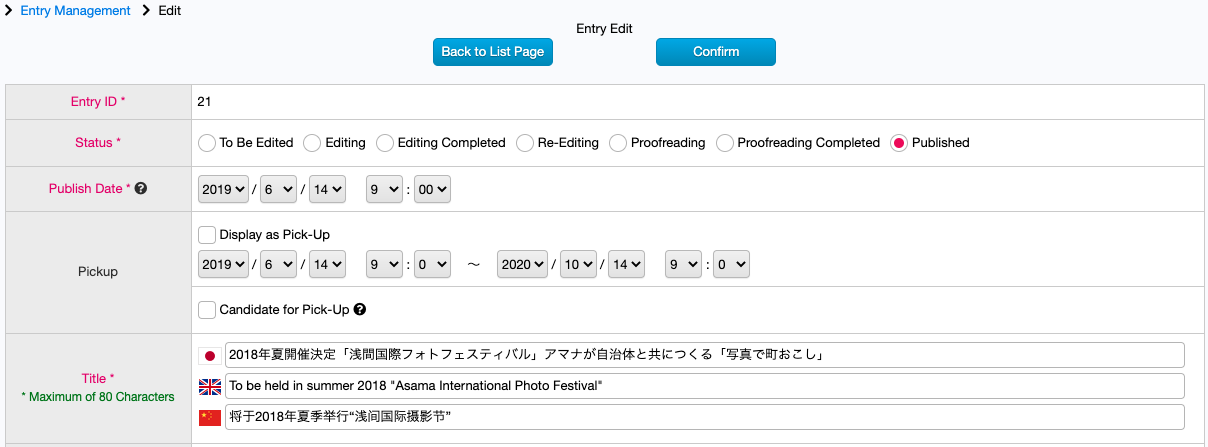
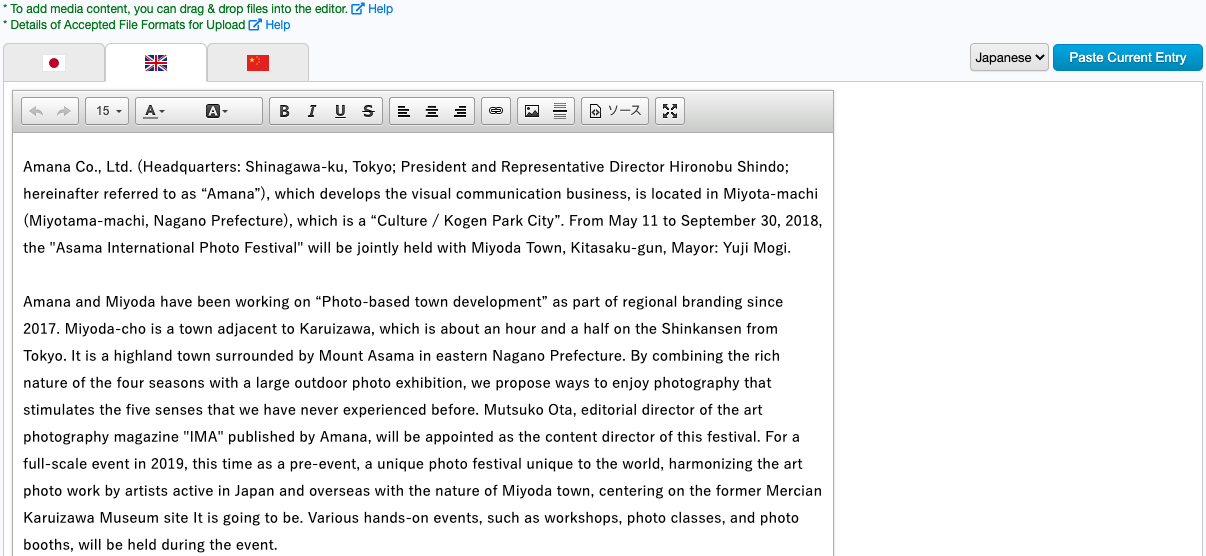
■English/Chinese Settings for Entry
On the Edit Entry page, sections to be set in English and Chinese, such as “Title” and “Body”, appear.


Enter English and Chinese contents in each section then update.

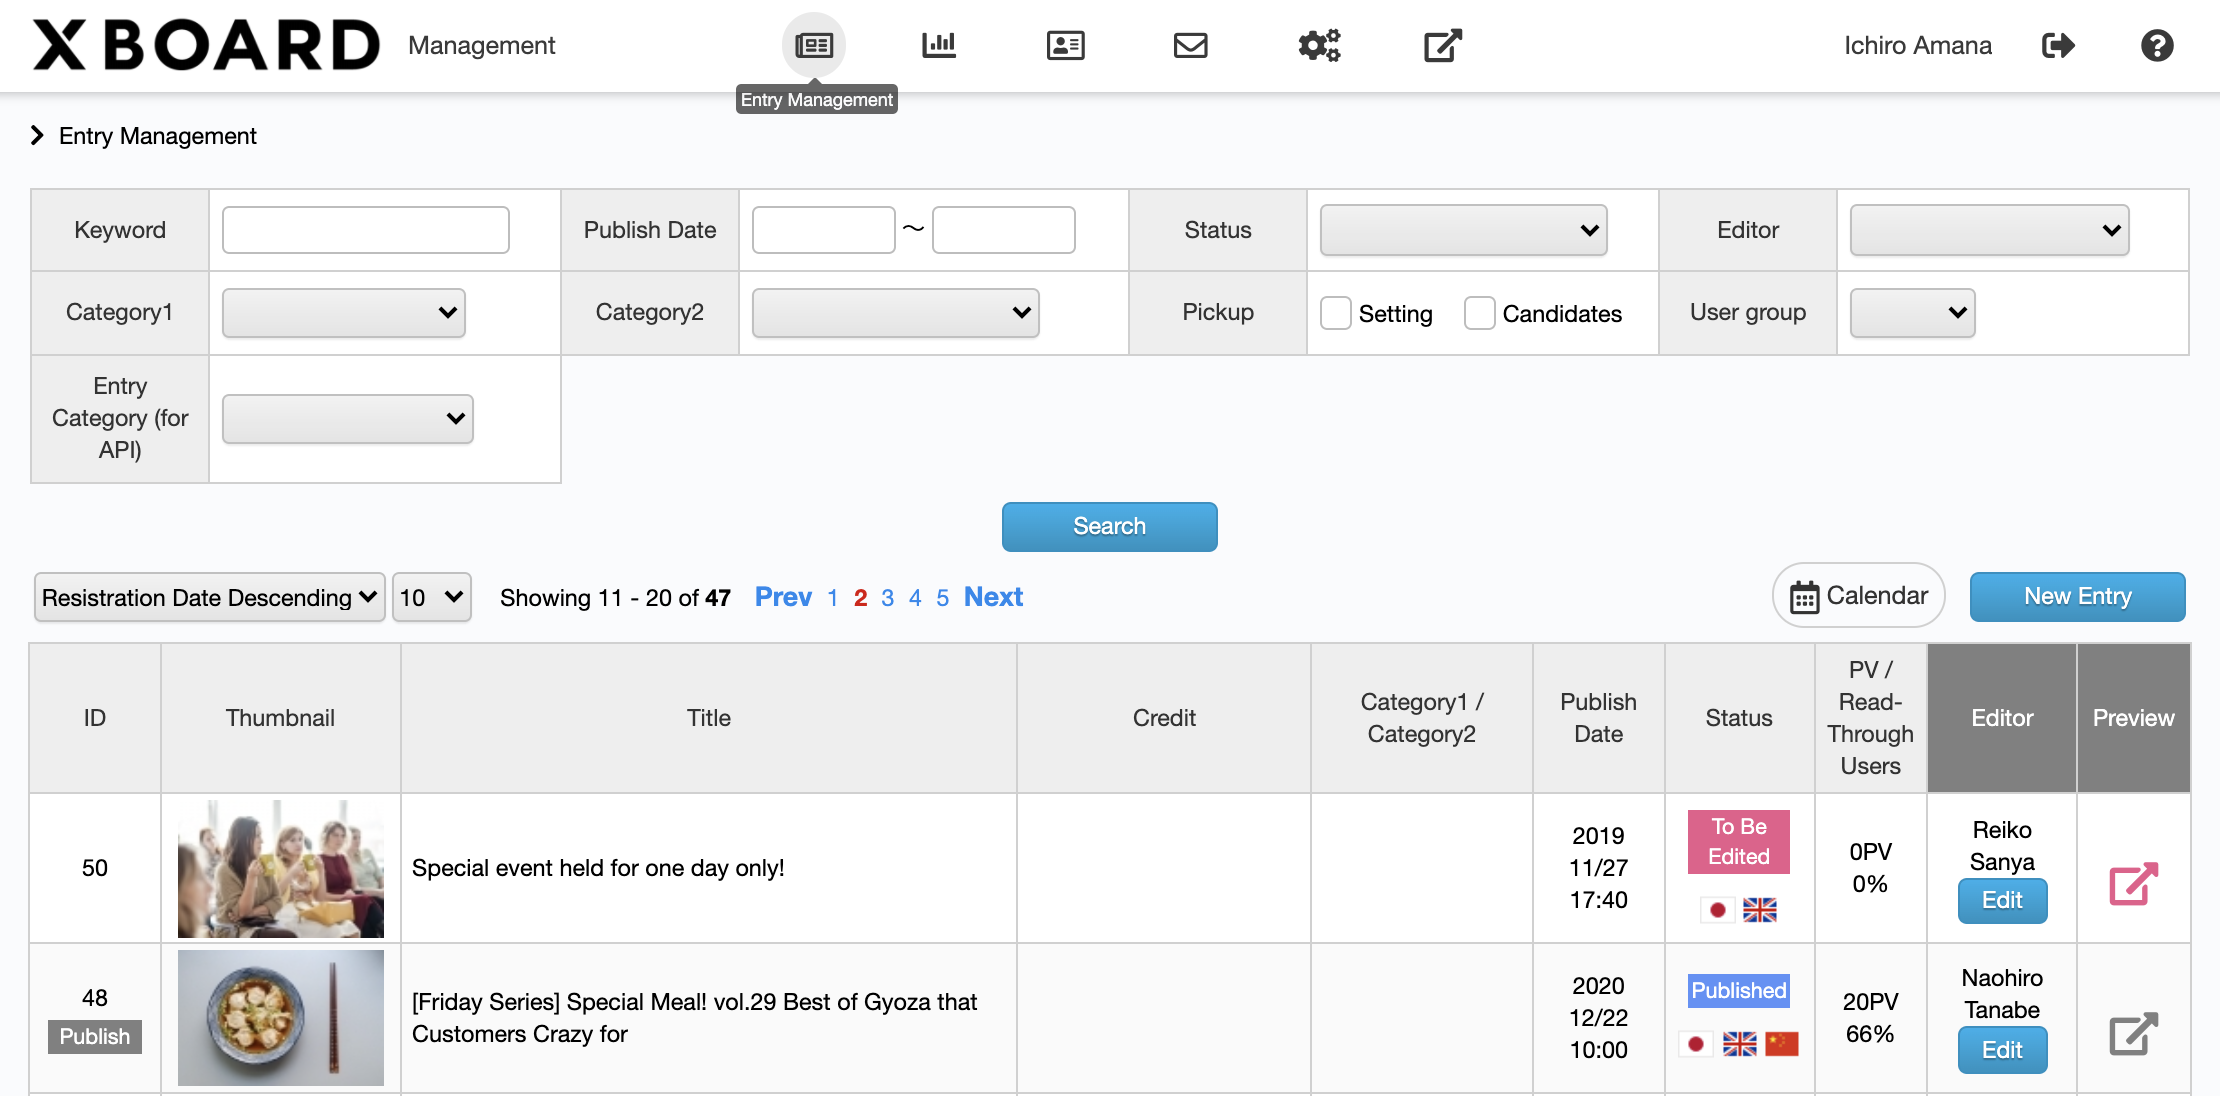
In the Entry List on Management System, only if there is content data set in English or Chinese, it will be displayed in the language user selected.
■ Entry preview on Publish page
Display the Publish page with the English and Chinese content data set.
Publish page of the user who selected “English” as the site language

Publish page of the user who selected “Chinese” as the site language

Publish page of the user who selected “Japanese” as the site language

■ English/Chinese Settings for Information/News
Set Information/News from “Site Settings” → “Information/News”.


Tabs for English and Chinese content appear in the Information Edit page.
Set the content in each language and update it.

Information on Publish page is also displayed in the language user selected.
■ English/Chinese Settings for Email Templates
The template setting of the email sent from the system can also be set in English and Chinese.


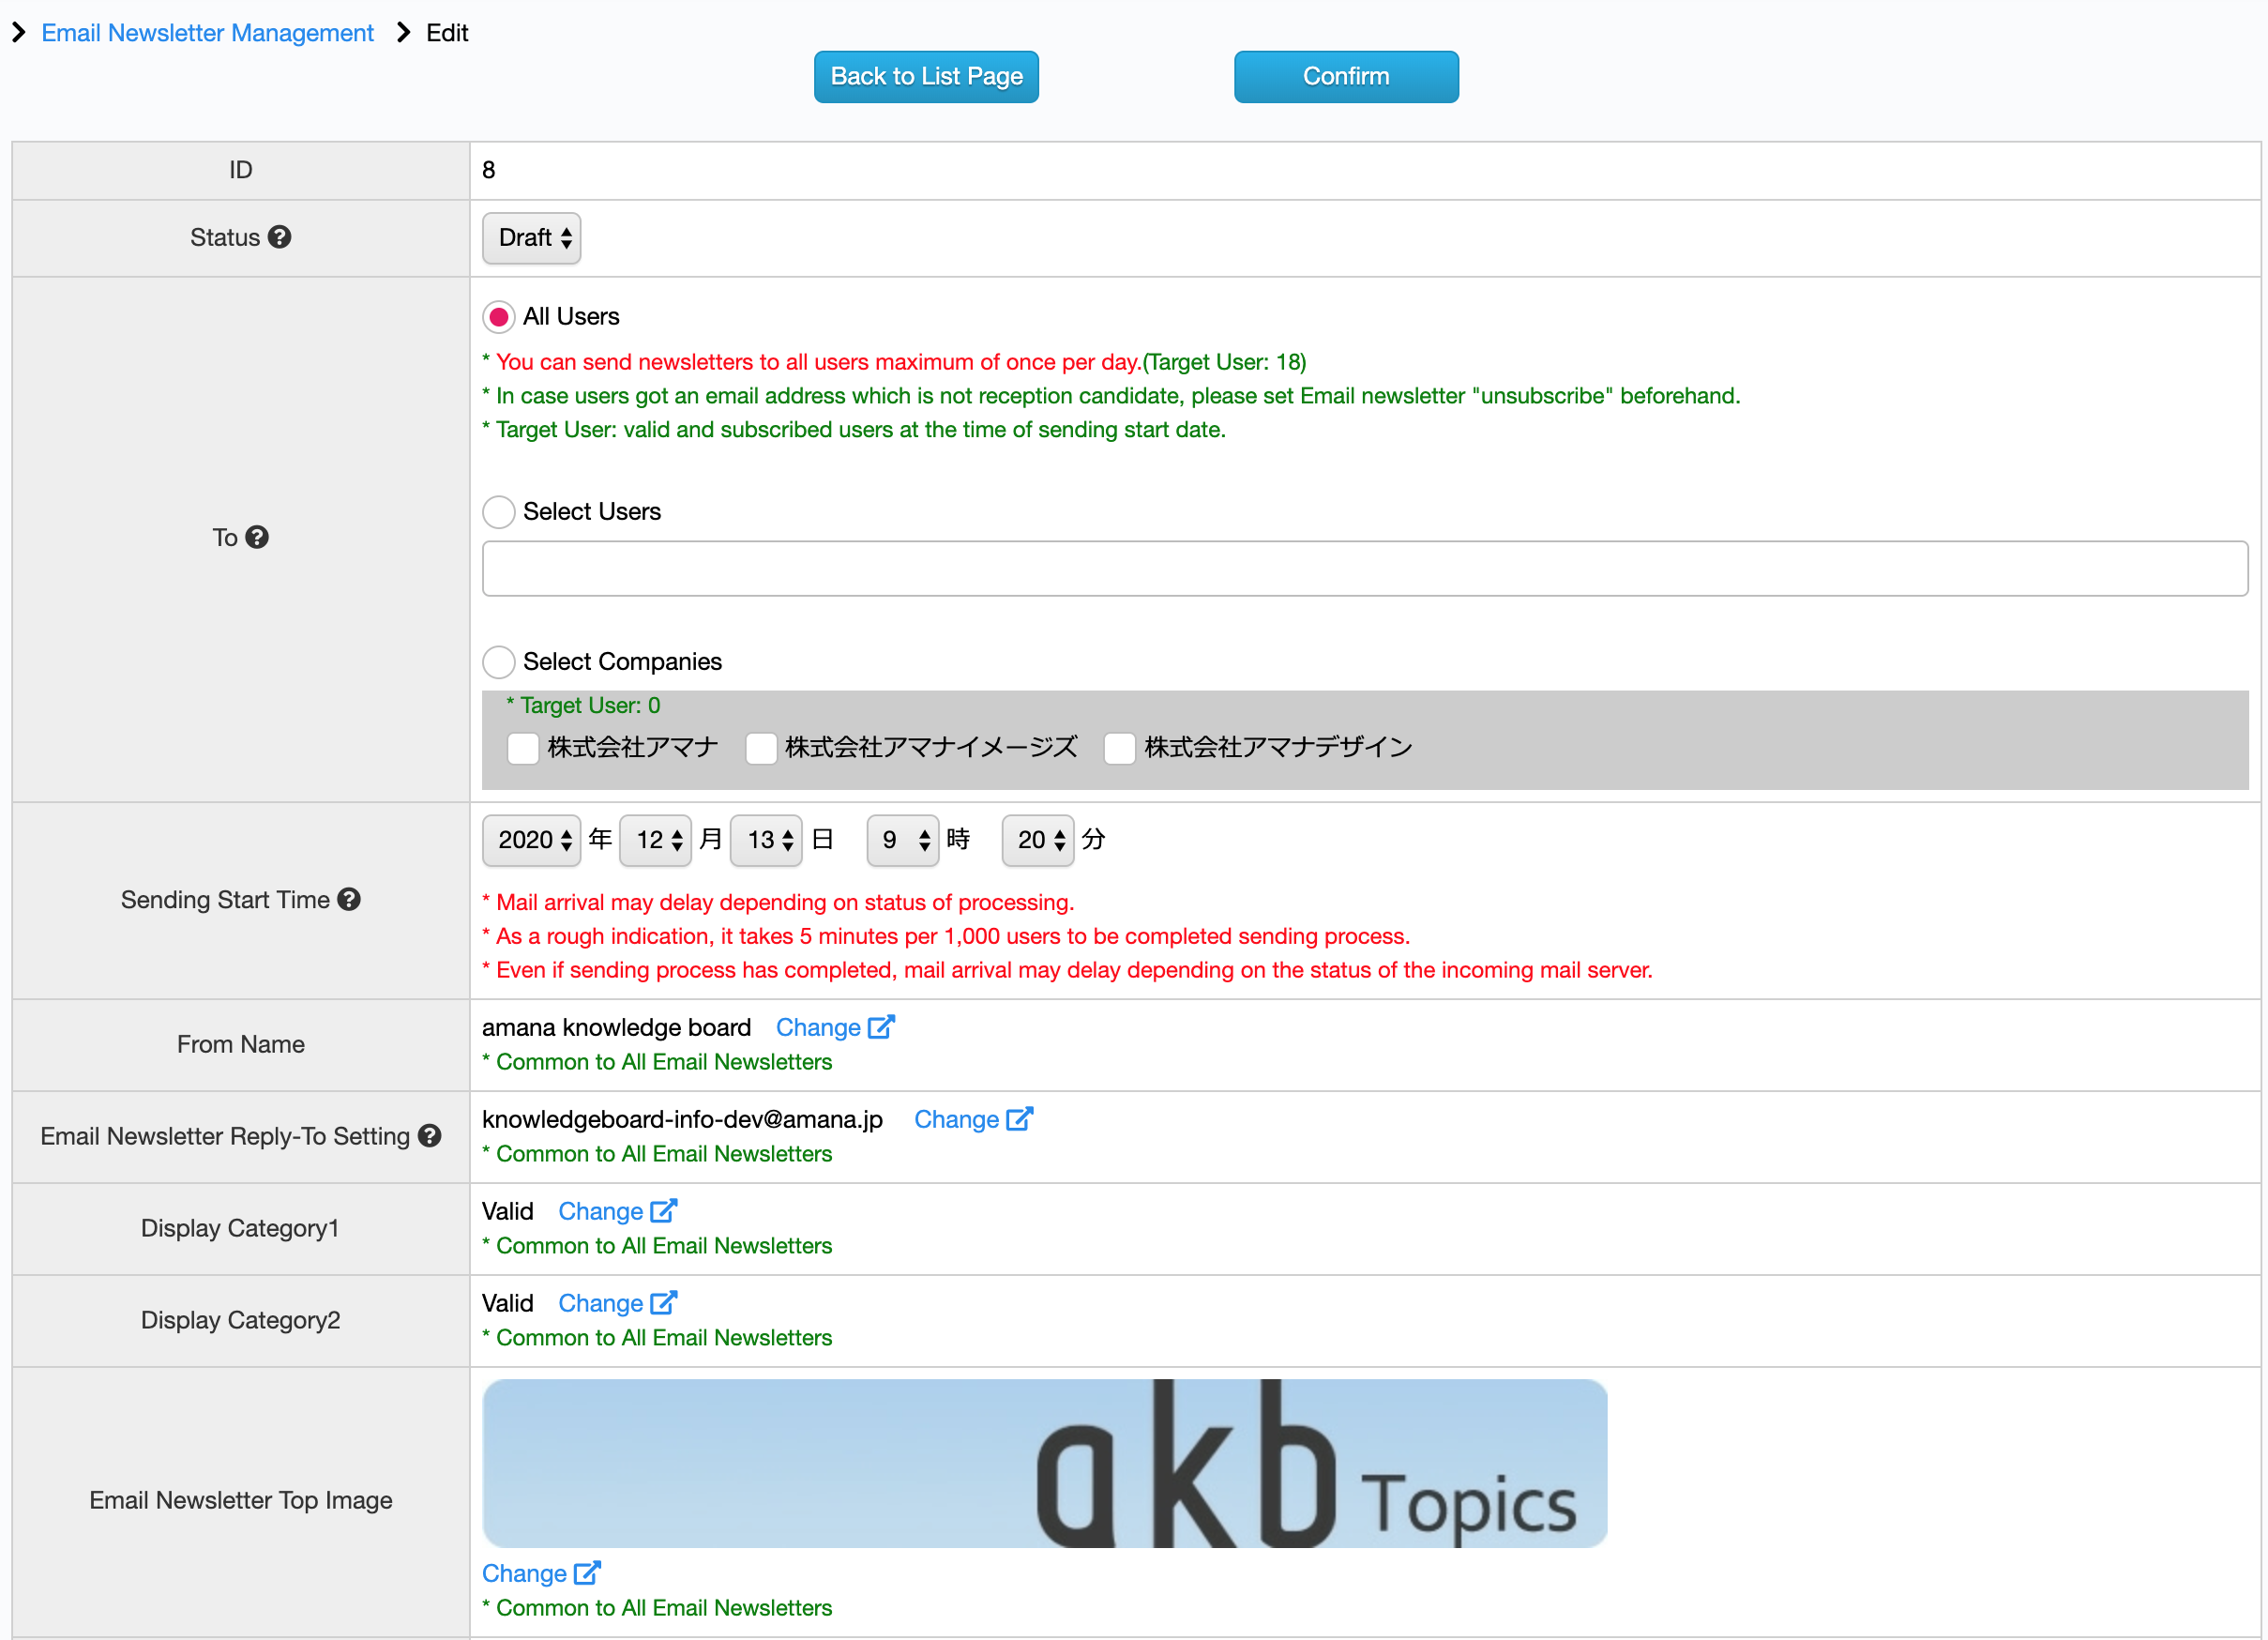
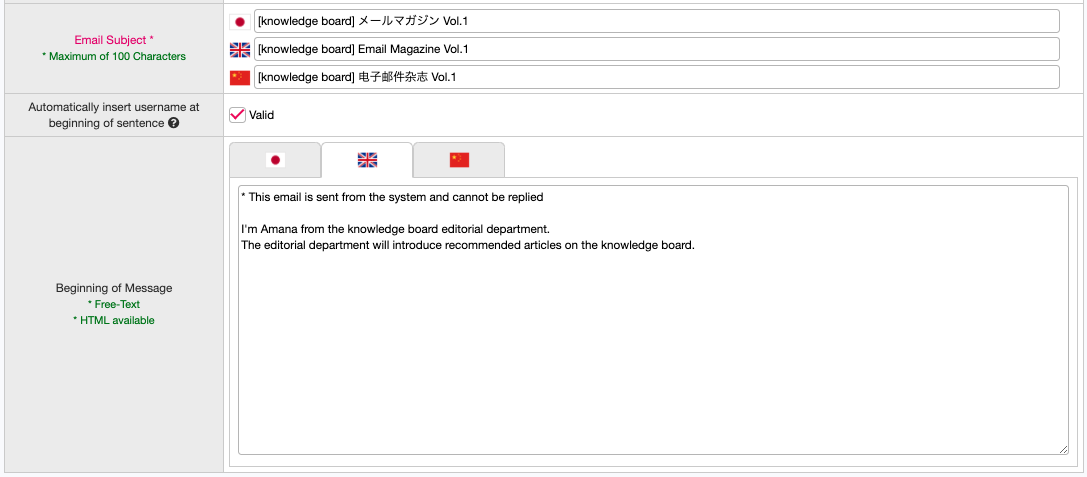
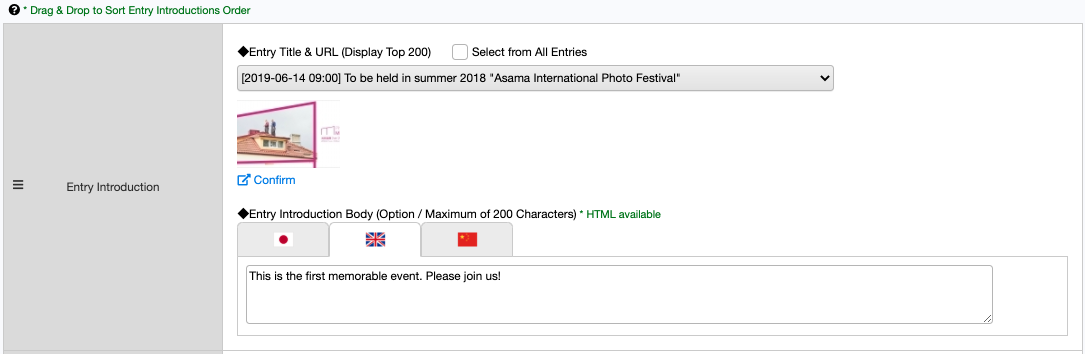
■ English/Chinese Settings for Email Newsletter
Email newsletters can also be set in English and Chinese. Email newsletter content is generated in the specified language by each recipient user.


Delivered Email Newsletter

Users will receive an email newsletter written in the selected language.
- Single Sign-On
※Single sign-on uses the “login ID” on the XBOARD side as a key. Therefore, when setting the “login ID”, the userinfo endpoint response (email, sub, unique_name, etc.) of Google, Microsoft 365, and other general-purpose single sign-on (OpenID Connect), which is the customer’s environment, must be set as the “login ID ” must be set.* This setting screen is displayed only on sites that have a single sign-on usage contract.
■Overview of single sign-on function
Single sign-on is a function that automatically logs in to the XBOARD by performing user authentication processing in the user management system that the customer is already using.
Currently, it supports Google, Microsoft365 (Microsoft Azure AD cloud version), and other general-purpose single sign-on (OpenID Connect), and when a user who has logged in to these services accesses the XBOARD, the login authentication process is automatically completed. You will be able to browse the XBOARD page seamlessly.
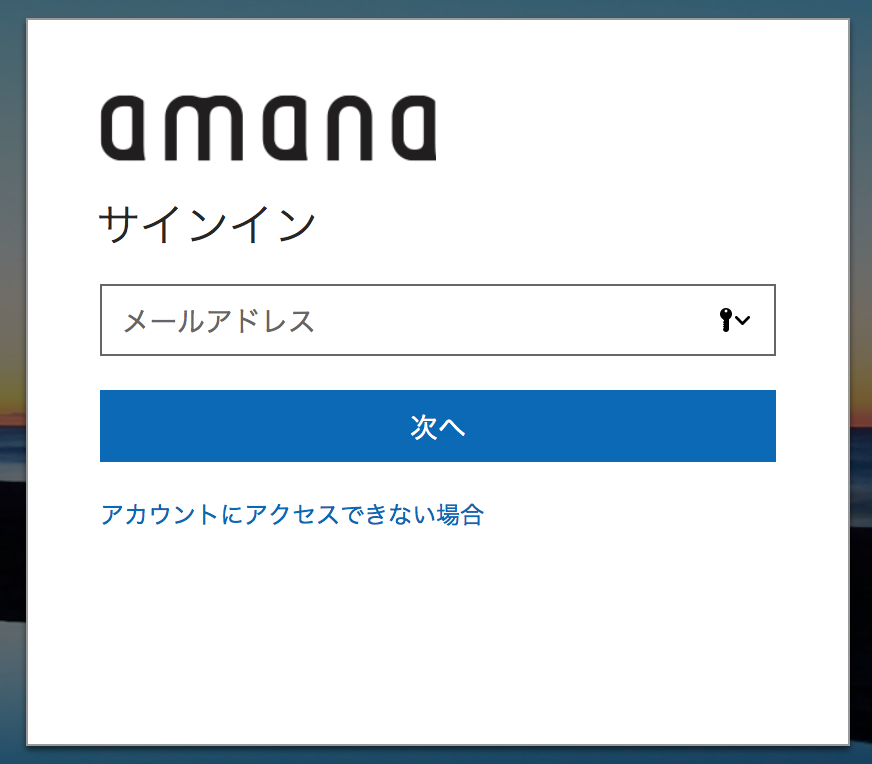
On the “Single sign-on” setting screen, you can set the authentication method to be displayed on the login screen.
You can log in with ID / PW and set multiple single sign-on settings.
If you set only one single sign-on, you will be able to perform the login process seamlessly without displaying the login form.
In order to use single sign-on, some settings are required in advance. Please refer to the item of your service.
■table of contents
How to set in advance (Google)
How to set in advance (Microsoft365 Azure AD cloud version)
How to set on the XBOARD management screen
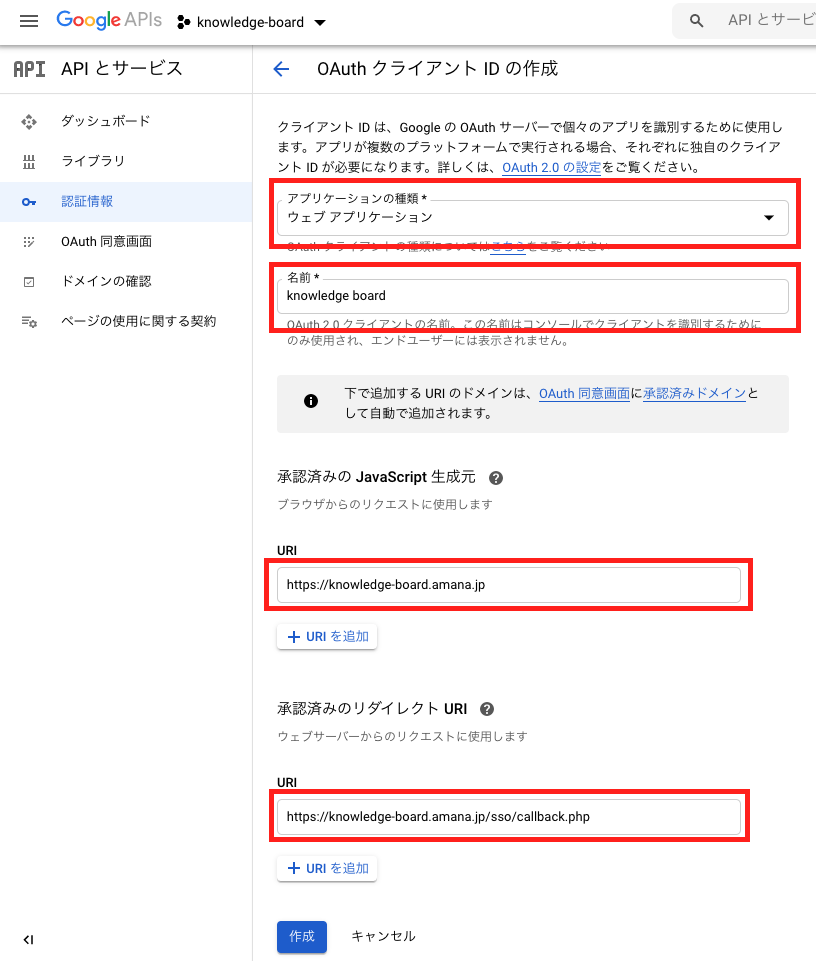
■How to set in advance (Google)
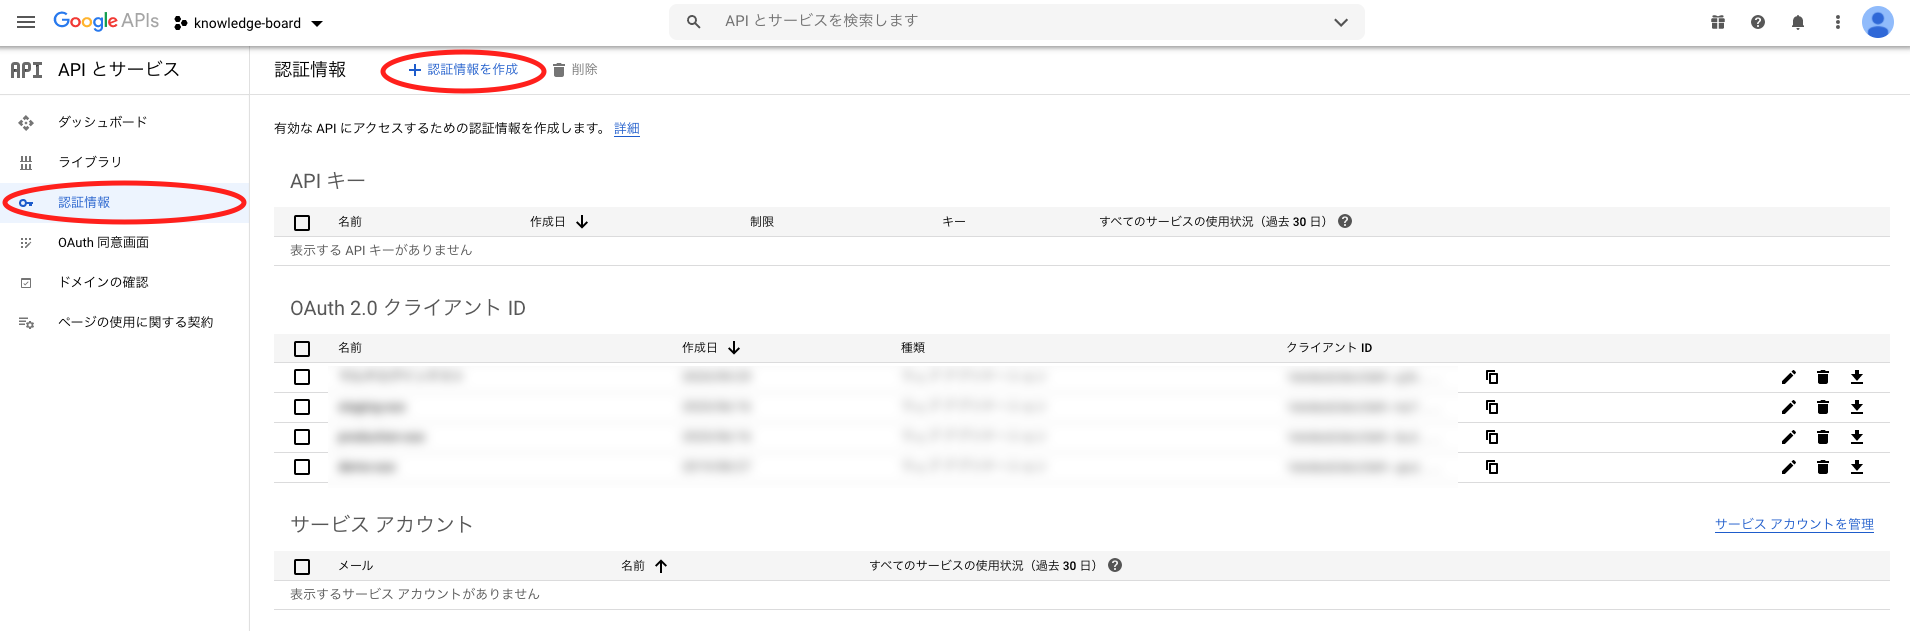
Settings on the Google management screen

Display the management screen of Google APIs.

Click “Credentials”-> “Create Credentials”-> “Oauth Client ID”.

◆ Settings
Application type … Web application
Name … XBOARD (Any)
Approved JavaScript generator … https://knowledge-board.amana.jp
Approved redirect URI … https://knowledge-board.amana.jp/sso/callback.php
* If you use the demo environment, please add the URL for the demo environment as well.
Set the above and click the create button.

“Client ID” and “Client Secret” are displayed. This content will be set from the management screen of the XBOARD, so make a note of it.
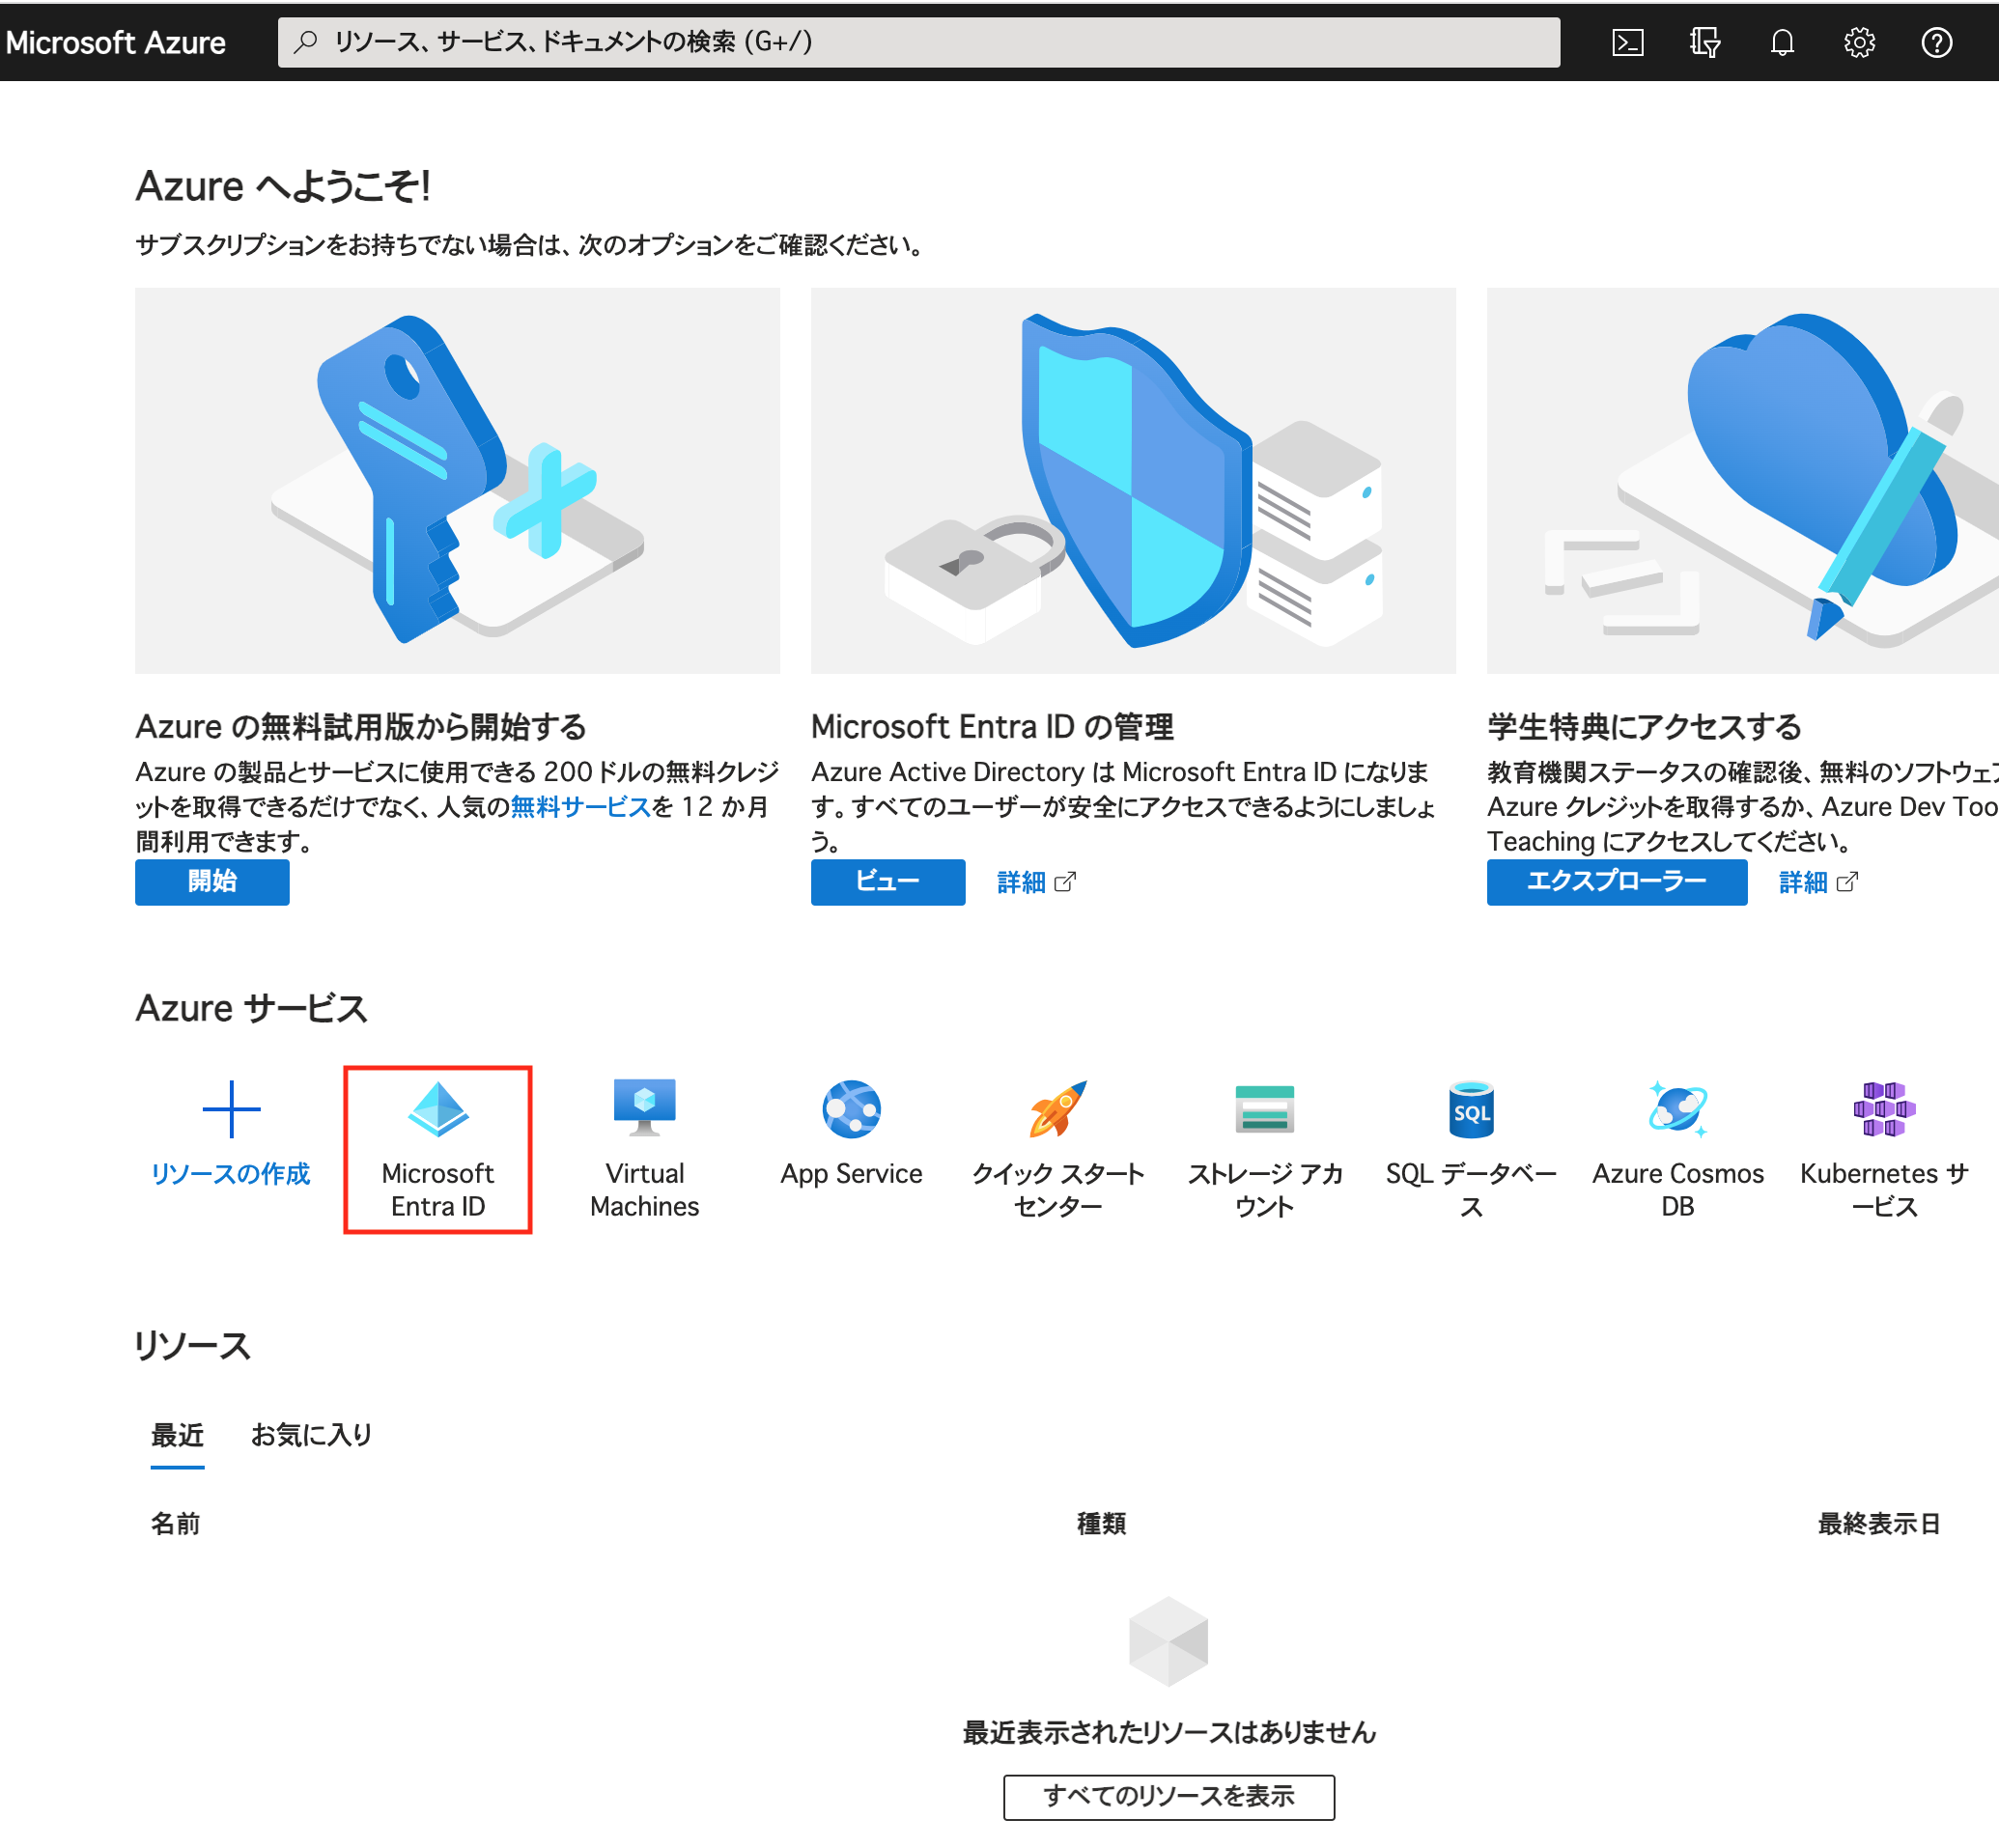
■How to set in advance (Microsoft365 Azure AD cloud version)
Settings on the Microsoft Azure AD administration screen

Log in to the Microsoft Azure administration screen and click Microsoft Entra ID.

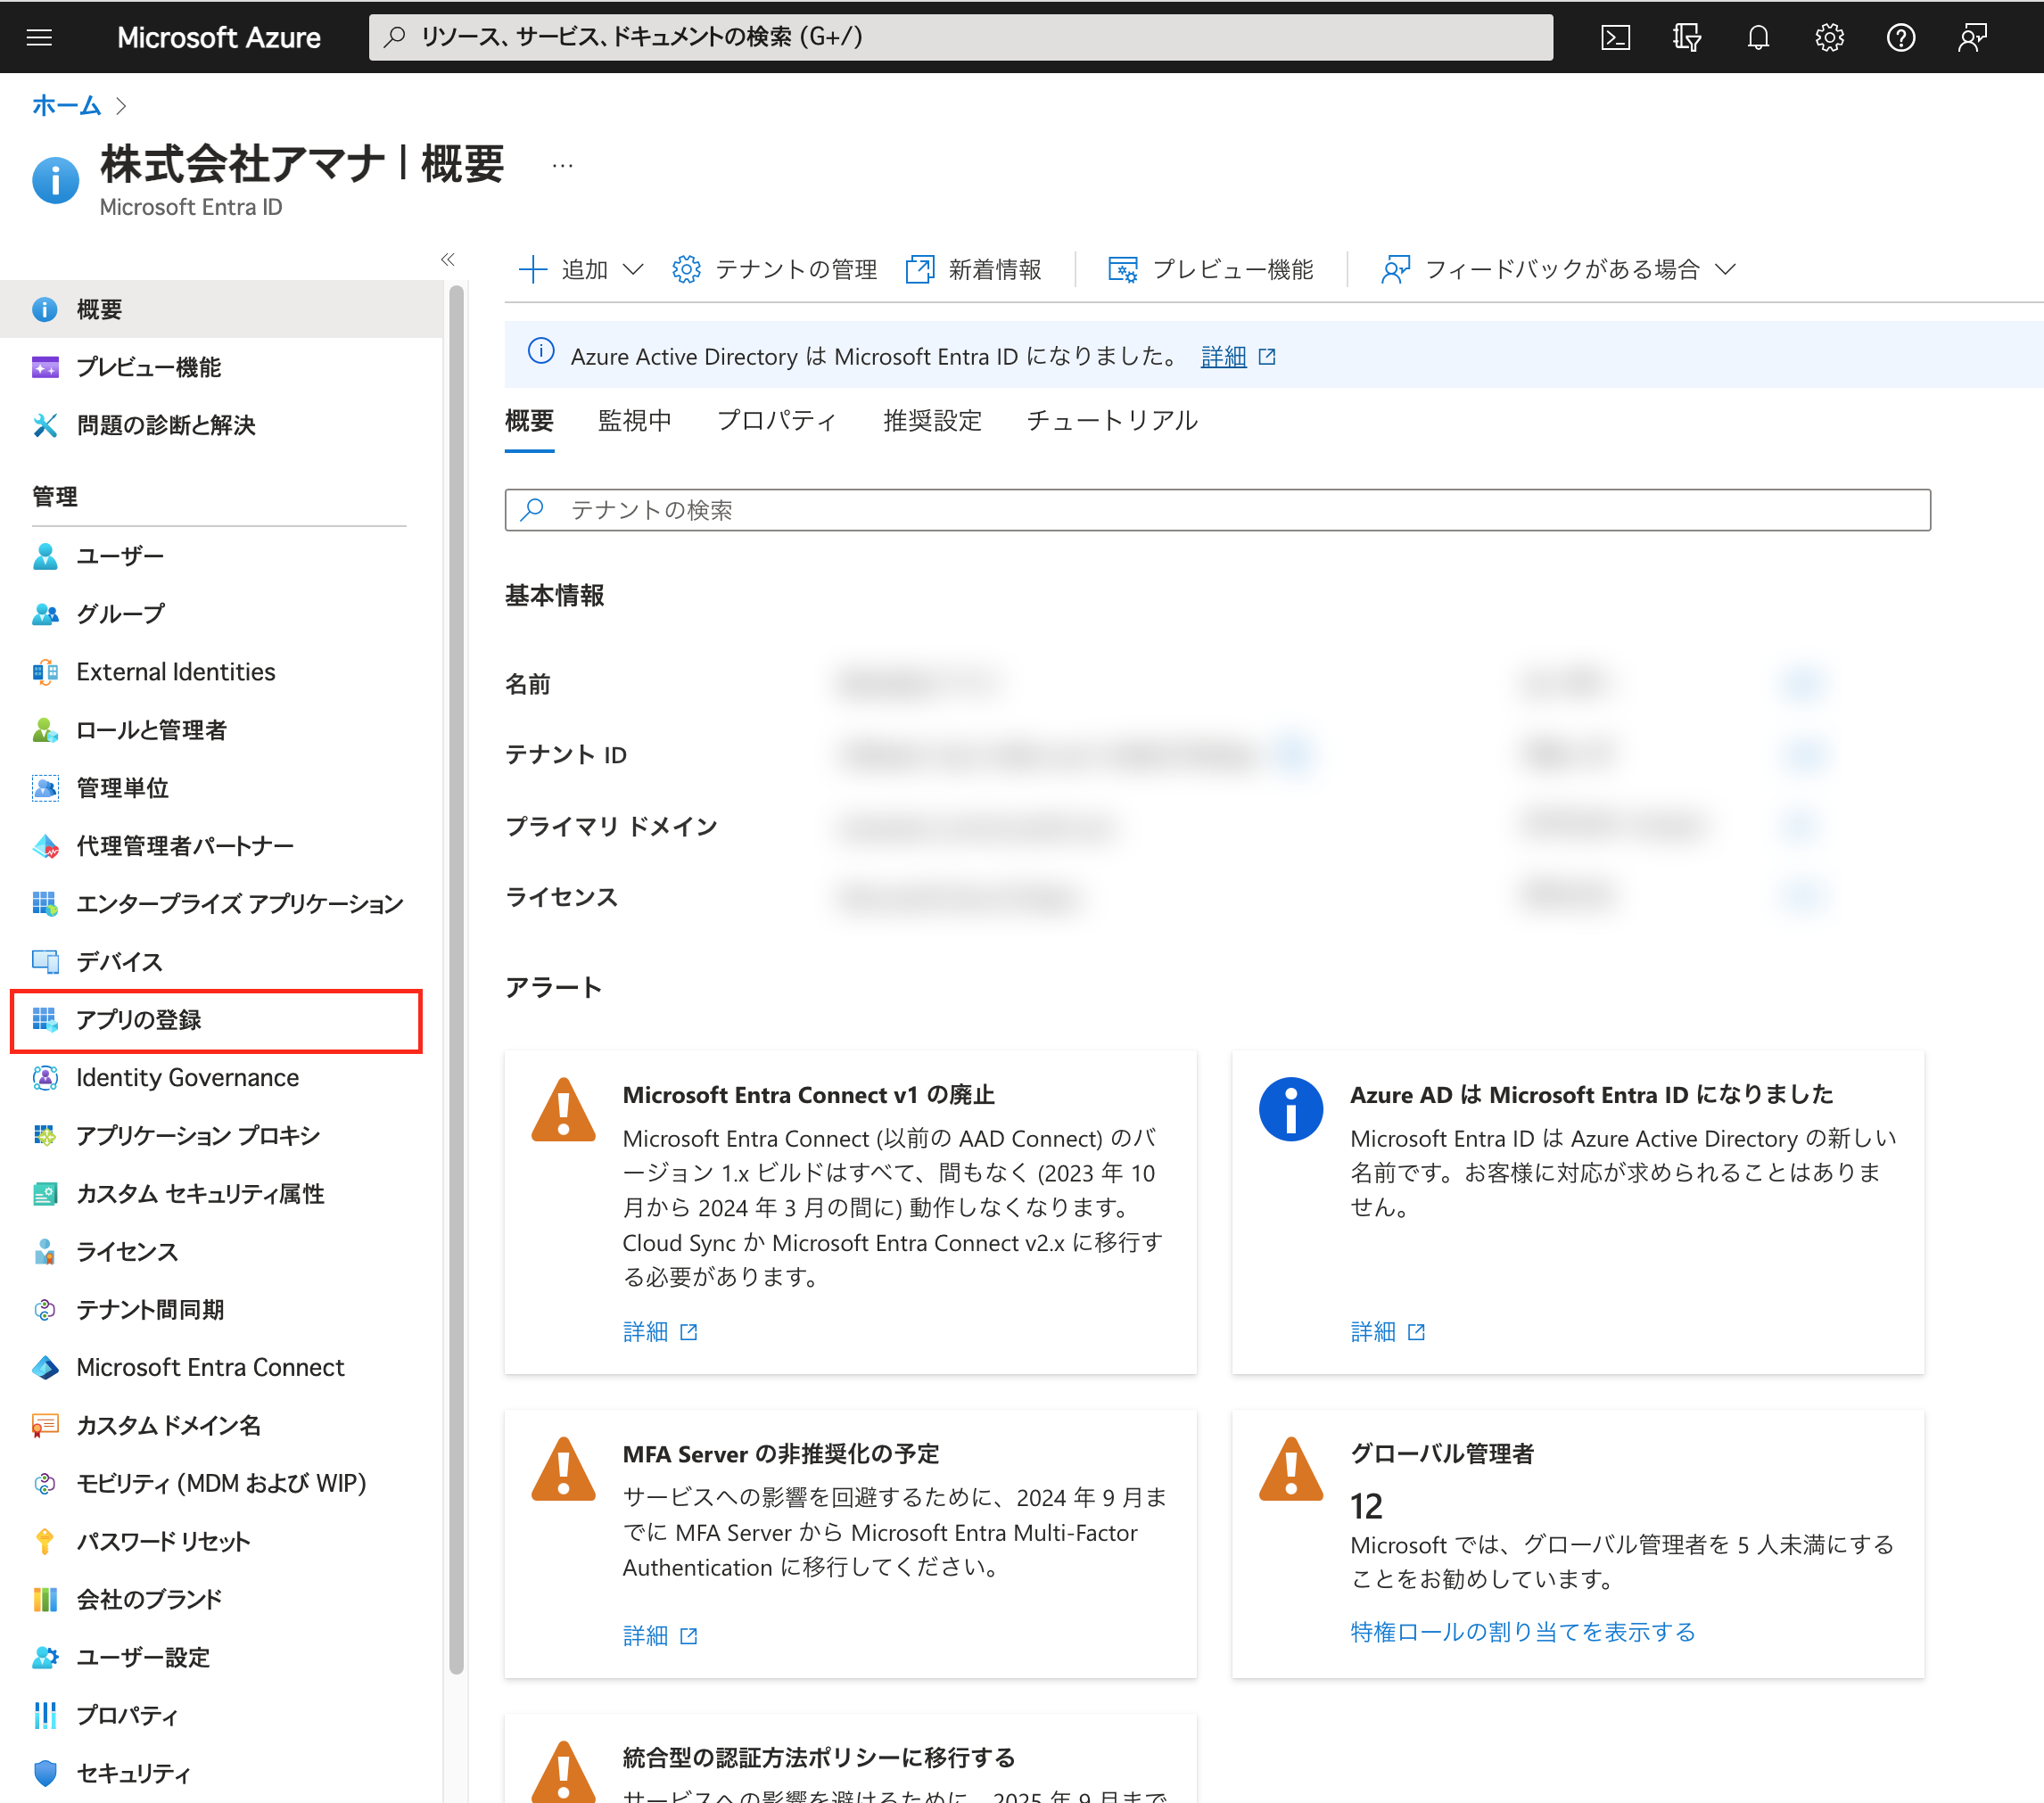
Click “Register App”.

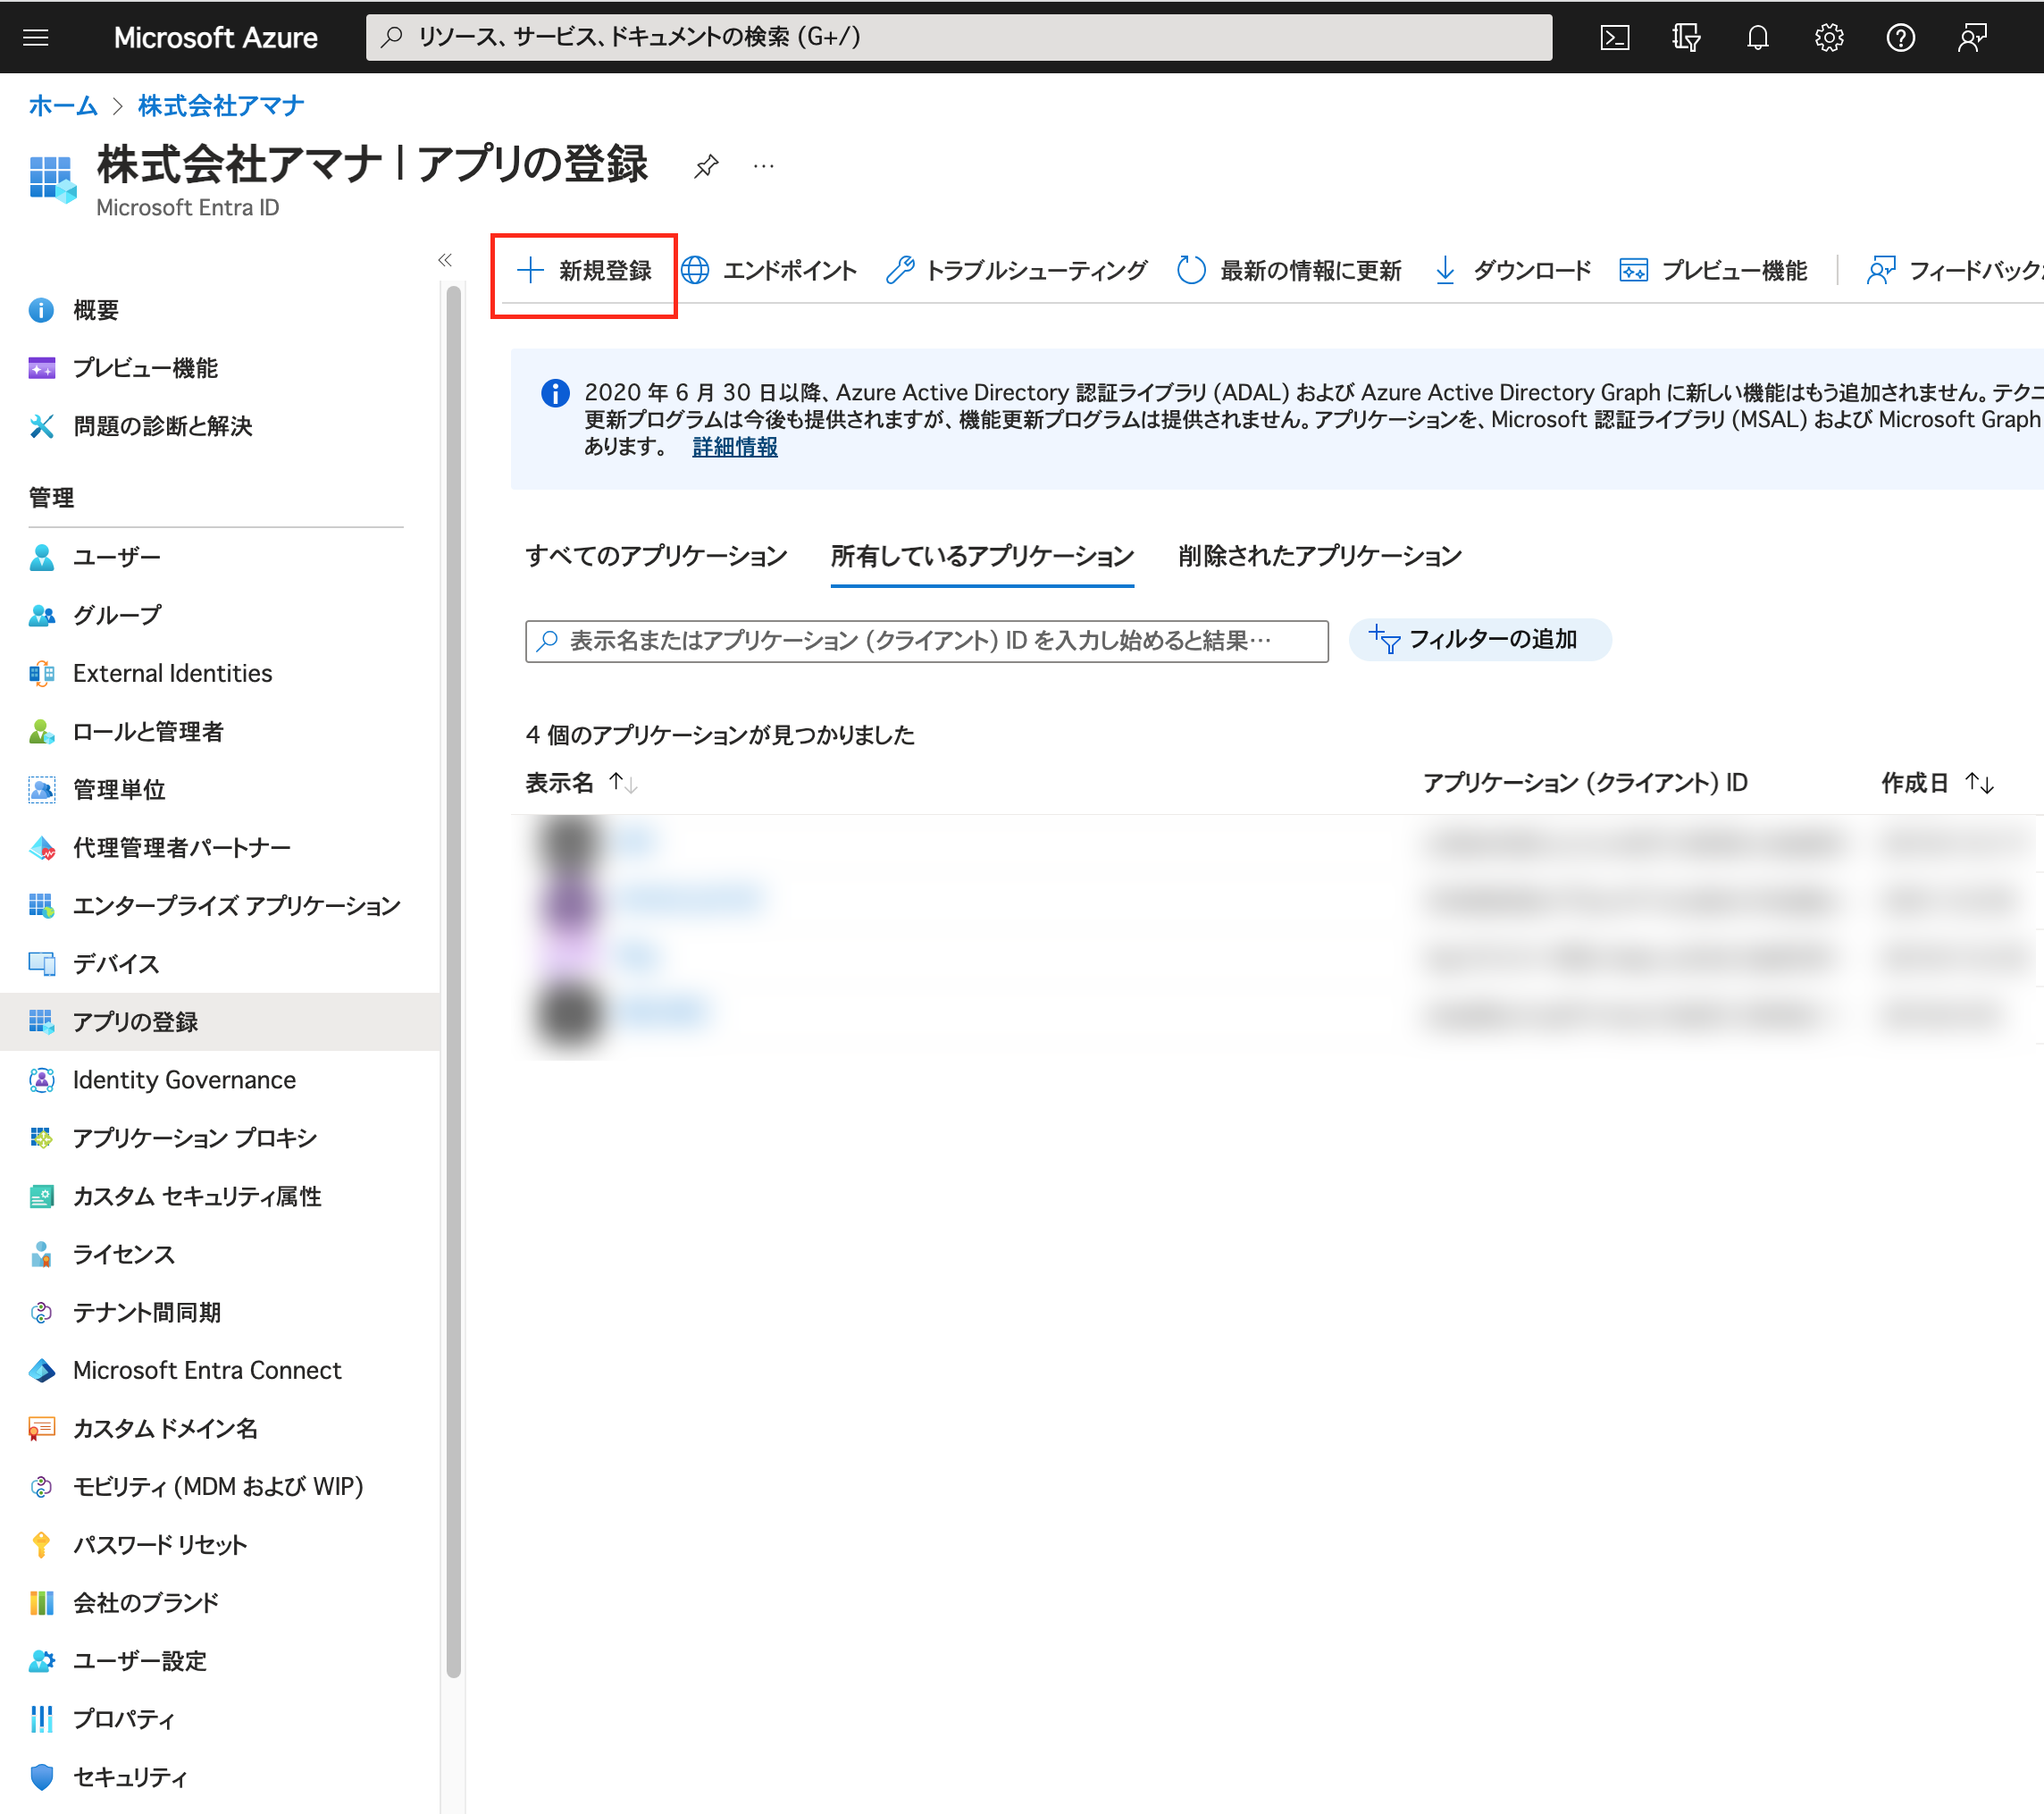
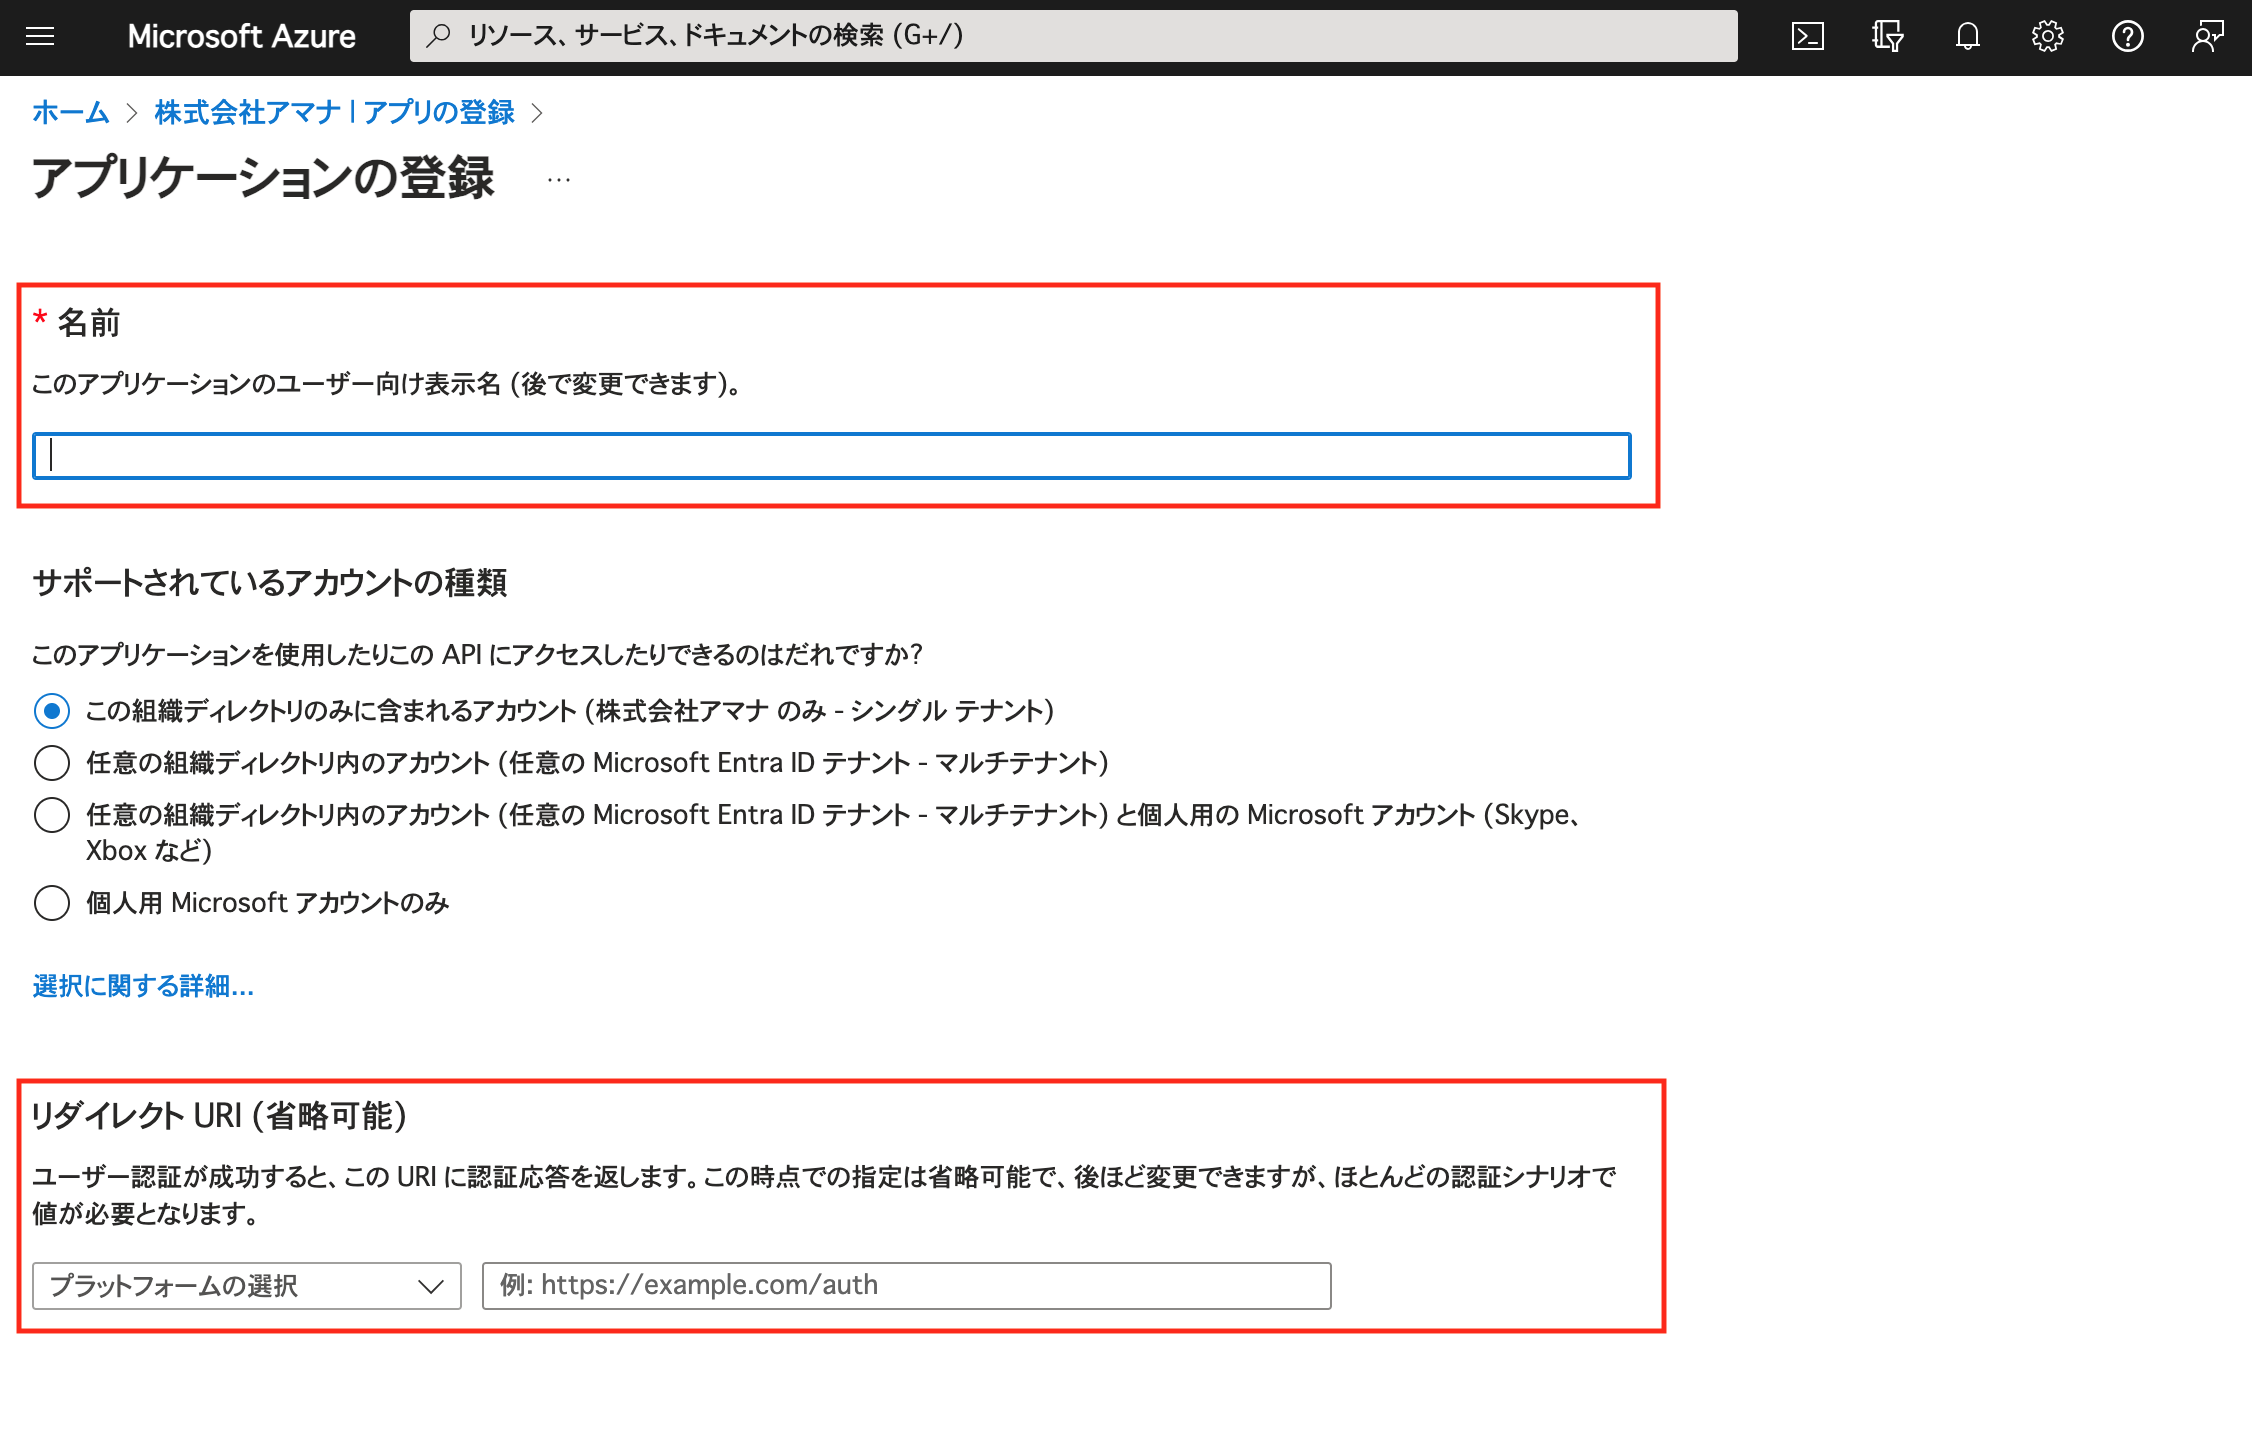
Click “New Registration”.

◆ Settings
Name … XBOARD (Any)
Redirect URI … https://knowledge-board.amana.jp/sso/callback.php
Enter the above and click the “Register” button.
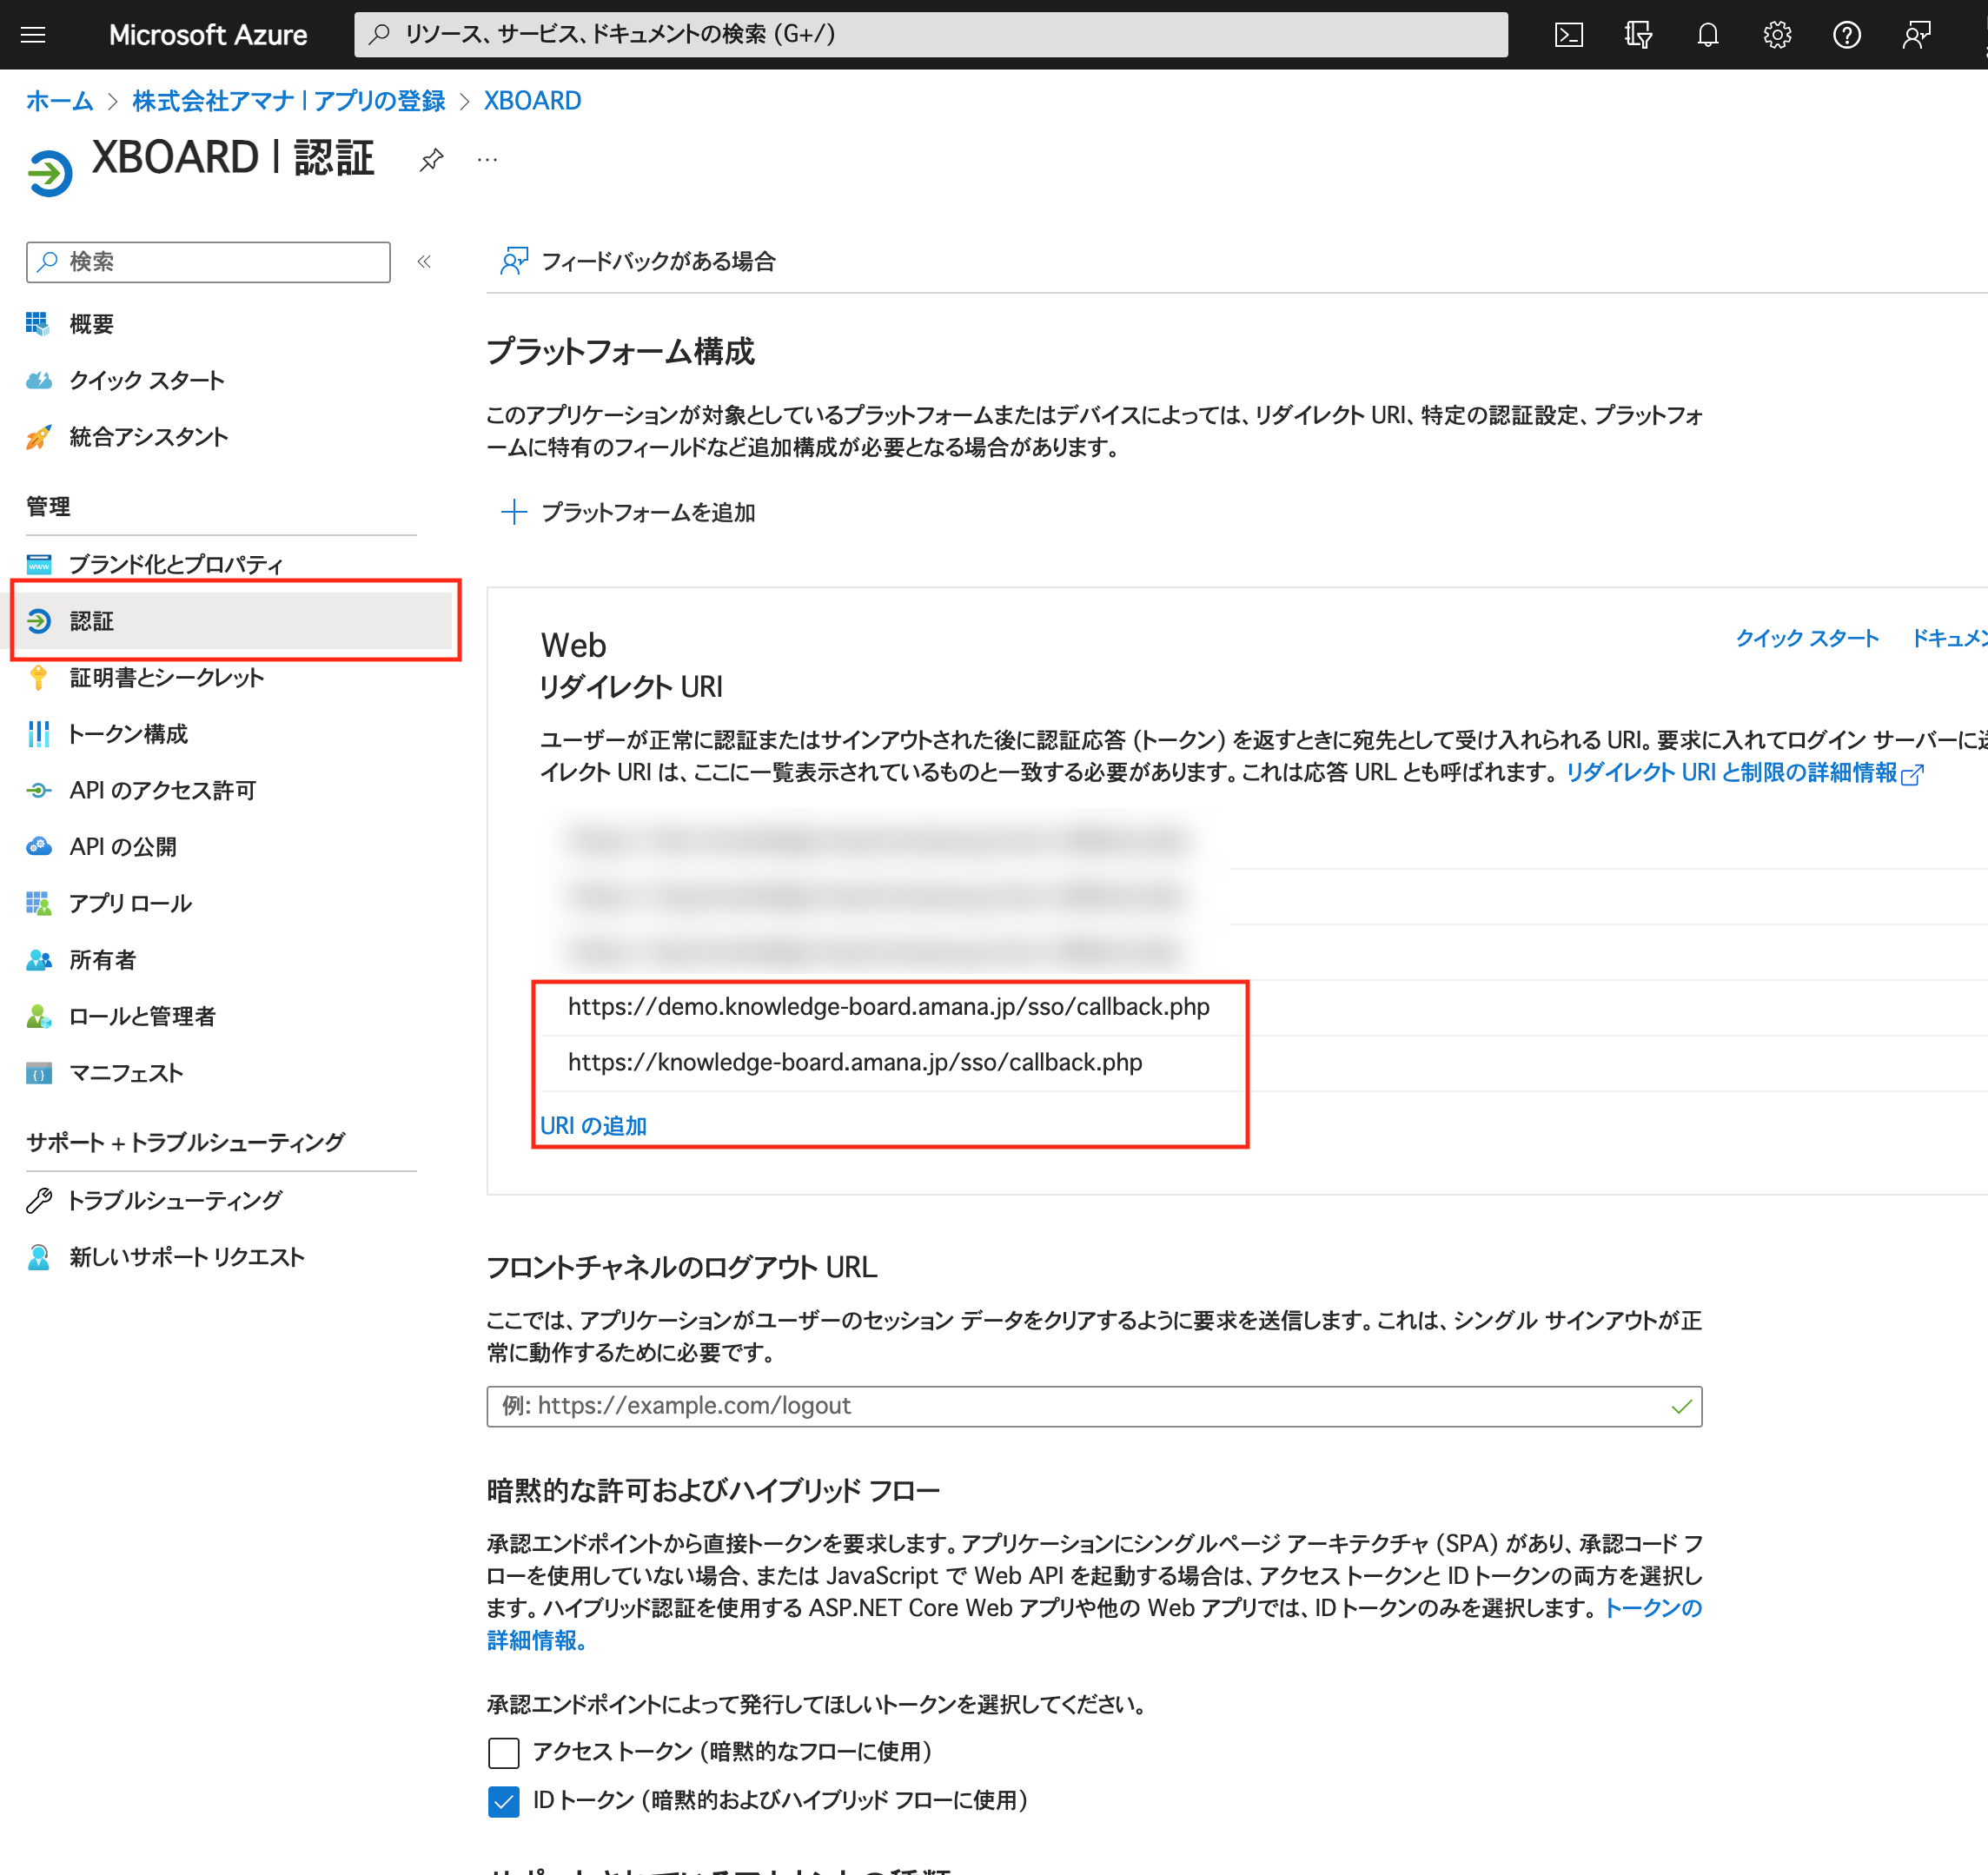
Click on the added application.

Click “Authentication” from the menu on the left.
* If you use the demo environment, please add the URL for the demo environment as well.


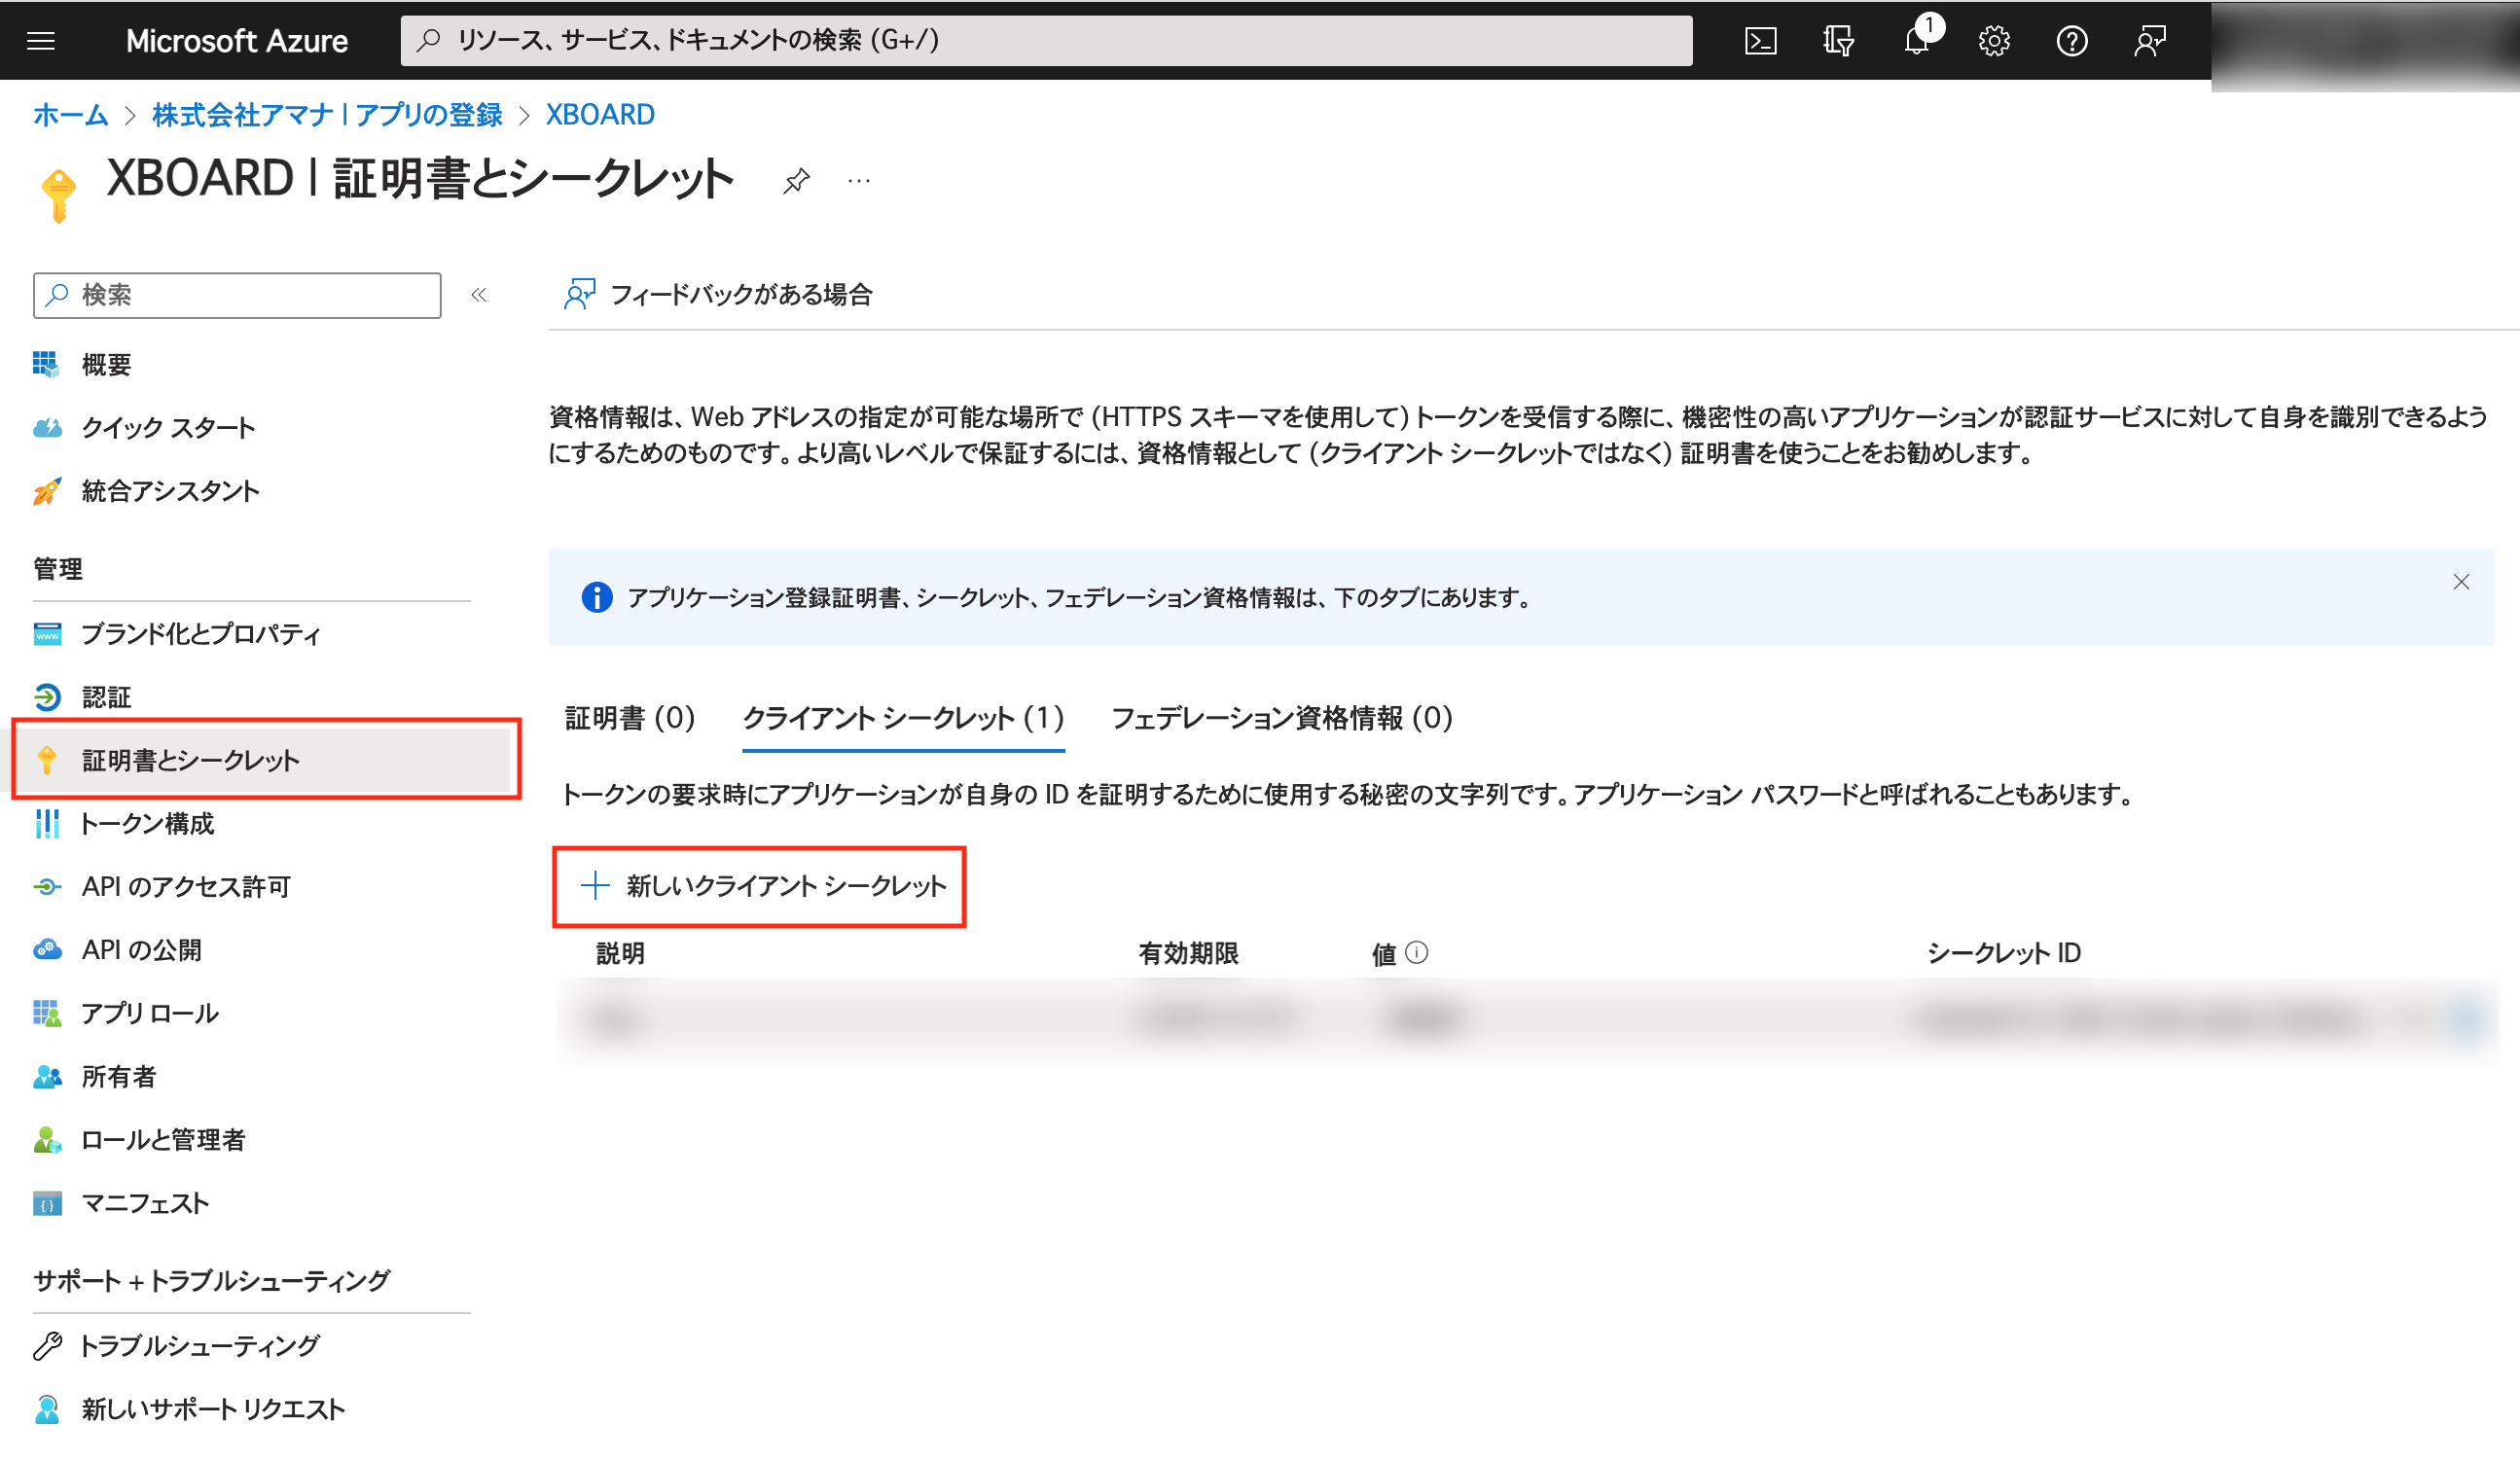
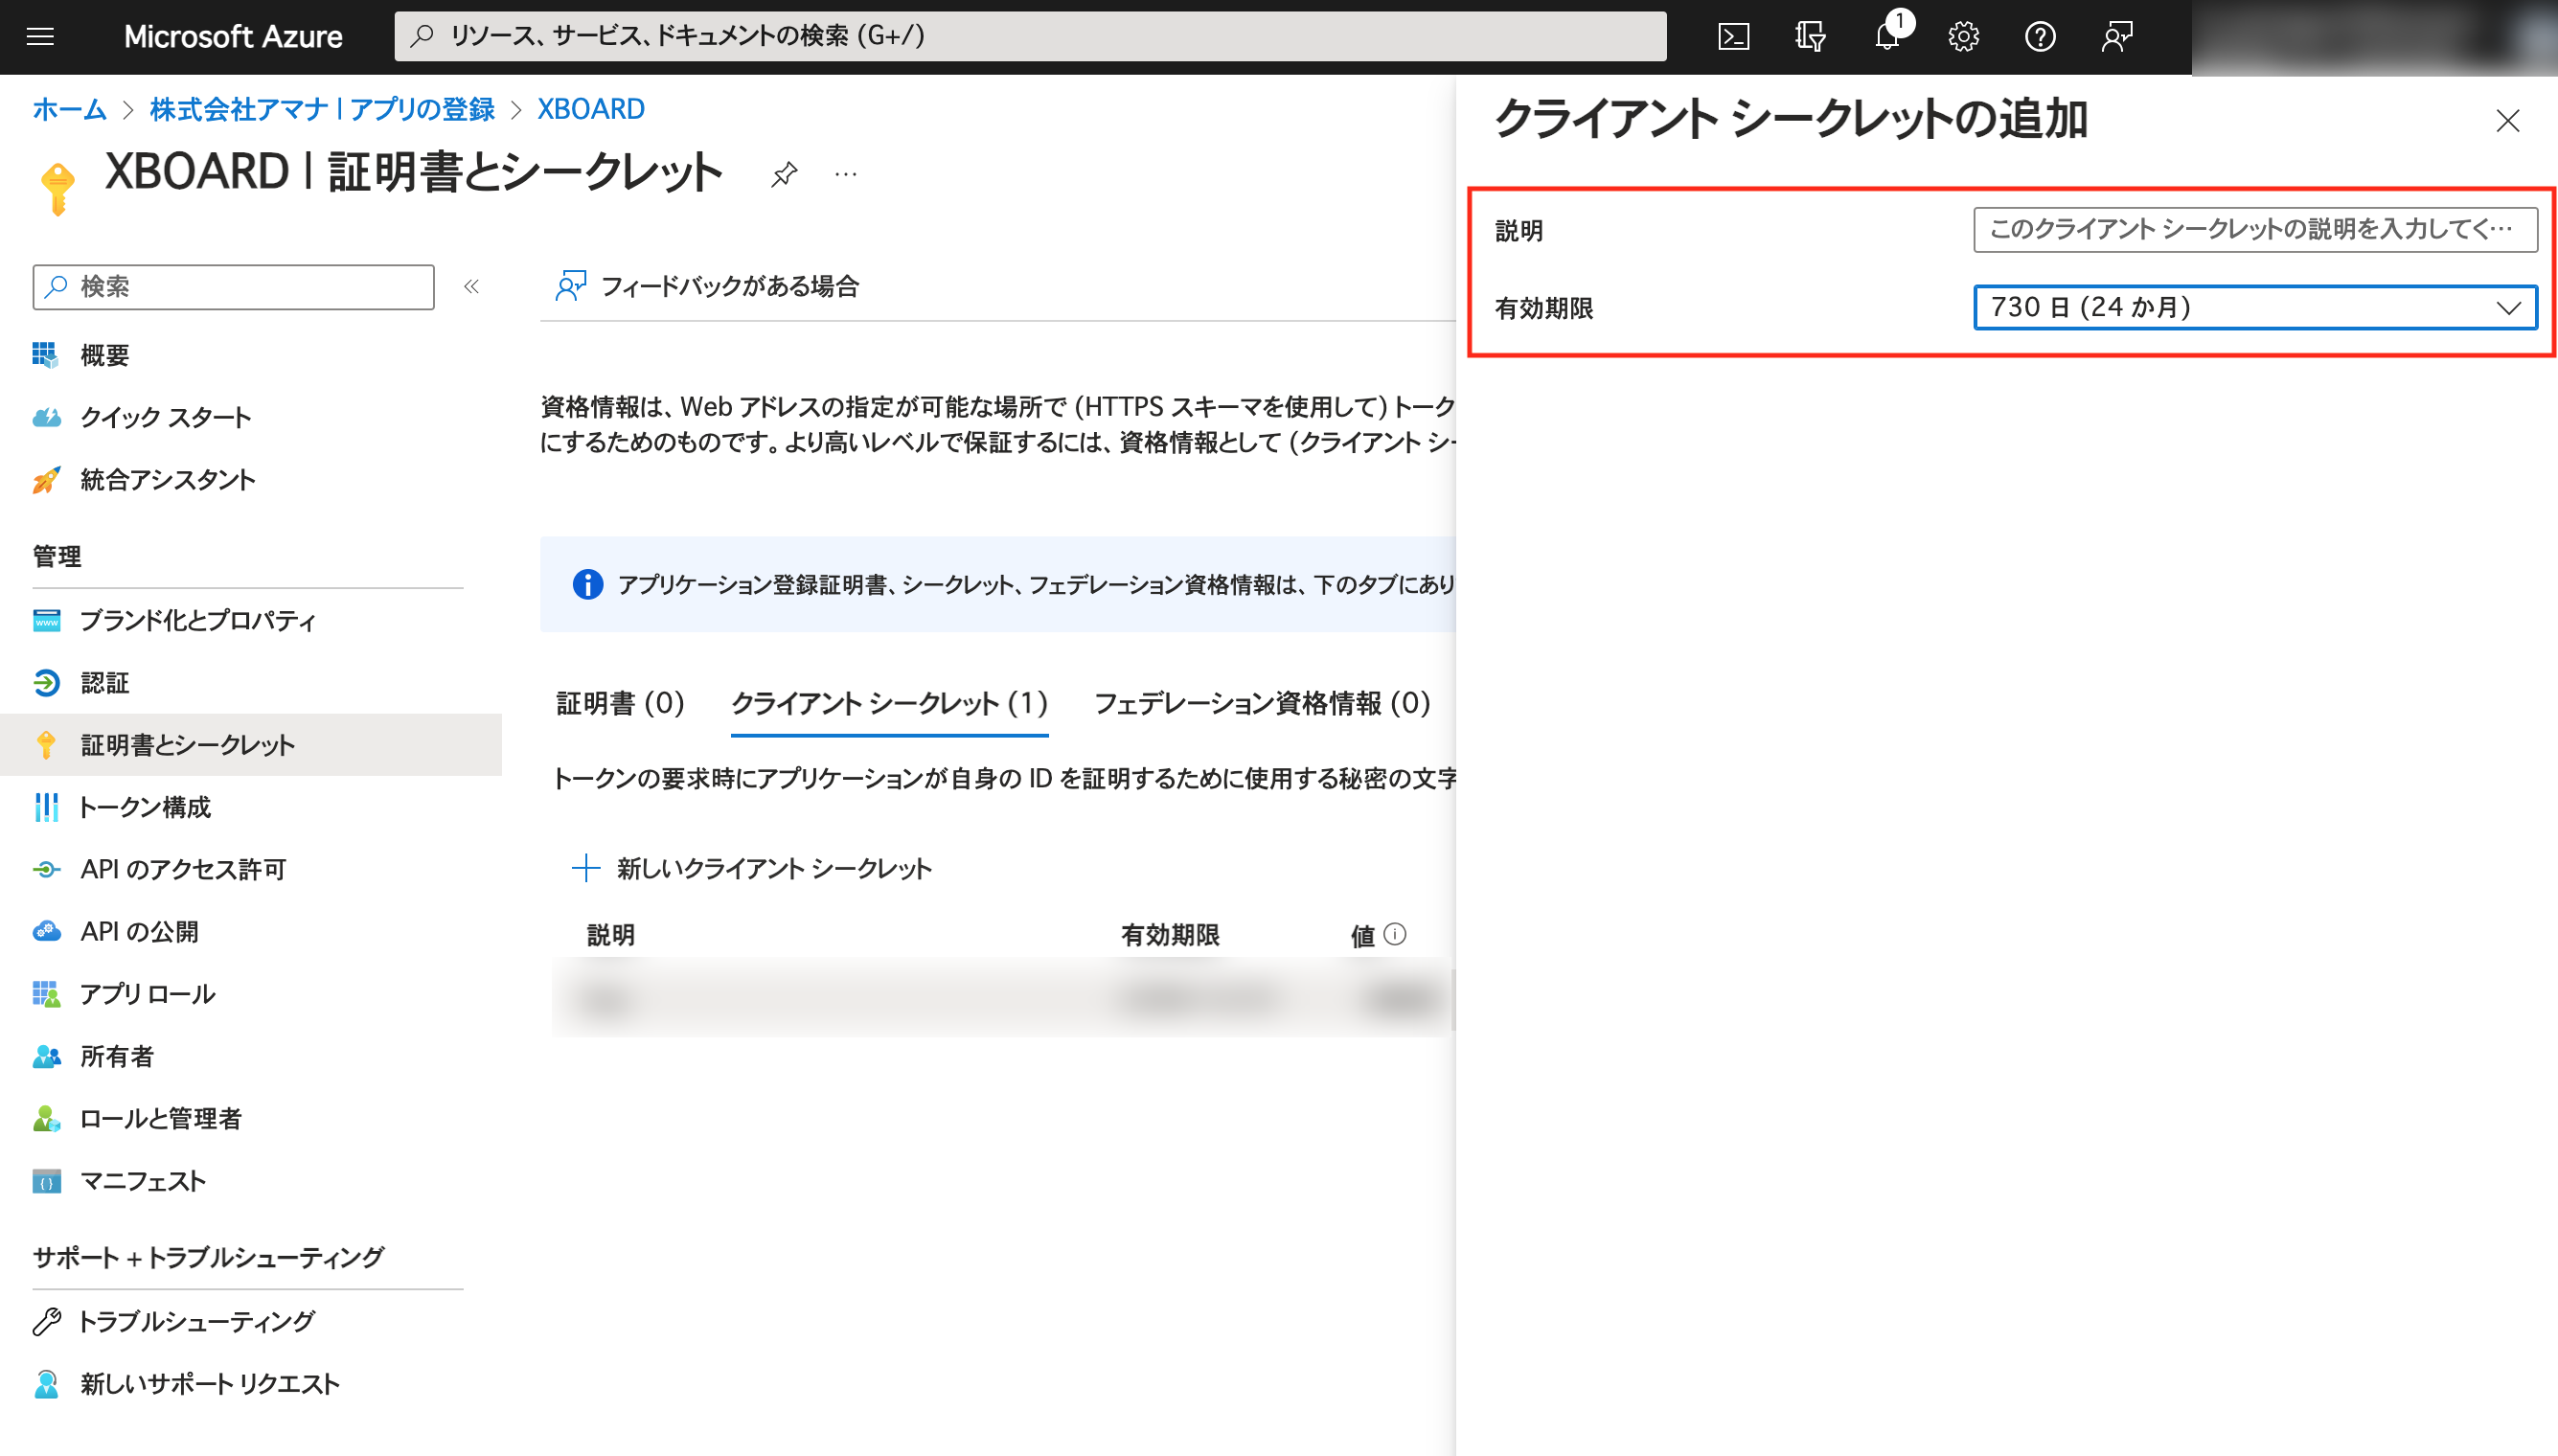
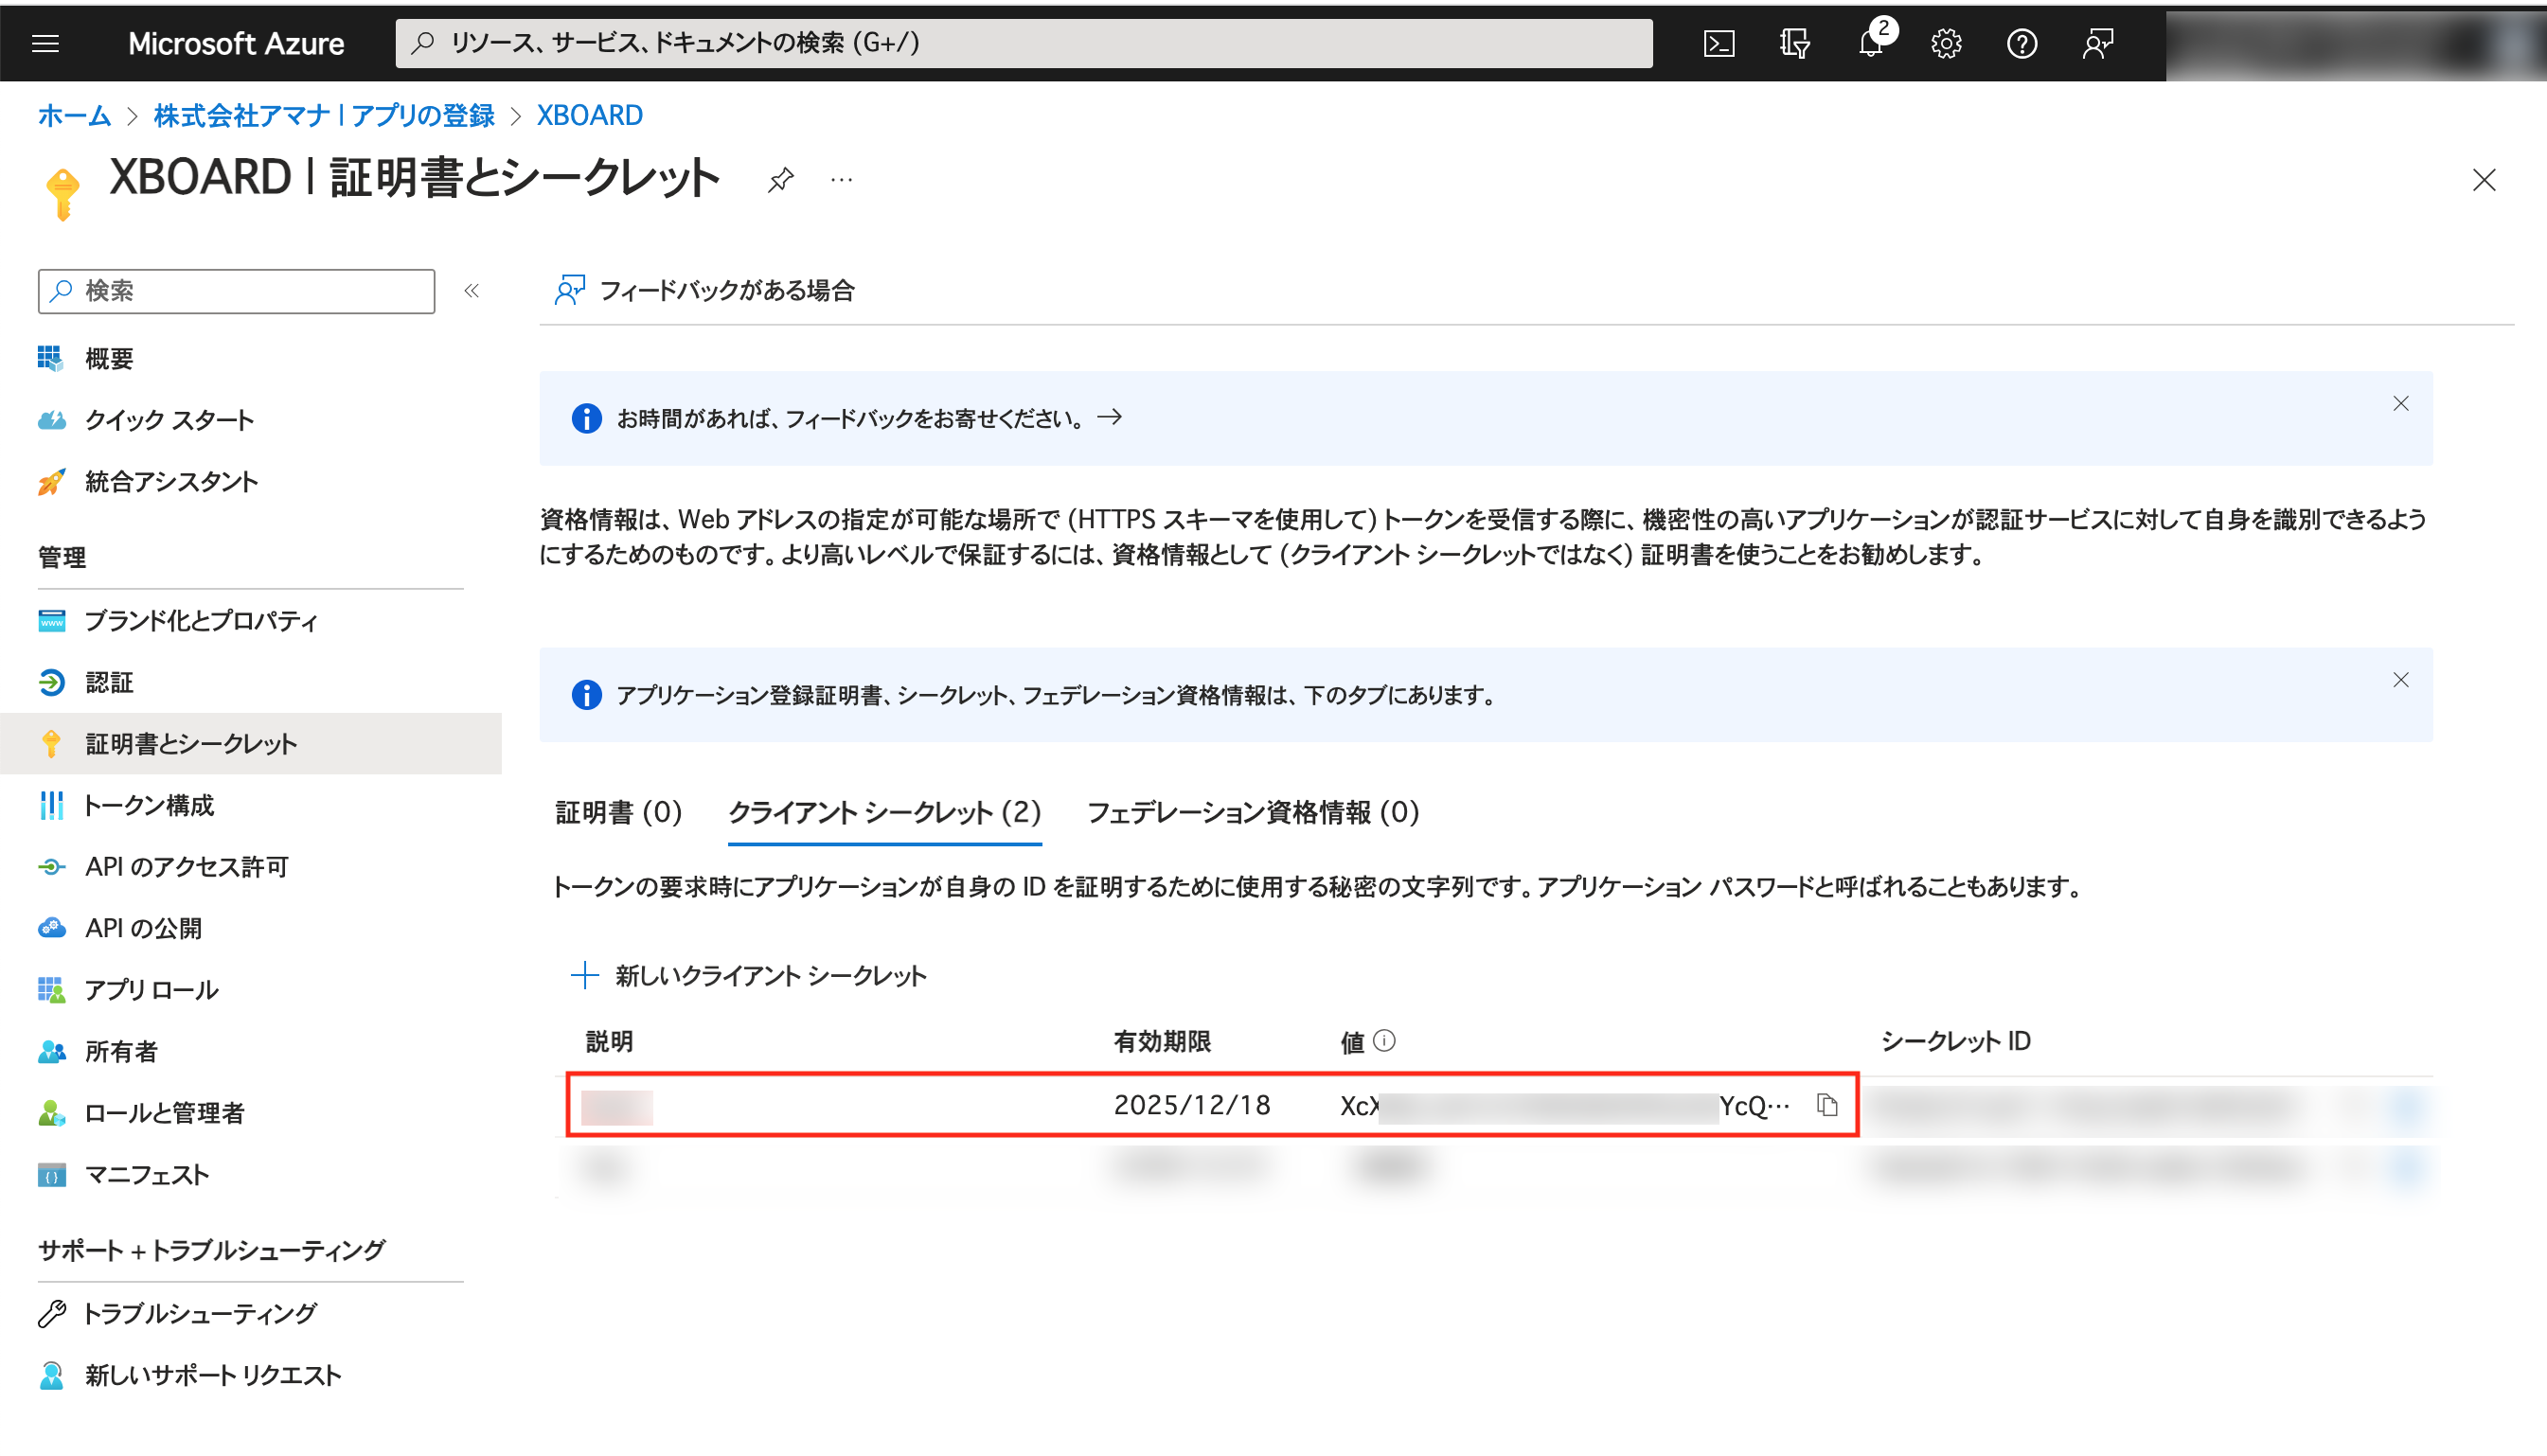
Click “Certificates and Secrets” from the menu on the left, then click the “New Client Secret” button to issue a client secret.
Make a note of the displayed client secret as you will use it later.
Please note that the client secret is a value, not a secret ID.

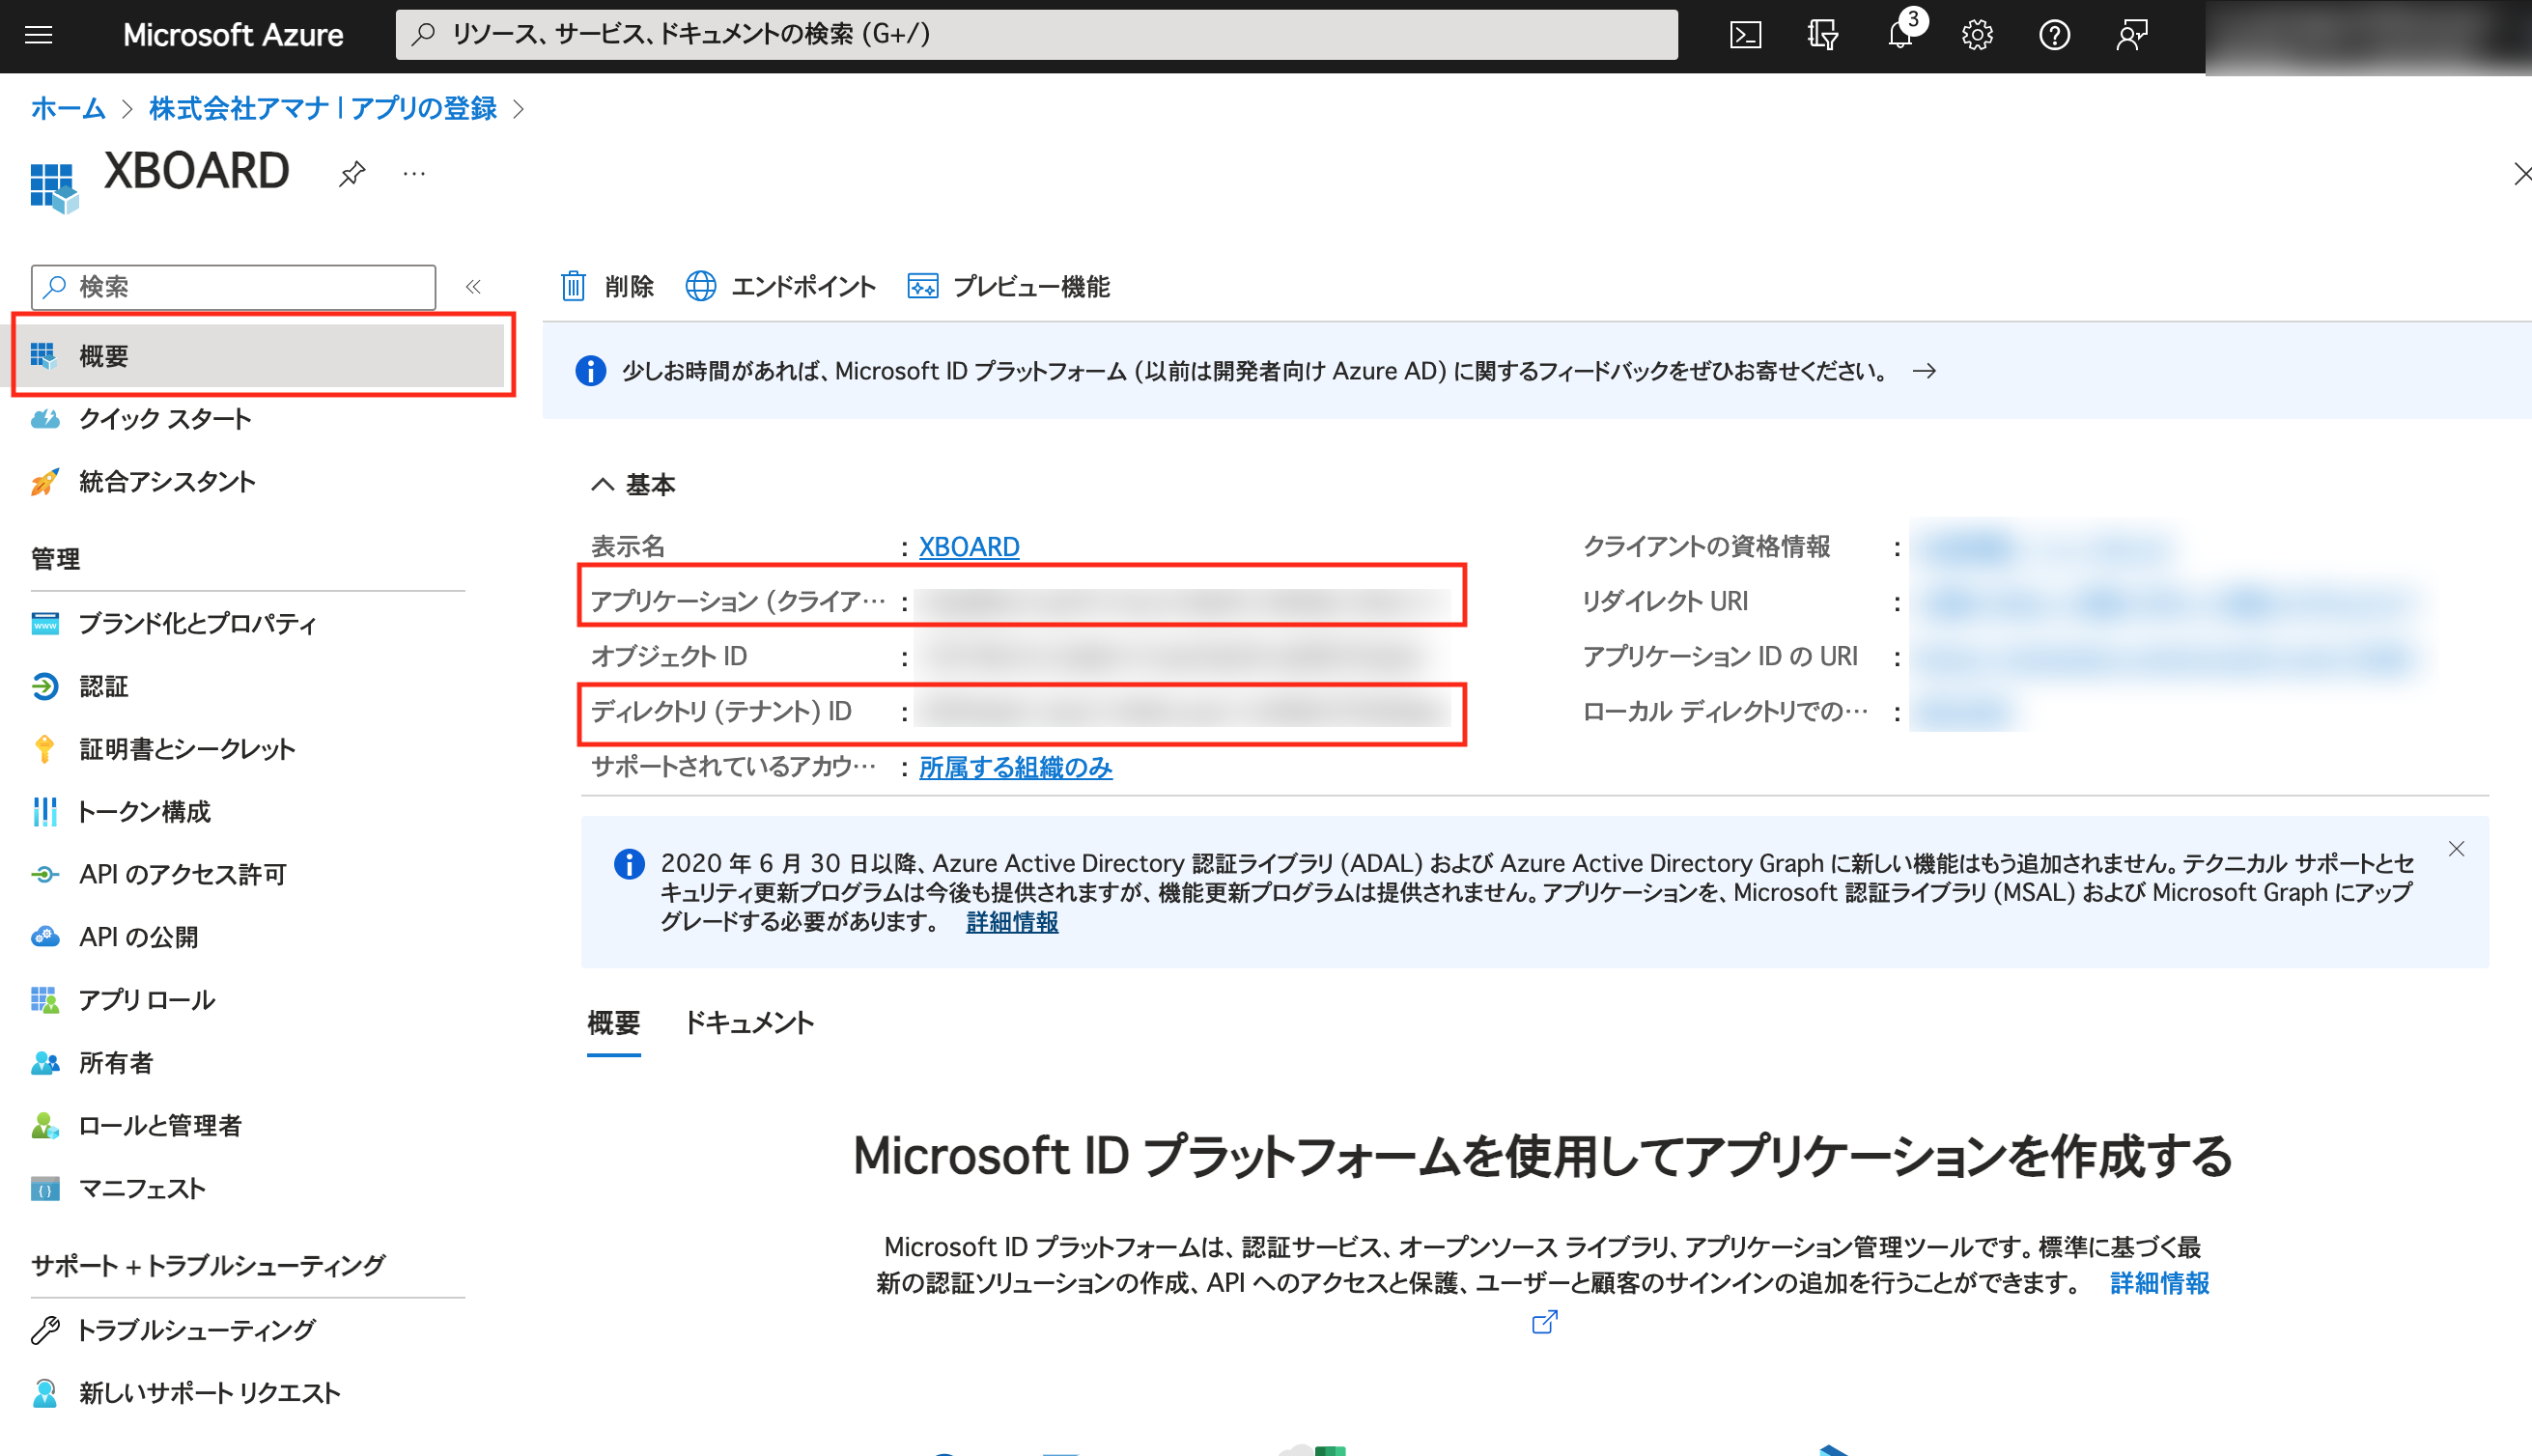
Click Overview from the menu on the left and make a note of the Application ID and Directory ID.
■How to set on the XBOARD management screen
Add users to use XBOARD
When the login authentication process in the linked service is completed, the email address of the user who logged in to the XBOARD will be returned, and if the email address exists in the login ID of the XBOARD user, that user will be logged in.
Therefore, it is necessary to register the user who uses the XBOARD (login ID is an email address) separately from the user management in the linked service.
Even if the user exists in the cooperation destination, if the user is not registered in the XBOARD, it will be “Failed to log in to the XBOARD after successful single sign-on”.
Please register the user whose login ID is your e-mail address in advance from the user management on the XBOARD management screen.
For how to add a user, refer to the operation on the user addition screen.
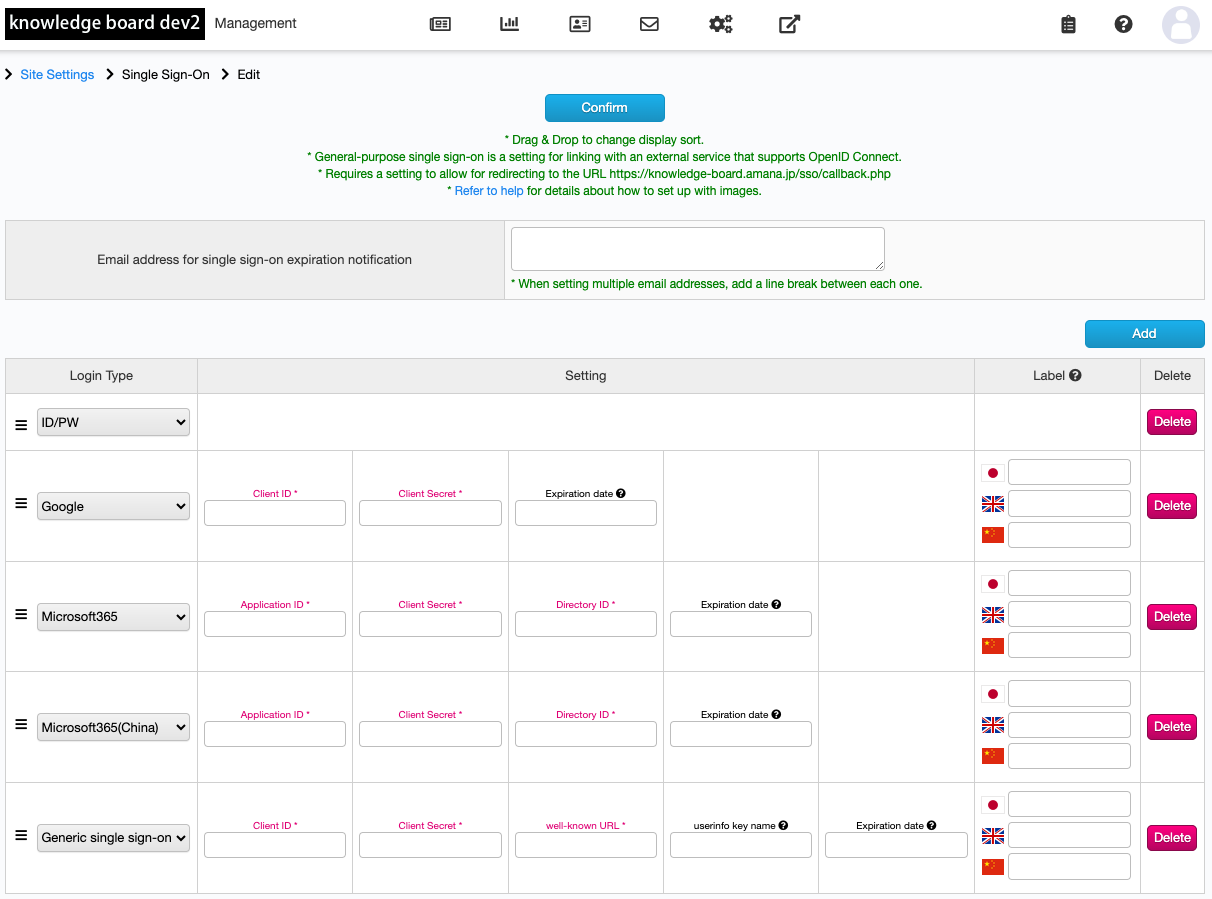
XBOARD Single sign-on settings on the management screen
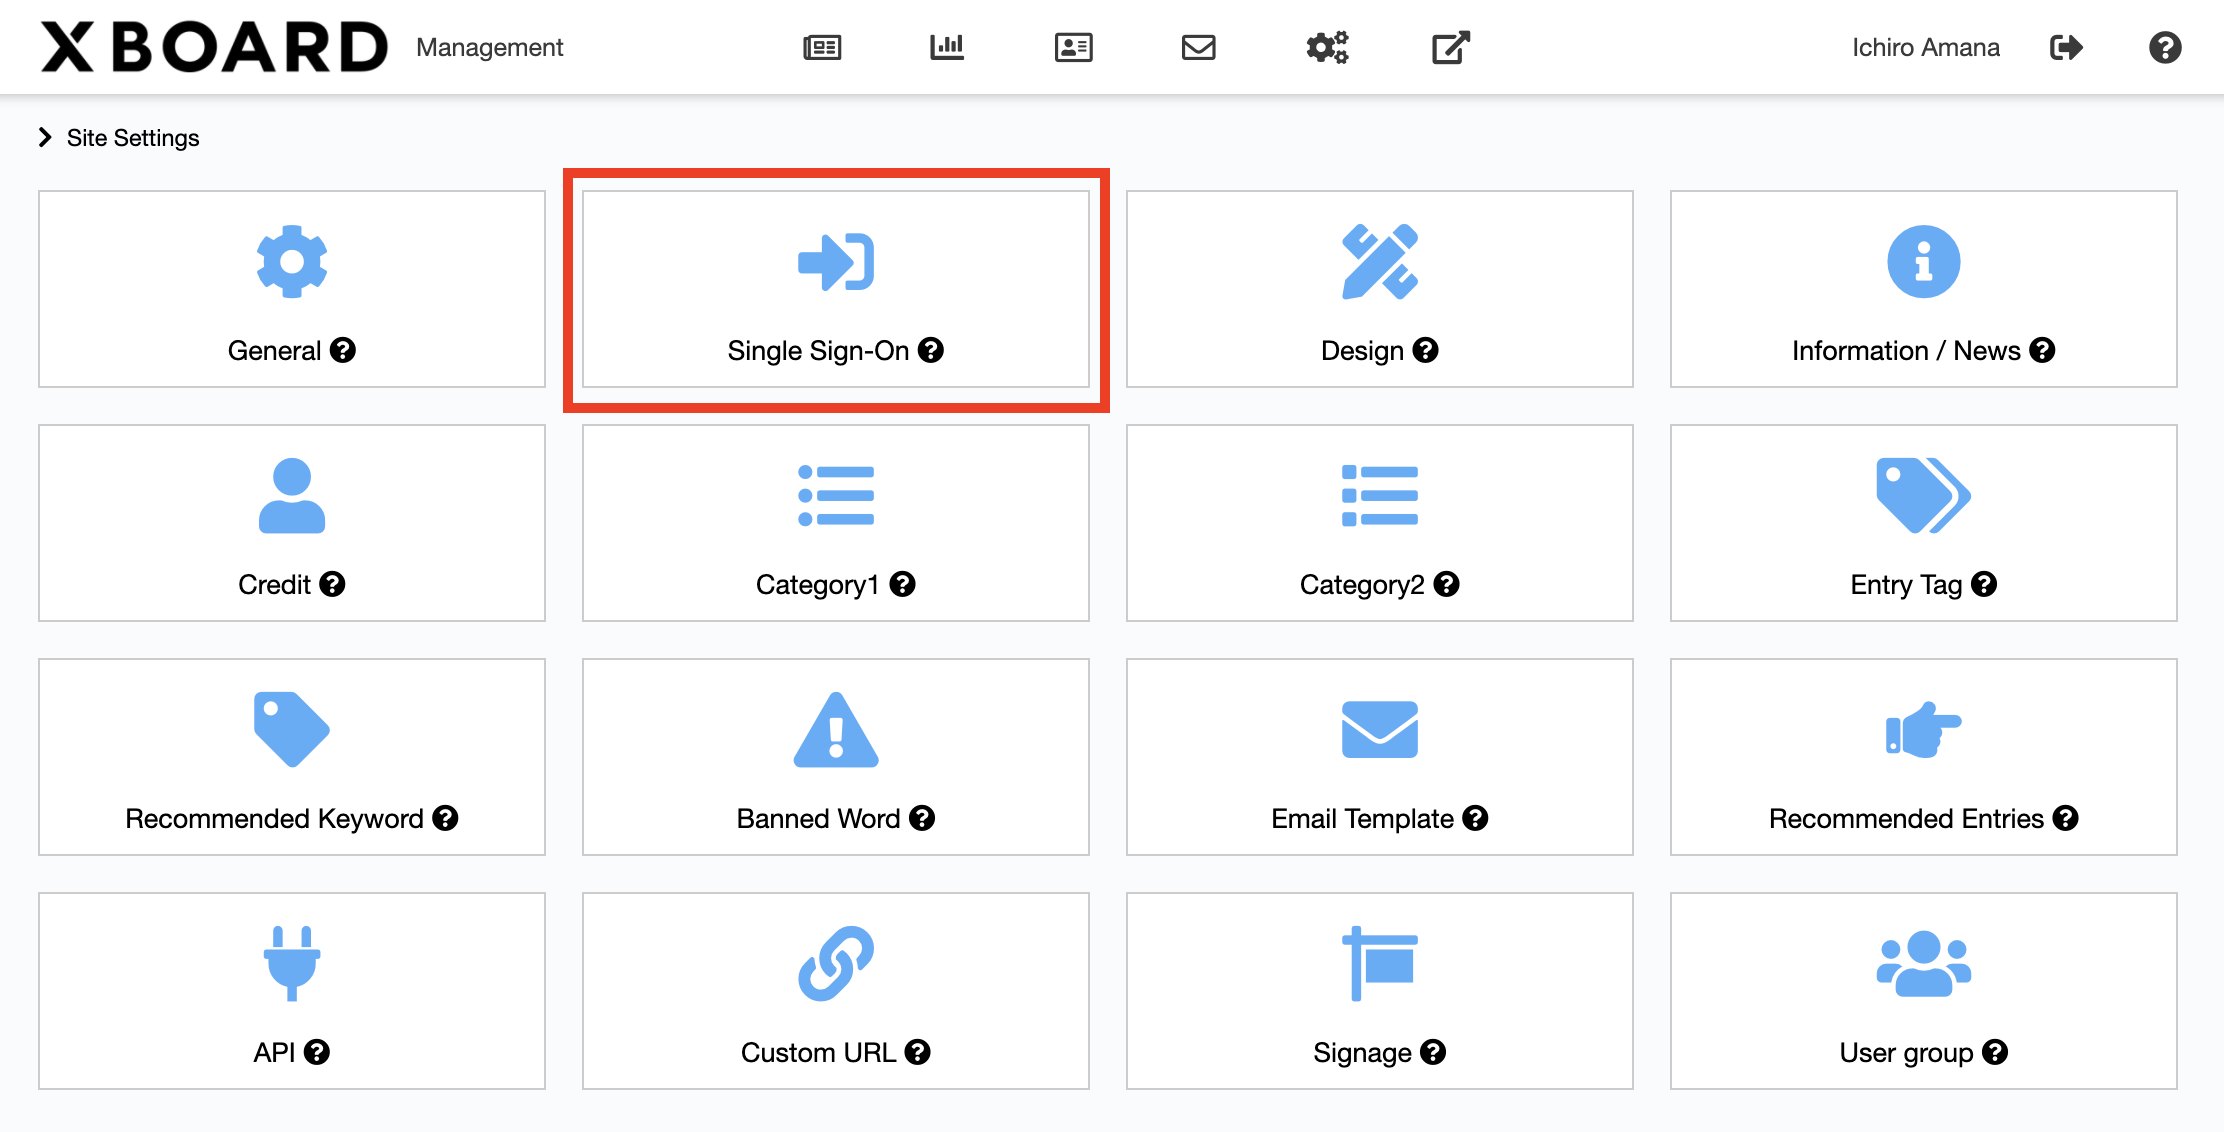
Single sign-on can be set from the site settings on the XBOARD management screen.


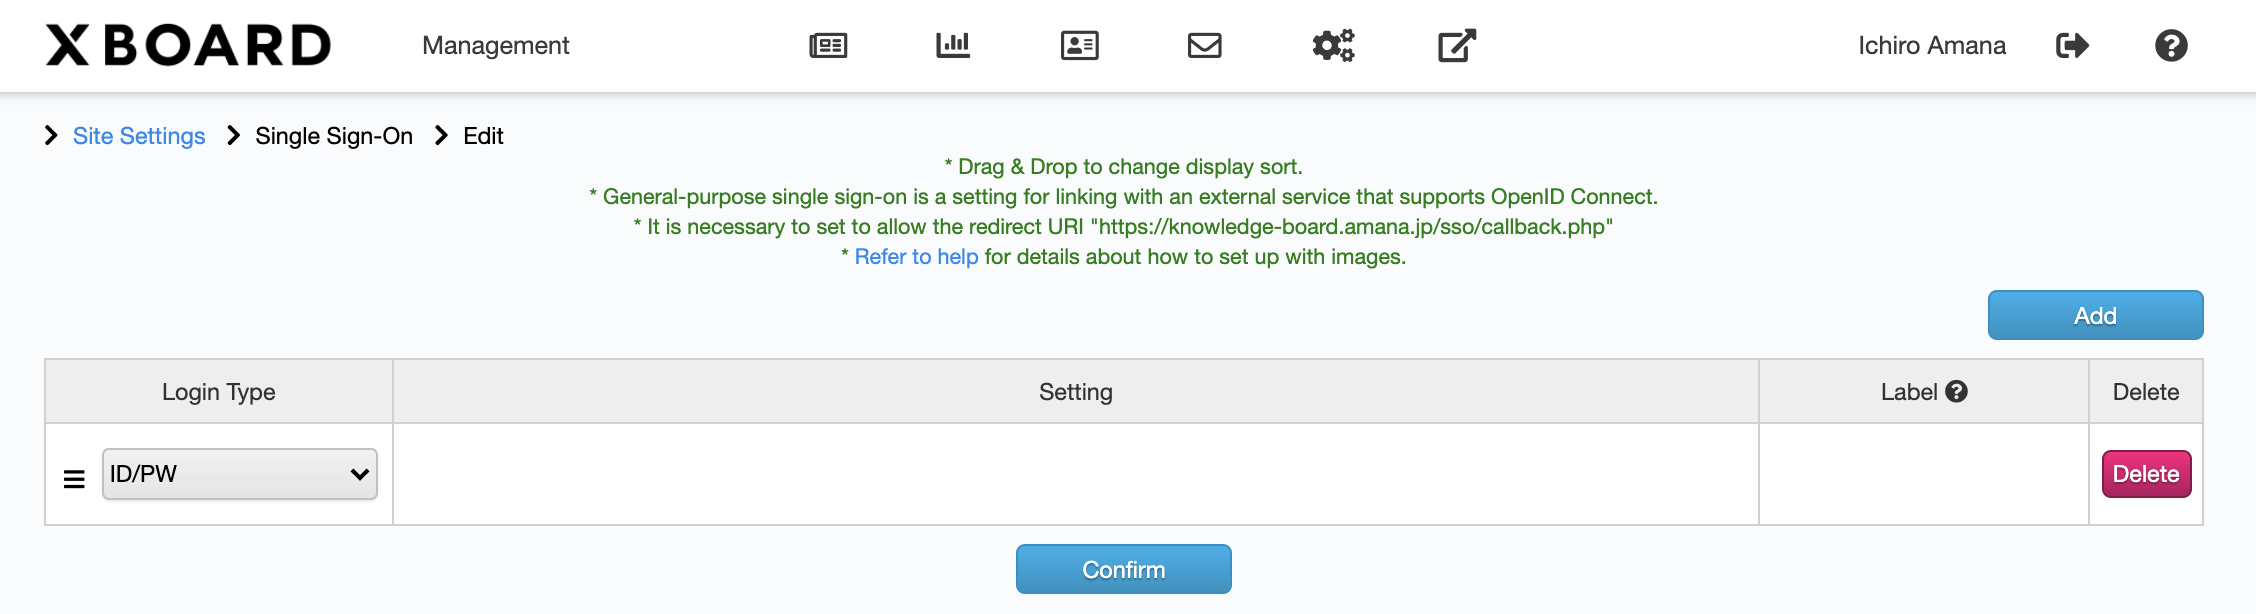
If you go to “Site Settings” and “Single Sign-On” from the top menu of the management screen, the above screen will be displayed. By default, only “ID / PW” is set.

You can add a site login method with the add button. You can change the authentication method by changing the login type pull-down. Unnecessary login methods can be deleted with the delete button.
For single sign-on settings, the Microsoft 365 client secret may have an expiration date, such as a maximum of 2 years. Once the expiration date expires, all users will be unable to log in, so we recommend setting the “Single Sign-on expiration notification email address” and “Expiration date” to receive notifications before the expiration date.
■ Combination of single sign-on settings
There are the following combinations for setting this function.
Since the account management of Single Sign-On is performed by an external service, the password (for SSO) cannot be reissued or changed. If both single sign-on and ID/PW login are set up, the password for ID/PW login can be reissued/changed.
The password expiration setting of the XBOARD is applied only when logging in to ID / PW.
Pattern Name Overview A ID/PW only Login form display
Password can be reissued / changed
Password expiration settings applyB ID / PW and single sign-on Login form display
Password can be reissued / changed
Password expiration settings applyC Only one single sign-on Hide login form
Password cannot be reissued or changed
Password expiration setting is ignoredD No ID / PW & multiple single sign-on Login form display
Password cannot be reissued or changed
Password expiration setting is ignored■ Description of each setting value
・Login type
ID/PW
Allows you to log in with your ID / PW (ID password). If you want to log in with single sign-on only, delete “ID / PW”.
Google
Allows you to use your Google account for single sign-on.
Microsoft365
Allows single sign-on using your Microsoft 365 account. Select if you are using Microsoft Azure AD.
Microsoft365(China)
Allows single sign-on using a Chinese version of Microsoft 365 account. Select if you are using the Chinese version of Microsoft Azure AD.
General purpose single sign-on
Single sign-on settings other than the above are possible. You can set the linkage with an service provider that supports OpenID Connect.
・Settings
Client ID
This ID is issued when you register the XBOARD application with a service provider (Google, Microsoft Azure, etc.).
Client secret
An authentication string issued by a service provider (Google, Microsoft Azure, etc.).
Application ID
This ID is issued when you register the XBOARD application with a service provider (Google, Microsoft Azure, etc.). Synonymous with client ID.
Directory ID
The directory ID issued by Microsoft Azure. Synonymous with tenant ID, directory, and tenant.
well-known URL
Well-known URL used to process OpenID Connect. The URL must end with “/.well-known/openid-configuration” and must be a URL that allows normal HTTP requests from the server of this service. Taking Google’s well-known as an example, it would be “https://accounts.google.com/.well-known/openid-configuration”.
In the userinfo endpoint response, set the index name to use for the login ID. If not set, use “email”. “sub”, “unique_name”, etc. are used.
If you set the expiration date for the client secret, etc., the “Single Sign-on expiration notification email address” will be sent 60 days, 30 days, 7 days, 3 days, 2 days, and 1 day before the expiration date. Send a notification email to. For Microsoft 365, the client secret has a maximum expiration date of 2 years, so we recommend setting it.
You can set the label for the login button. If not set, it will be the default value.
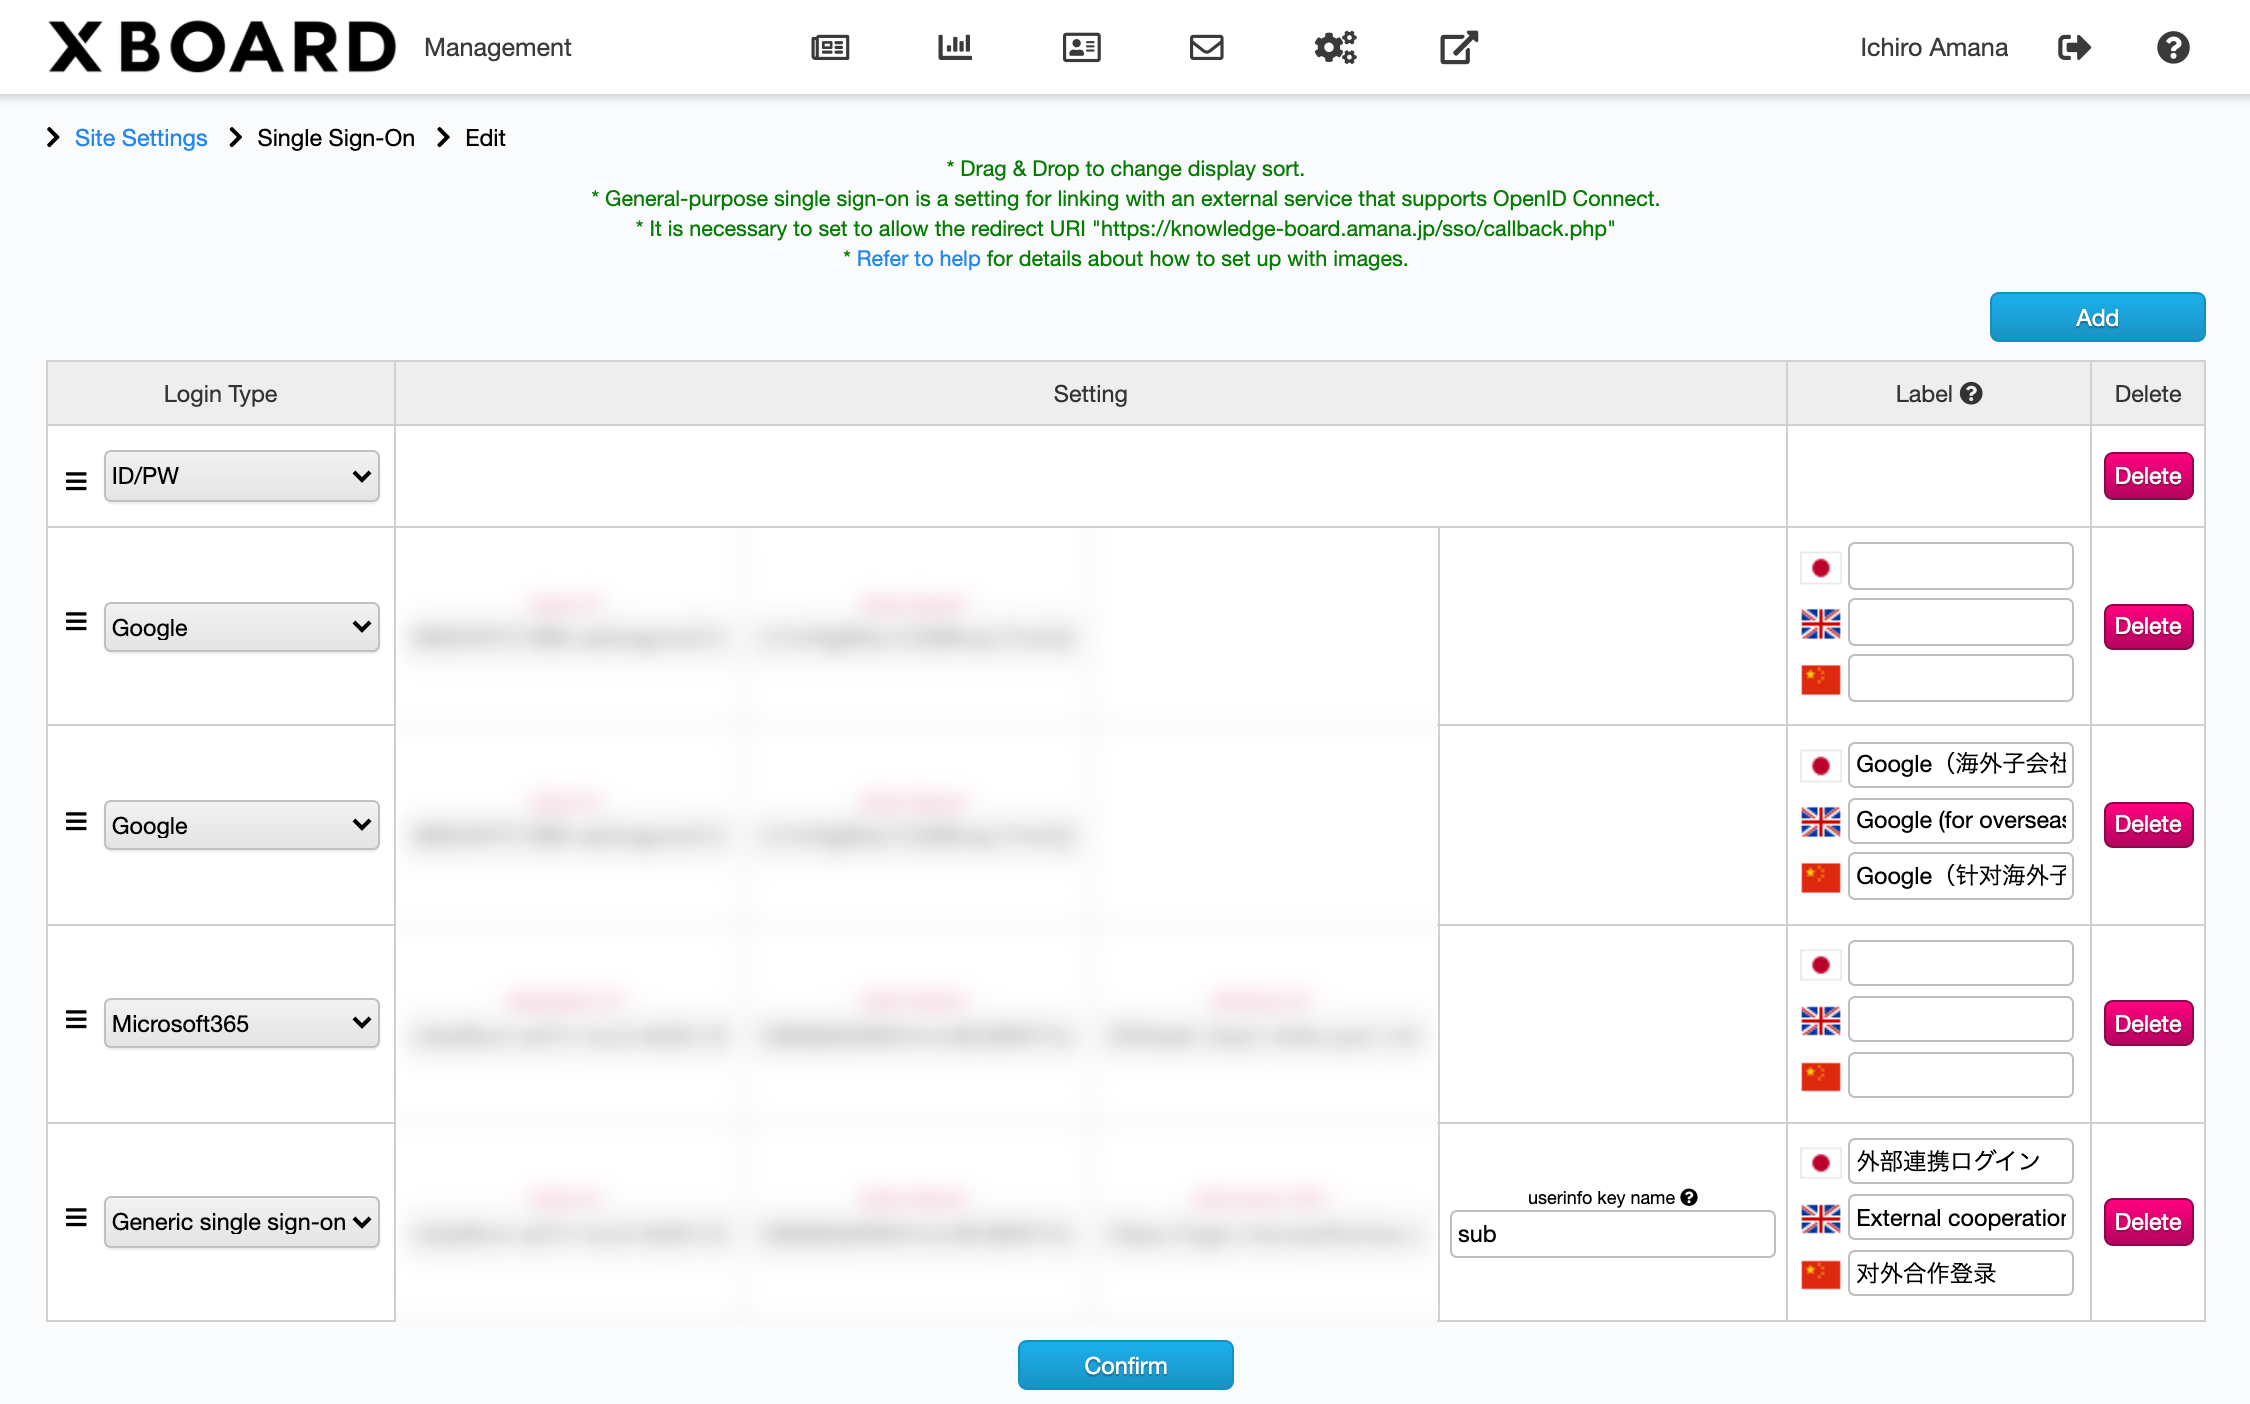
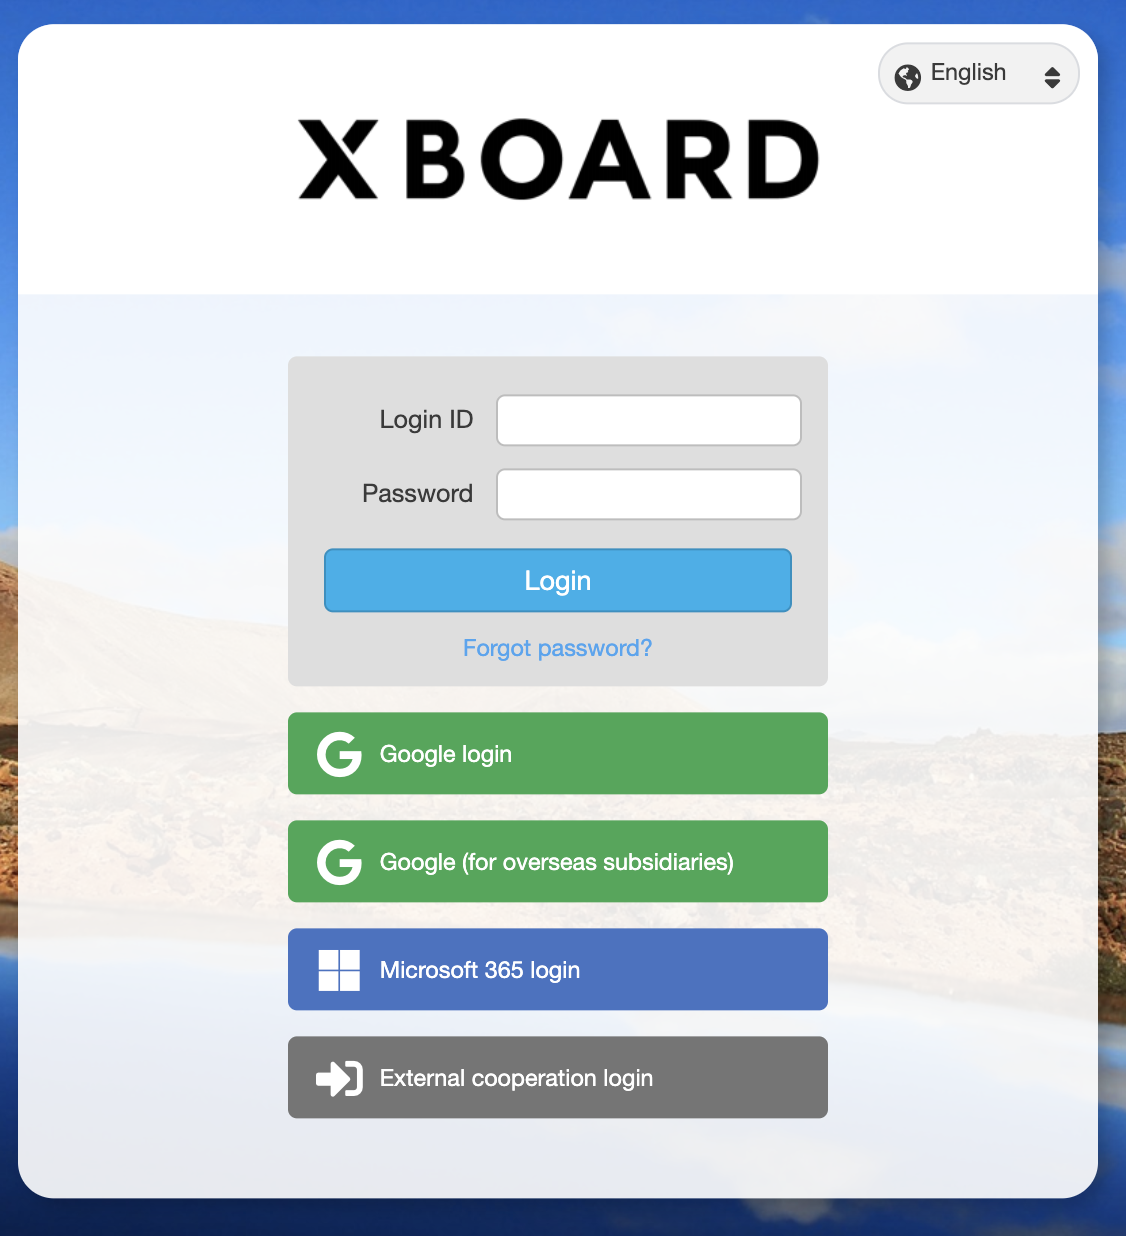
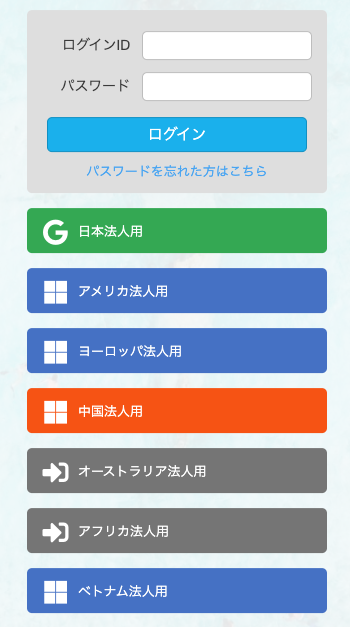
■Setting example and login screen image

In the example above, five login methods are configured: ID/PW login, Google login (for domestic companies), Google login (for overseas subsidiaries), Microsoft365 login (for overseas group companies), and external federated login (external services that support OpenID Connect using “sub” as login key).

The login screen will be displayed as above. The display order can be changed by dragging and dropping each item from the management screen.
■Operation check
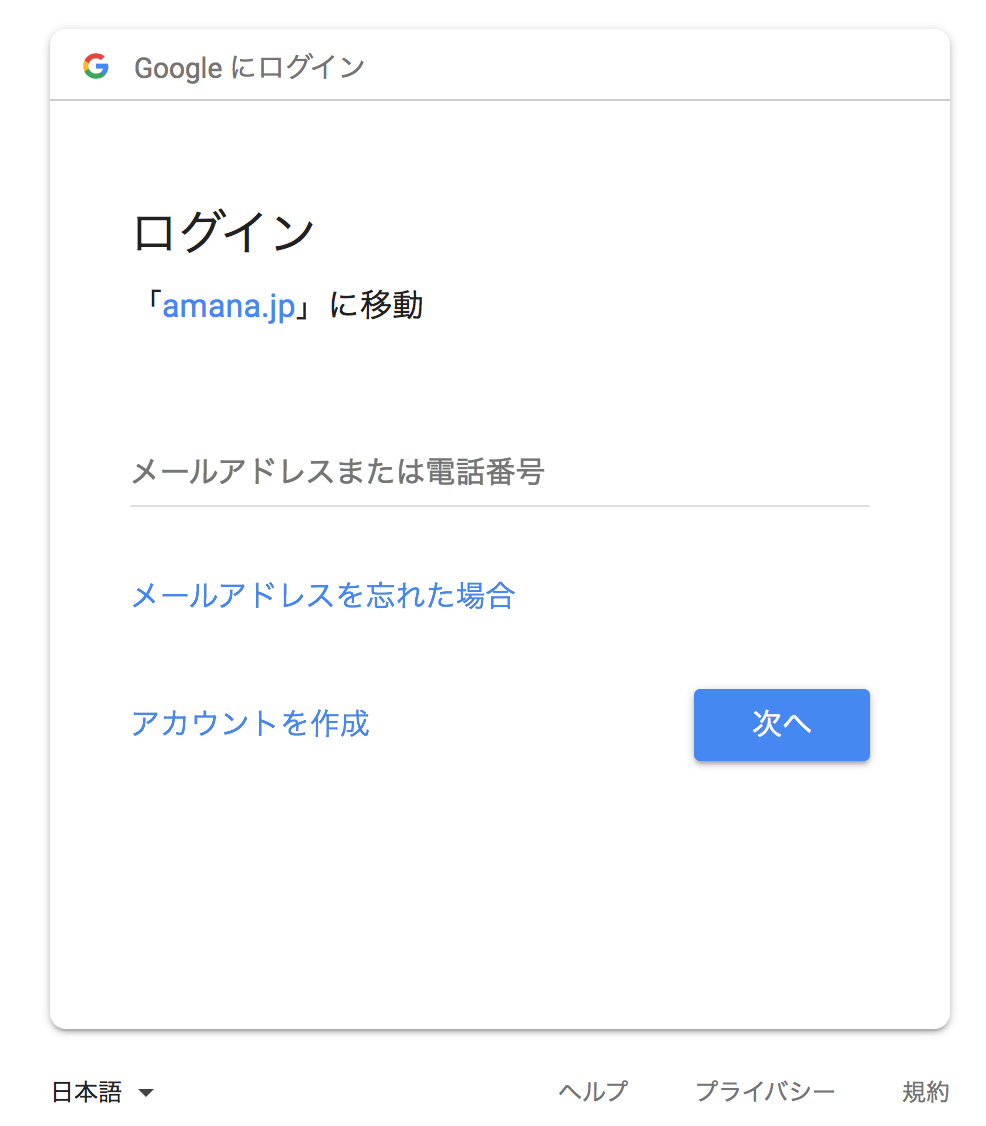
For Google
If you log out with the browser logged in to the management screen, you may not be able to return to the management screen if the settings are incorrect. Therefore, it is recommended to start up a different browser to check the operation of the single sign-on setting.

After successfully logging in with your Google account, you will automatically be taken to the XBOARD page to complete the operation check.
If the Google login screen is not displayed normally, or if you do not automatically move to the XBOARD page after logging in, there is a possibility that the single sign-on setting on the XBOARD management screen is incorrect, so there is a space before and after the setting value. Check if there is any space in the text or if the characters are not interrupted.
If the message “This is a user who cannot use the site” is displayed, check whether the login ID of the email address you logged in to exists as a user on the XBOARD or is not an invalid user.
For Microsoft365 (Microsoft Azure AD cloud version)
If you log out with the browser logged in to the management screen, you may not be able to return to the management screen if the settings are incorrect. Therefore, it is recommended to start up a different browser to check the operation of the single sign-on setting.

After successfully logging in with your Microsoft Azure AD account, you will automatically be taken to the XBOARD page to complete the operation check.
If the login screen of Microsoft Azure AD is not displayed normally, or if you do not automatically move to the XBOARD page after logging in, the single sign-on setting on the XBOARD management screen may be incorrect, so before and after the setting value Check that there are no spaces in, and that the characters are not interrupted.
If the message “This is a user who cannot use the site” is displayed, check whether the login ID of the email address you logged in to exists as a user on the XBOARD or is not an invalid user.
- How to skip the login form when using multiple single sign-on settings
If multiple single sign-ons are configured, a login form will be displayed.
Here is how to perform a seamless single sign-on process without displaying this login form.

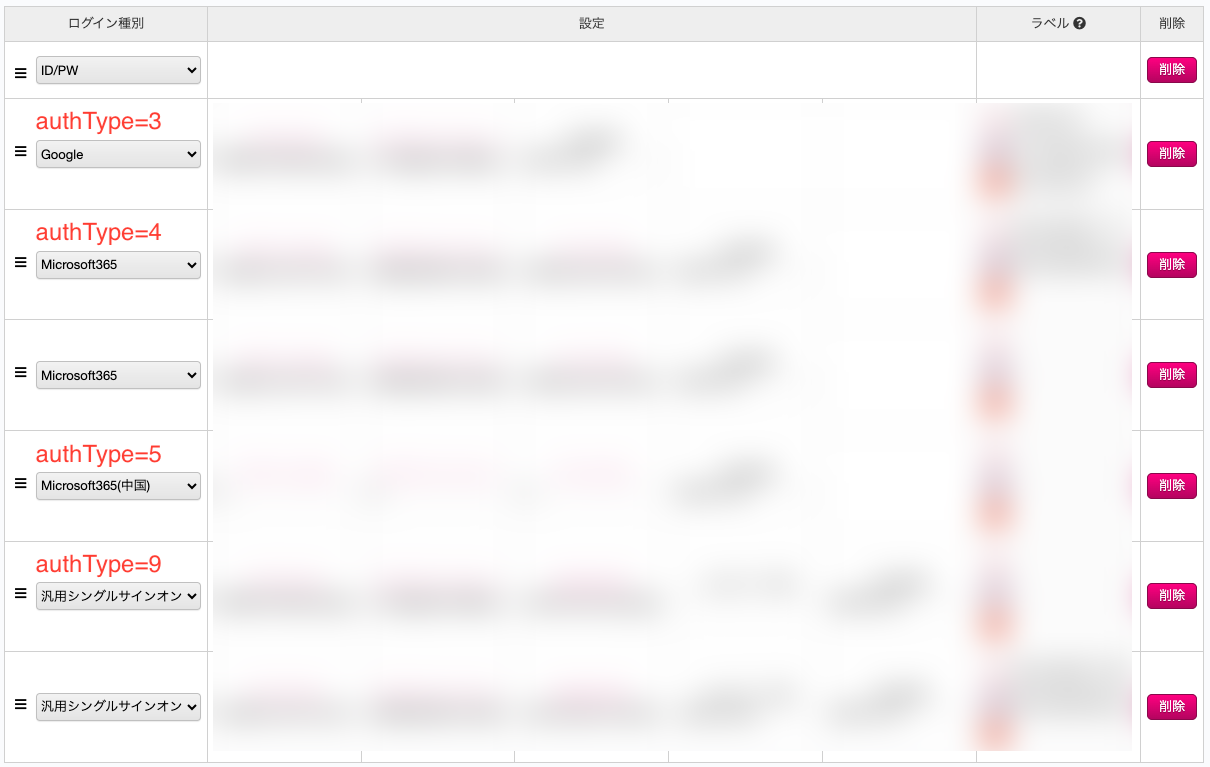
■How to skip the login form on the entry list page
By adding the authType parameter (login type) to the URL, single sign-on for the specified login type will be automatically performed.
Login kind authType Google 3 Microsoft365 4 Microsoft365(China) 5 Generic single sign-on 9 If you want to use the entry list page (the top public page) with Microsoft 365 login, you can skip the login form display by accessing the following URL.
https://knowledge-board.amana.jp/SiteCode/?app=Entry&action=list&authType=4
If you want to use the article details page for entry ID 10 with Microsoft 365 login, you can skip the login form by accessing the following URL.
https://knowledge-board.amana.jp/SiteCode/?app=Entry&action=confirm&ENTRY_ID=10&authType=4
■Behavior when there are multiple settings for the same login type
If you specify authType=4, which is a Microsoft 365 login, and multiple Microsoft 365 logins are set, the one at the top of the sorting order will be applied.
If multiple login types of the same type are set, you cannot specify the settings below.

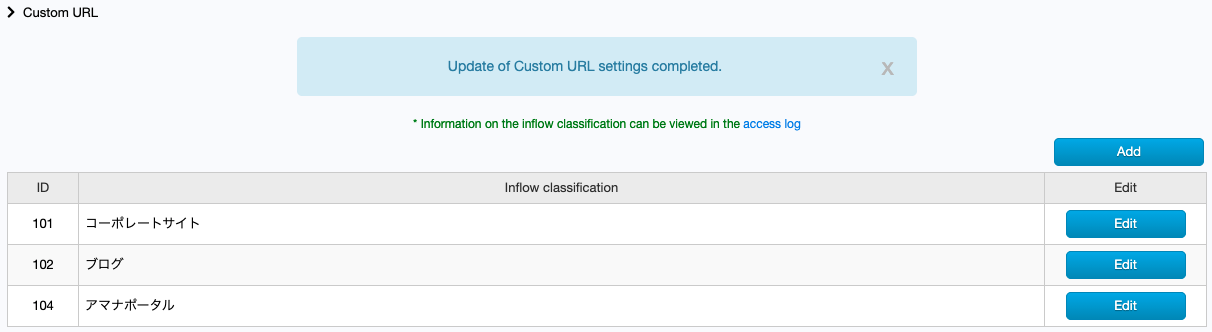
- Custom URL
On the “Custom URL” screen, you can add, edit, and delete link URLs to the top page and article page.
If you click the URL created with the custom URL to move, the access history will be recorded in the inflow classification of “Entry list log” and “Entry detail log” of log management.
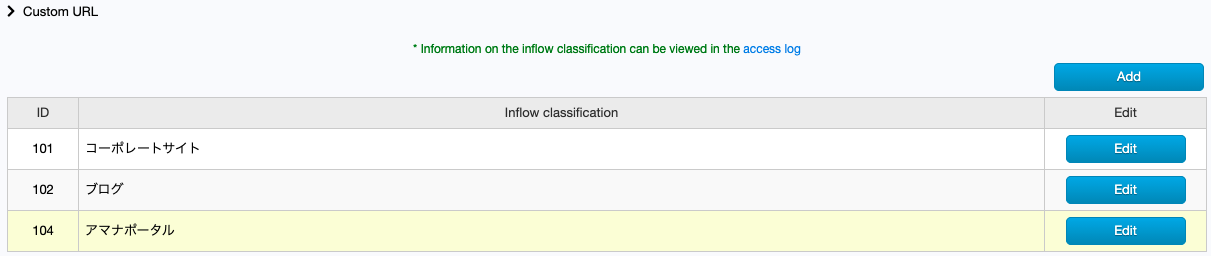
■ Operation of “Custom URL” screen
A list of current custom URLs is displayed.
* Custom URL is optional. If it is not set, it will be hidden.


Inflow classification
Set the name of the inflow category. The name set here is displayed in the “Inflow classification” of the log.
Confirm and update custom URL
After editing or inputting, be sure to click the [Confirm Input] button to update the contents on the “Confirm Custom URL” screen. When the update is complete, you will be taken to the “Custom URL List” screen.
If you want to change the settings on the “Custom URL Confirmation” screen, click the [Return to Edit Screen] button.
* If you do not update the custom URL by clicking the [Confirm Input] button, the edited and input contents will be discarded.

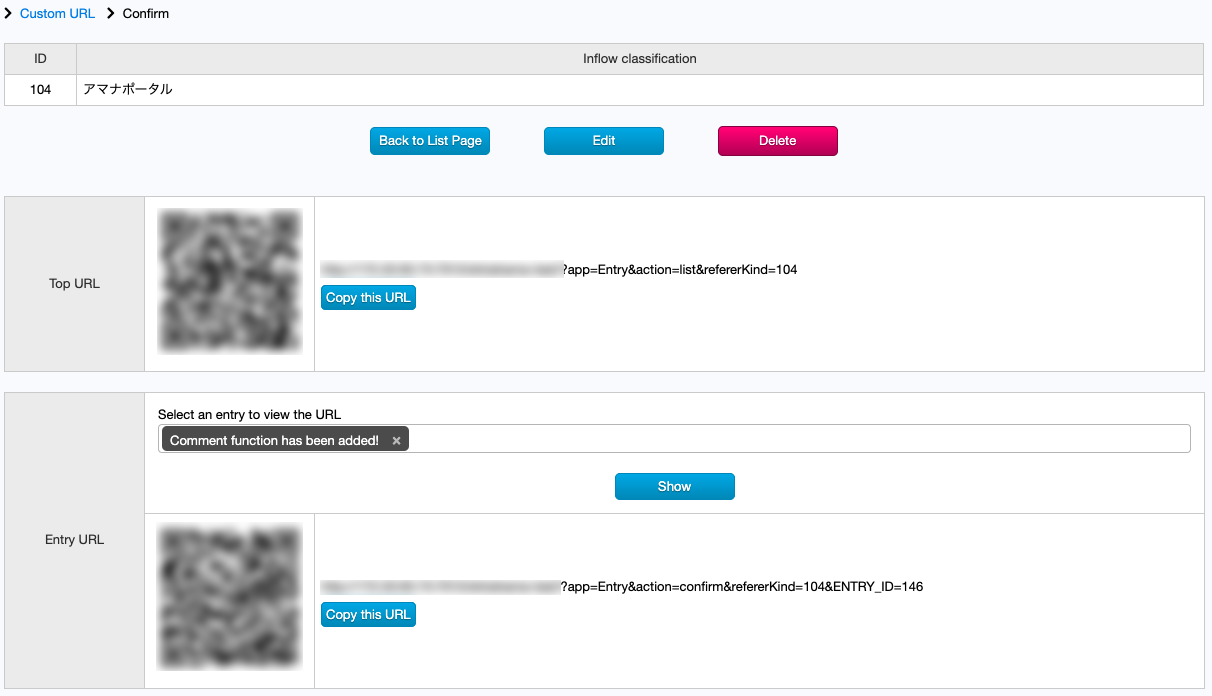
■ Operation of “Custom URL Confirmation” screen
A list of current custom URLs is displayed.
Place the cursor in the margin of the list and click.

A screen for creating and confirming a custom URL is displayed.

If you jump to the top page from the displayed URL or QR code, it will be recorded in the access log.

You can create a QR code / URL by selecting an article and displaying the URL, specifying the article title, article ID, etc., selecting the article, and clicking the display button.
Click the Copy URL button to copy the URL to the clipboard.
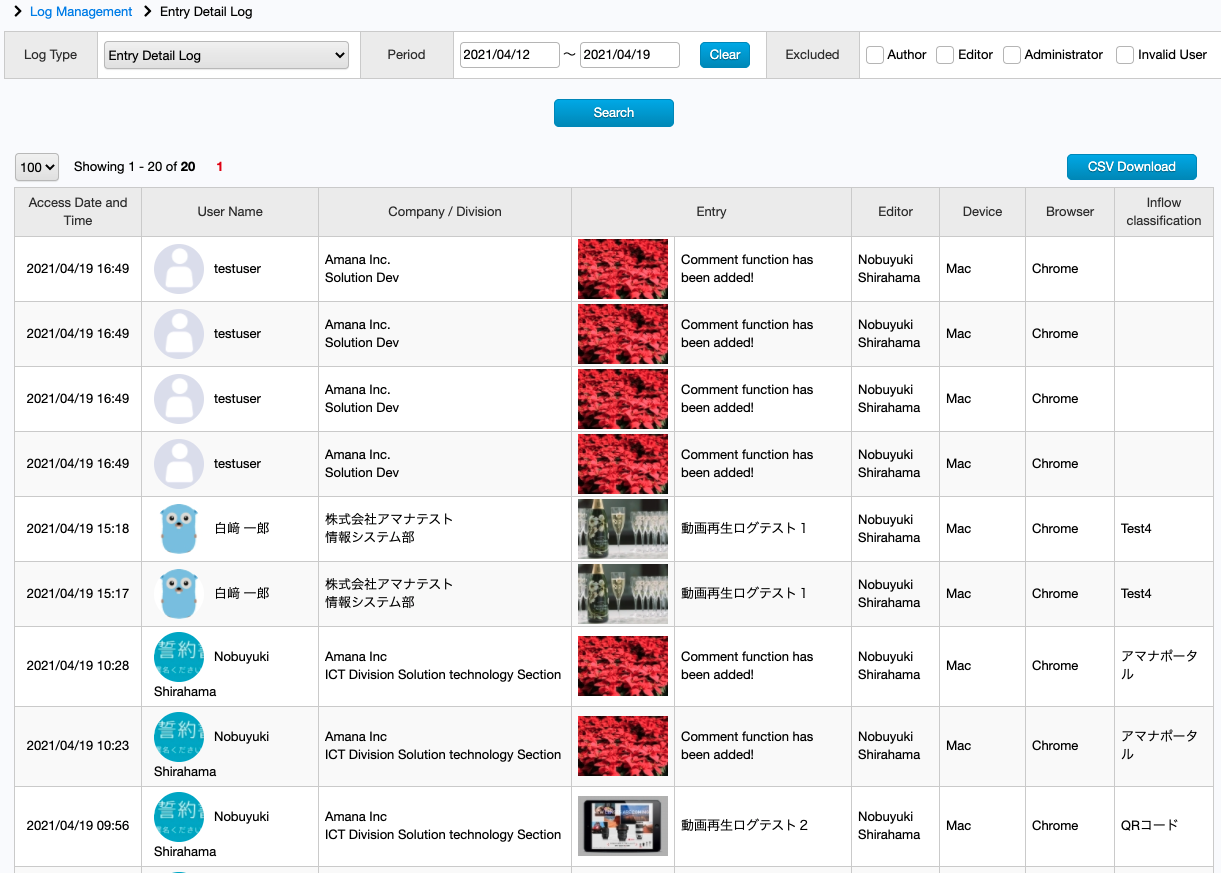
■ Operation of “Log Management” screen
You can check the access log by clicking the link of the set custom URL from “Entry list log” and “Entry detail log” in the log management.
Inflow classification data is also output for CSV download.

- Signage
From the Site Settings, click on the button below to start the Signage Settings.

※This setting screen is displayed only on sites that have an API usage contract.
■Overview of Signage function
We have the email newsletter function to notify users of the publication of entries, but how do we notify people who do not have a company PC/smartphone? The solution is to install digital signage.
By installing signage at public places such as entrances,
company cafeteria, factories, etc., where many employees see it on daily basis, it is possible not only to notify them of the publication of the entry, but also to increase the awareness of the site itself.Also, by scanning the QR code displayed on the signage, they can also access the entry immediately.
For more information about case study of utilizing signage function, please check out from here.
■Table of Contents
Settings on the Signage dashboard
■Pre-configuration on XBOARD
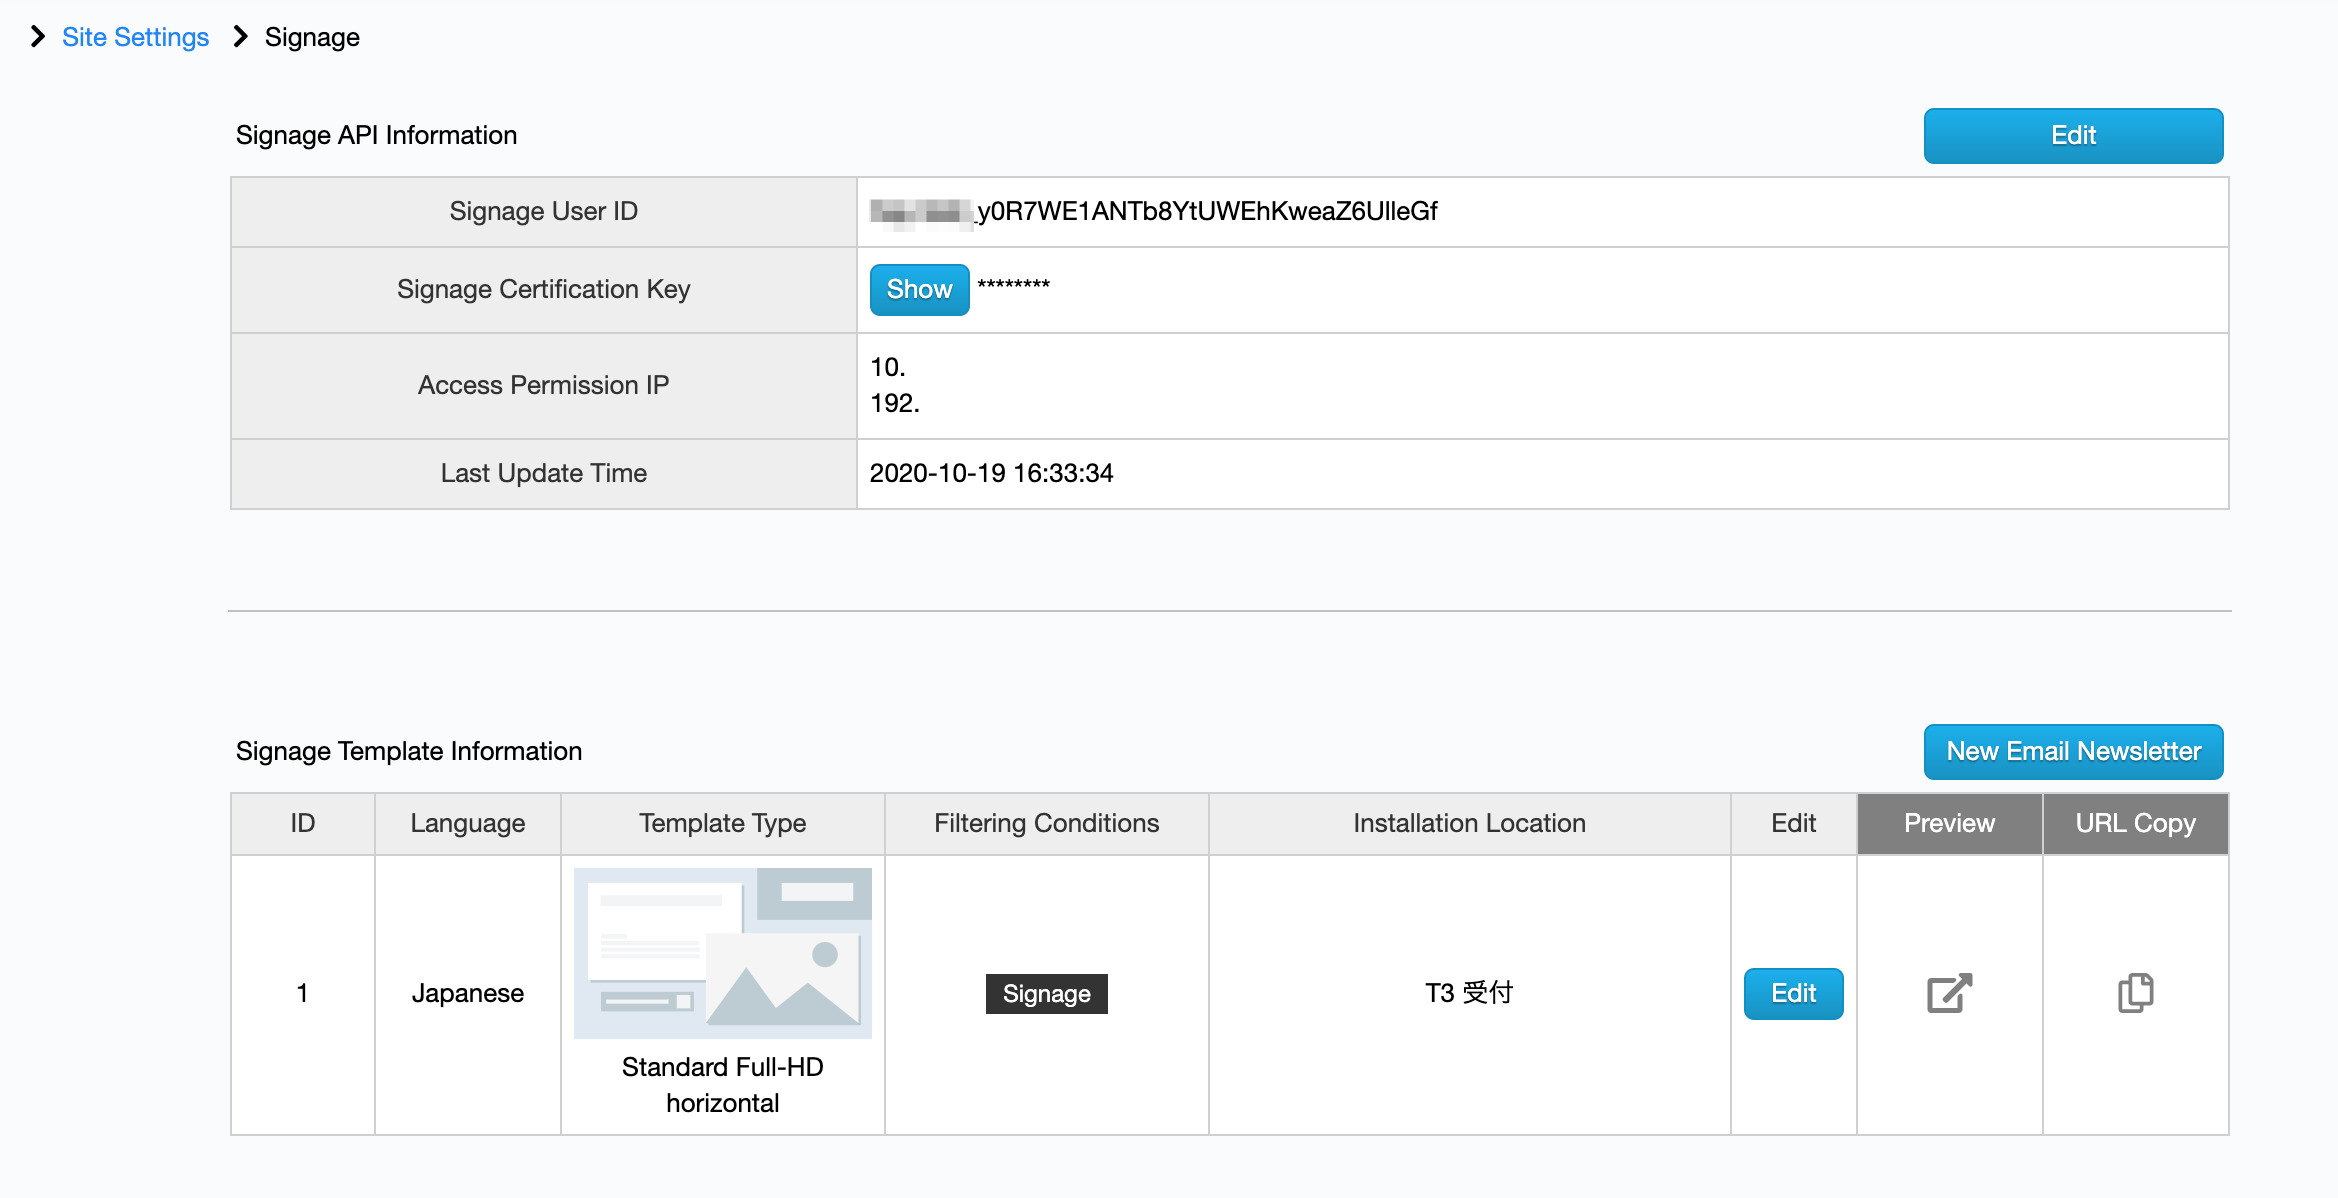
- Structure of Signage Settings

Signage API Information
To utilize the signage function, you will need the connection information listed.
Signage Template Information
You can create/edit signage templates.
Preview
You can check the preview of the signage. Please make sure you check it on your device before publishing.
URL Copy
Copy the URL to set it up on the signage display.
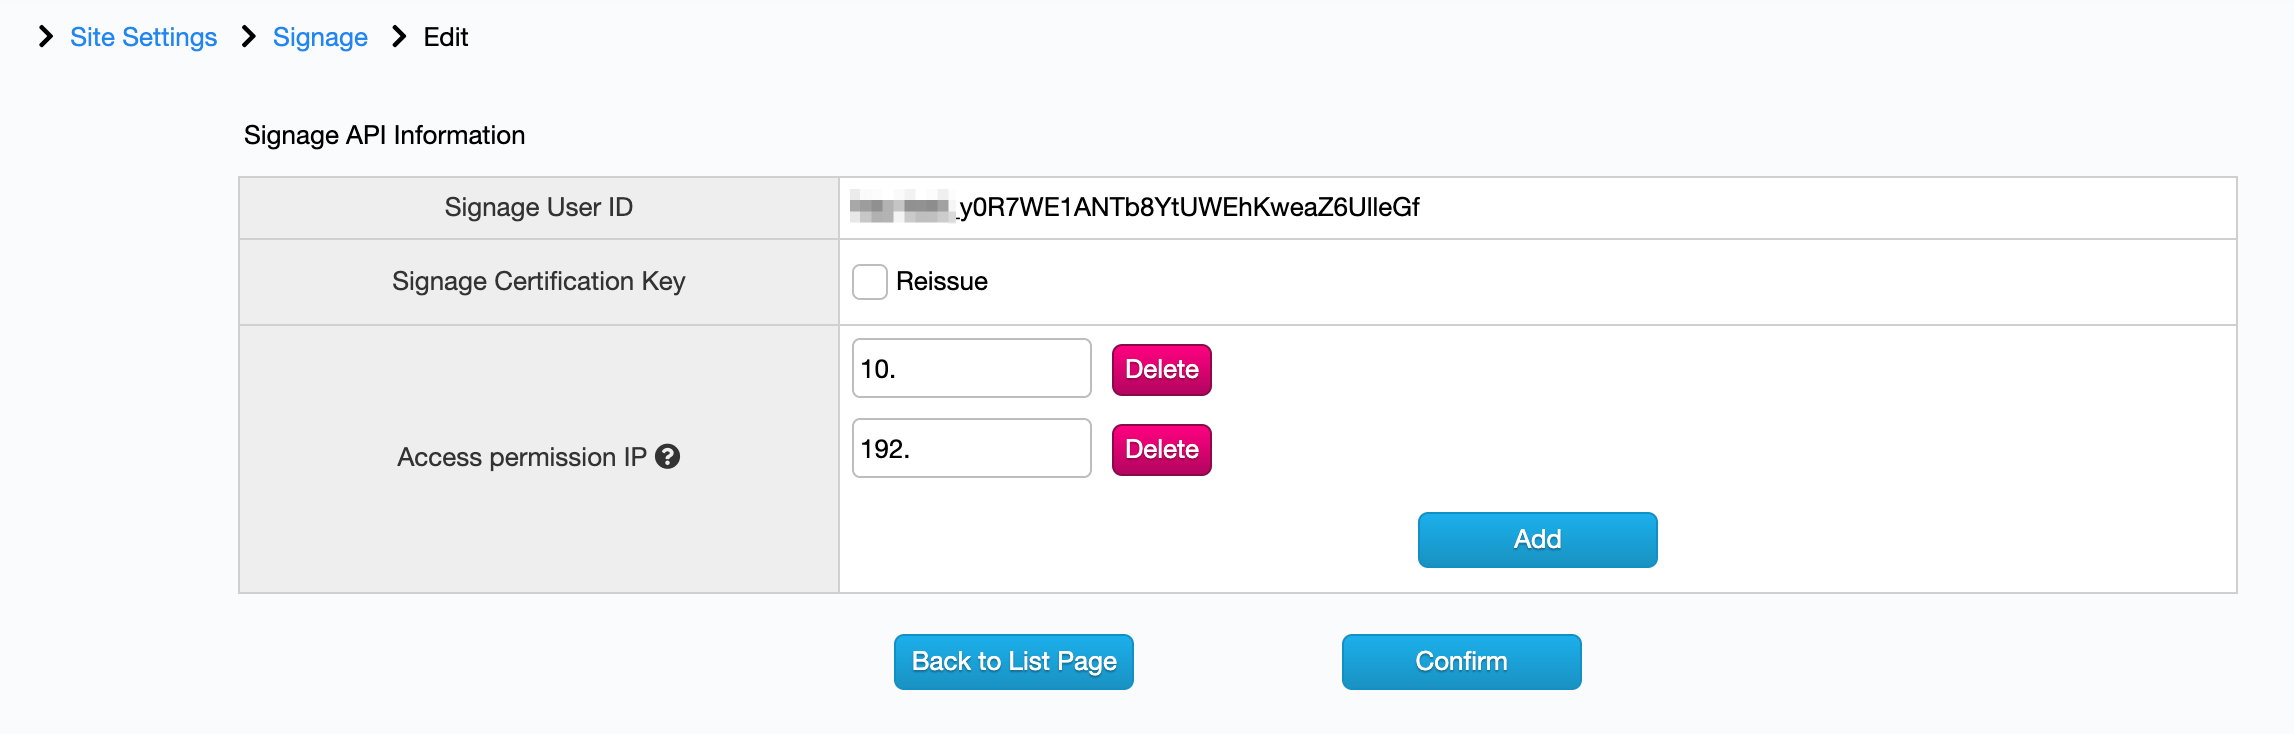
- Signage API Information > Edit

Signage User ID/Signage Certification Key
When you create a signage template, a unique URL with the following structure will be issued.
https://knowledge-board.amana.jp/[Site Code]/?app=Signage&action=signage&SIGNAGE_ID=[Signage ID]&ApiUser=[Signage User ID]&ApiKey=[Signage Certification Key]
※”Signage User ID” and “Signage Authentication Key” are given at the end of the URL.
The ‘Signage Certification Key’ can be reissued at any time. In case of reissue, the URL will be changed, so please make sure to update the URL in the setting screen of signage terminal.
Apart from the IP restriction of the site and API, you can set up a dedicated IP for signage access.
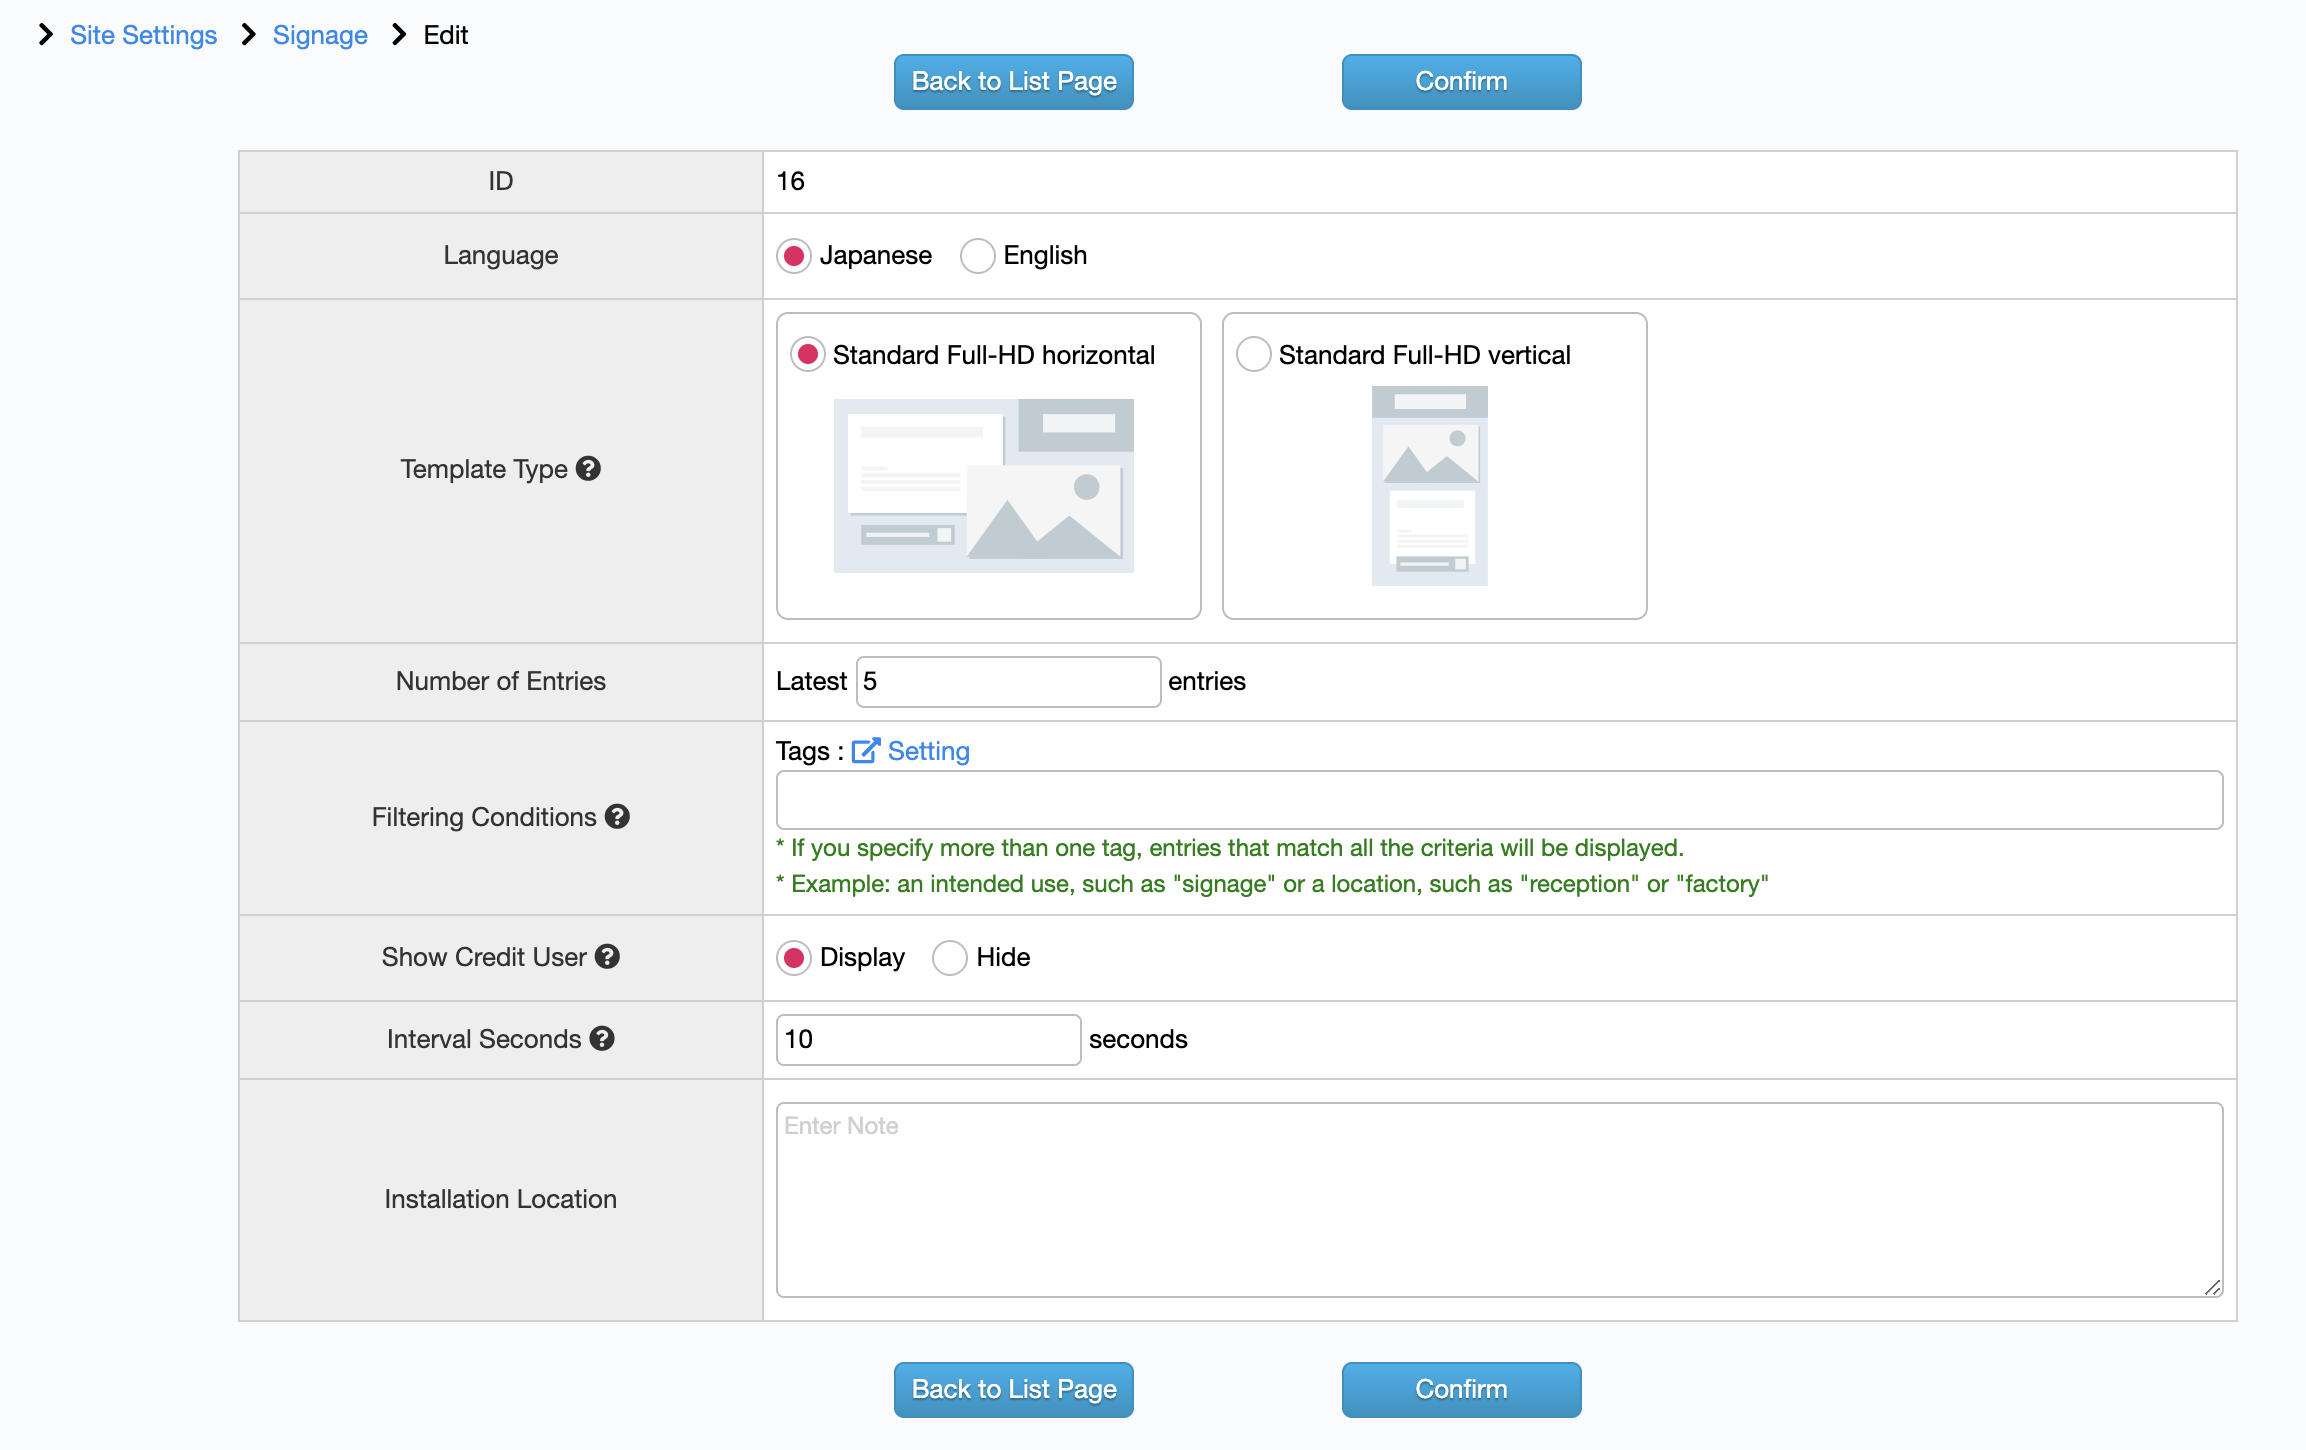
- Signage Template Information > Edit
In this page, you can set the template type of the signage and the content to be displayed.
After setting, please copy the URL from the list page.

Language
Set in which language the content should be displayed. This field will only appear on multilingual sites.
The standard Full HD vertical (1920×1080) and horizontal (1080×1920) templates are available.
If you would like to add a template with a different size or layout, we offer the option of creating a custom template for a fee.
For more information, please contact the XBOARD sales representative.Number of Entries
You can specify the number of entries to be displayed in a loop.
You can specify any entry tag to narrow down the content you want to display on your signage.
If you do not specify this, the specified number of entries will be picked up and displayed across all published entries, with priority given to those with the most recent publication date.Set whether or not to display the photo and name of the credited user.
Only one user will be displayed, and if more than one person is credited, the user set as the initial profile display will be displayed.Set the number of seconds per content to be displayed. By default it is set to 10 seconds.
Installation Location
Please use this field as an administrative note.
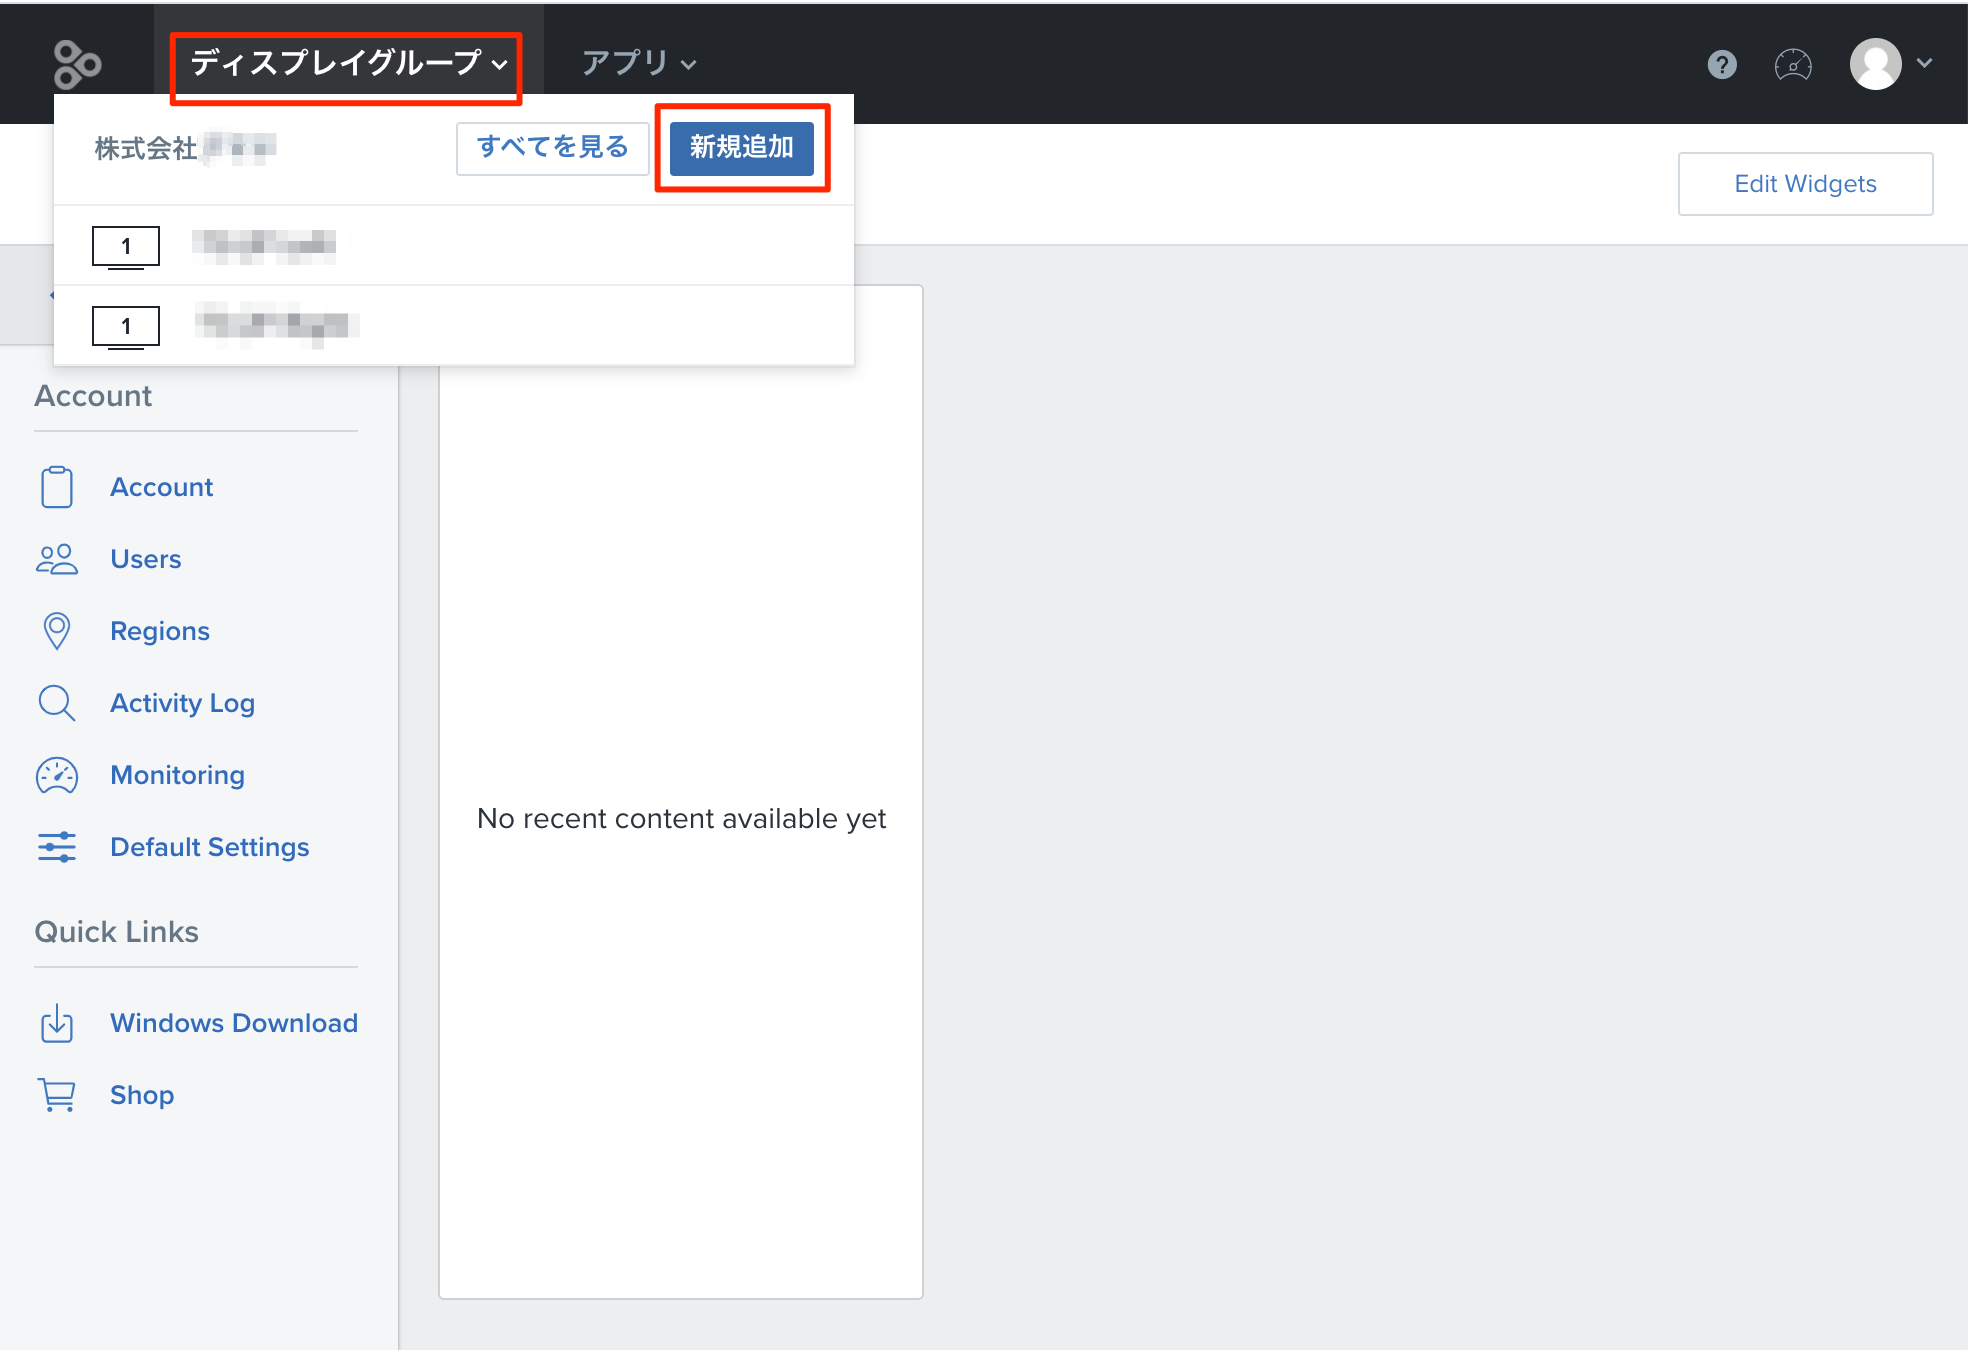
■Settings on the Signage dashboard
As an example, here is how to set it up in Enplug, a leading signage product.
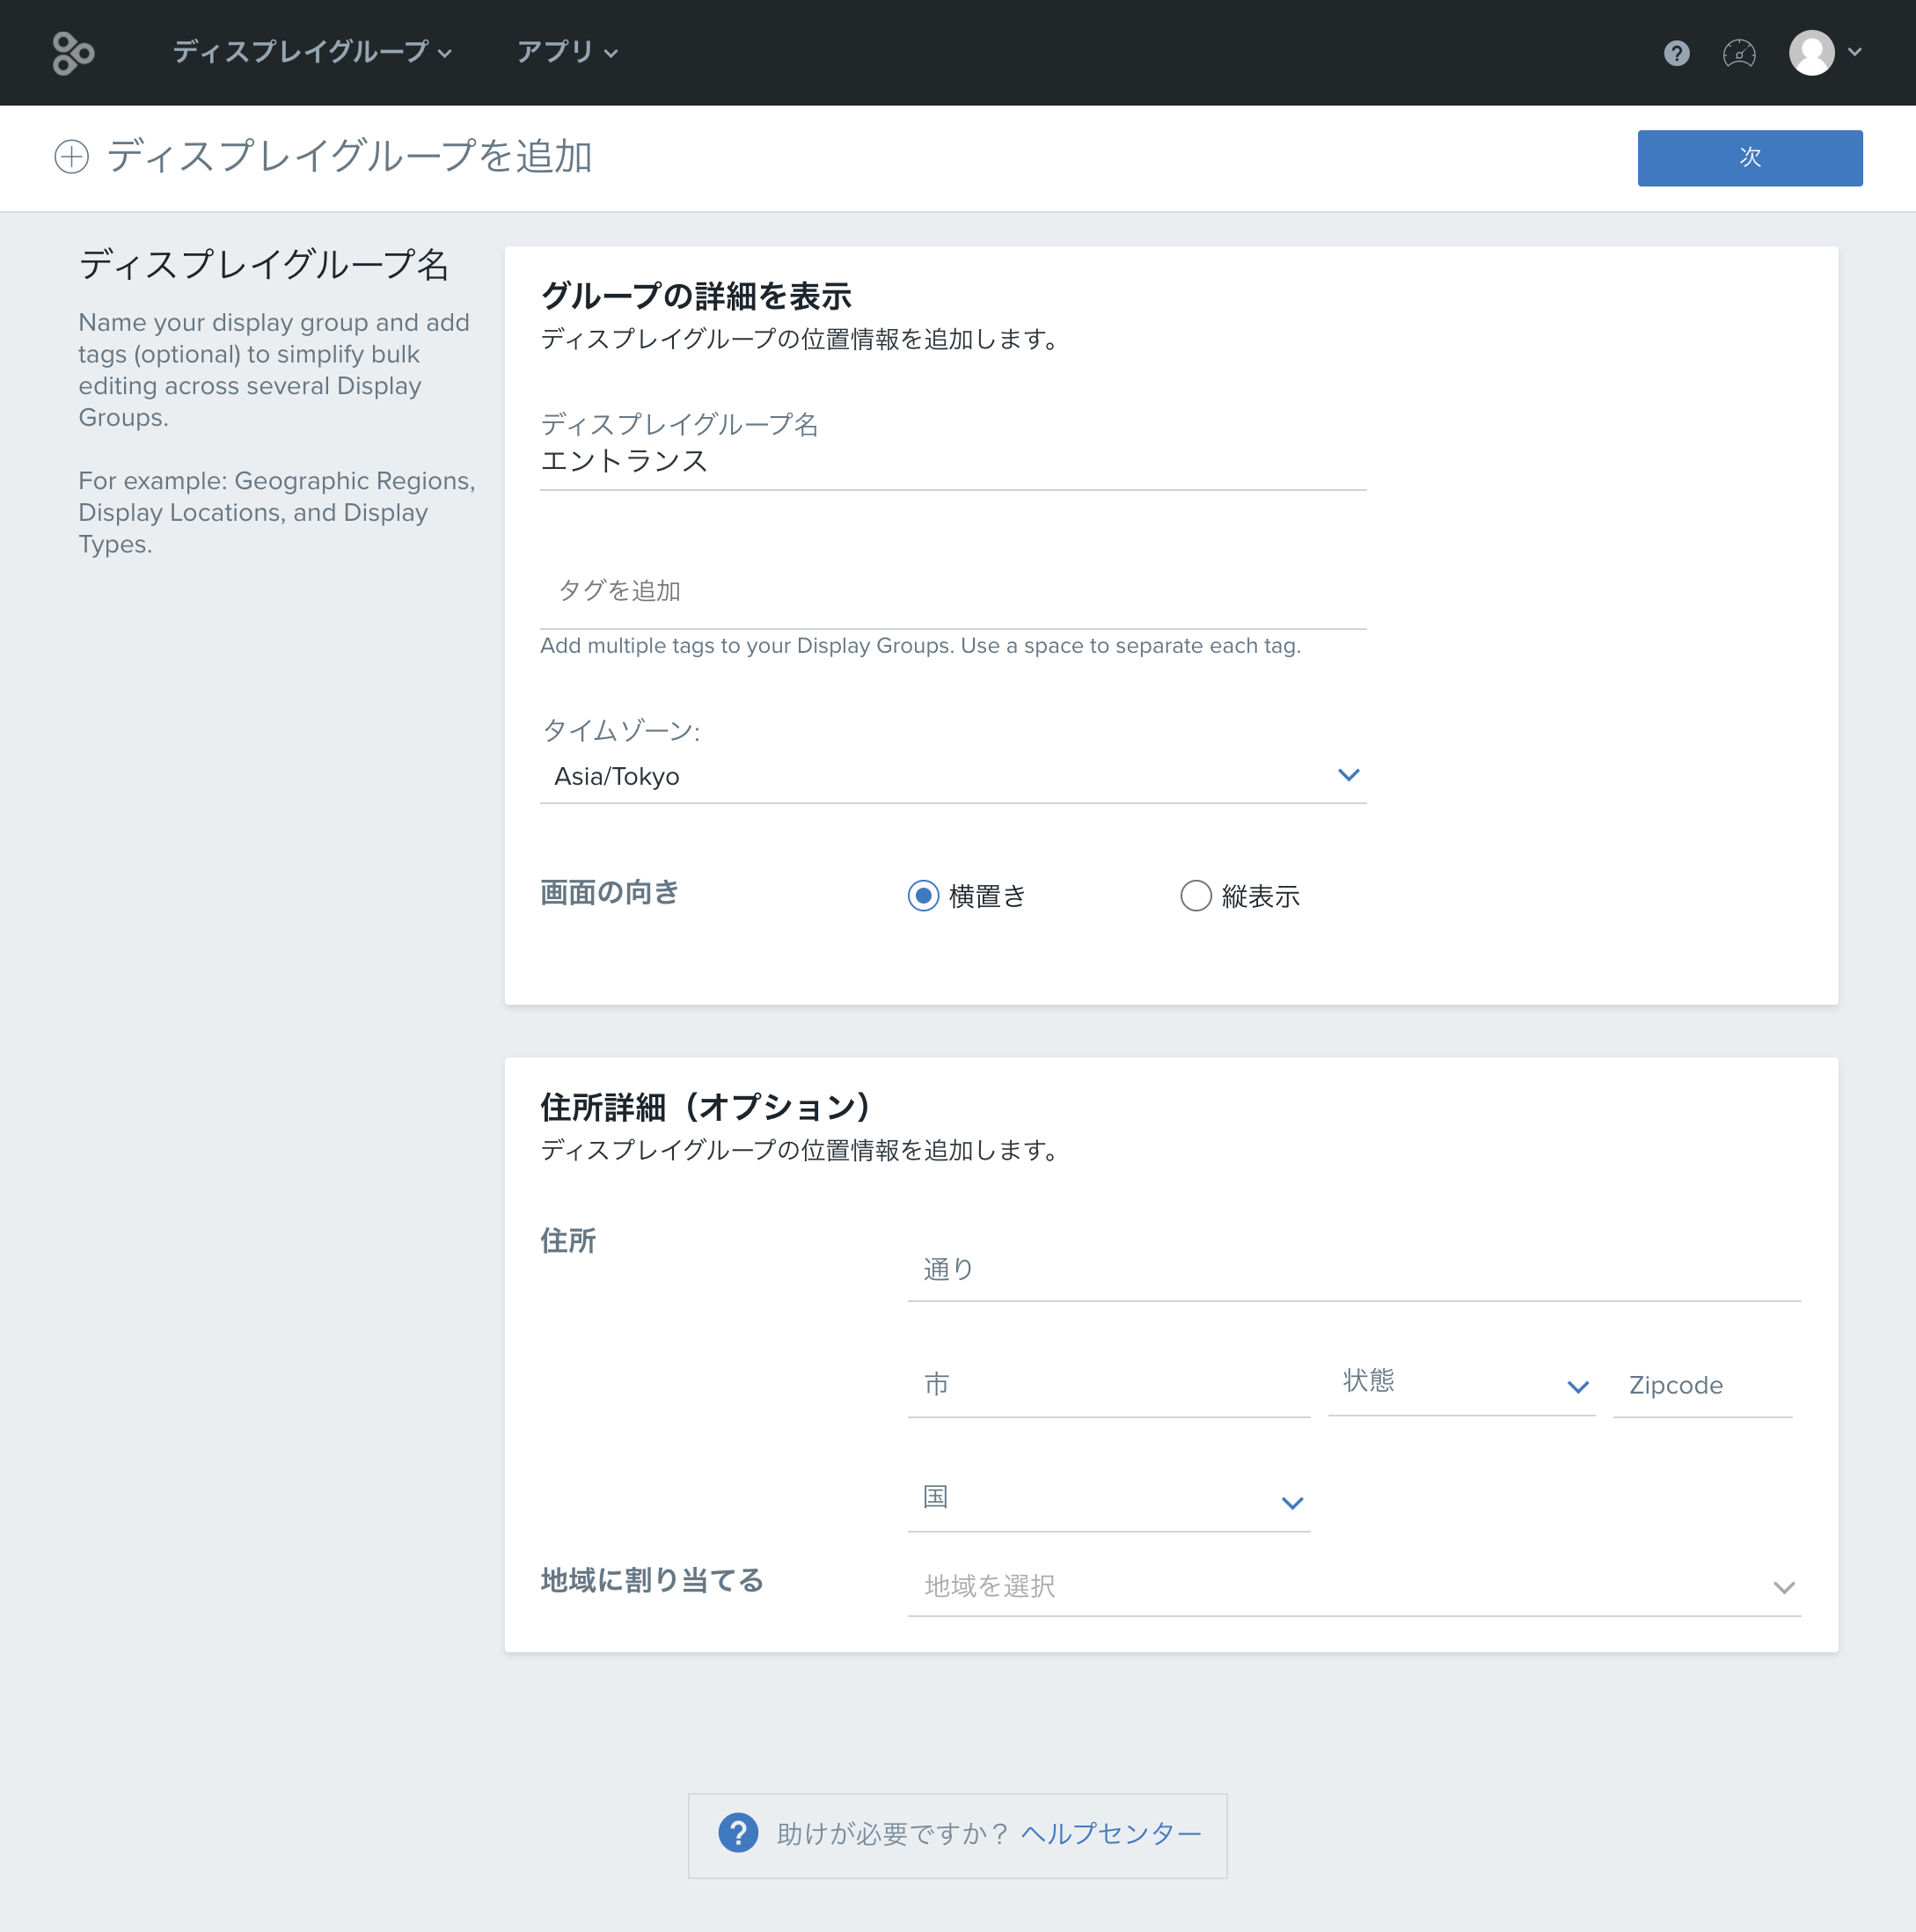
1. Adding a display group
From the header menu, select ‘Display Groups’ > ‘Add New’.

Enter the name of the display group and click on the ‘Next’ button.

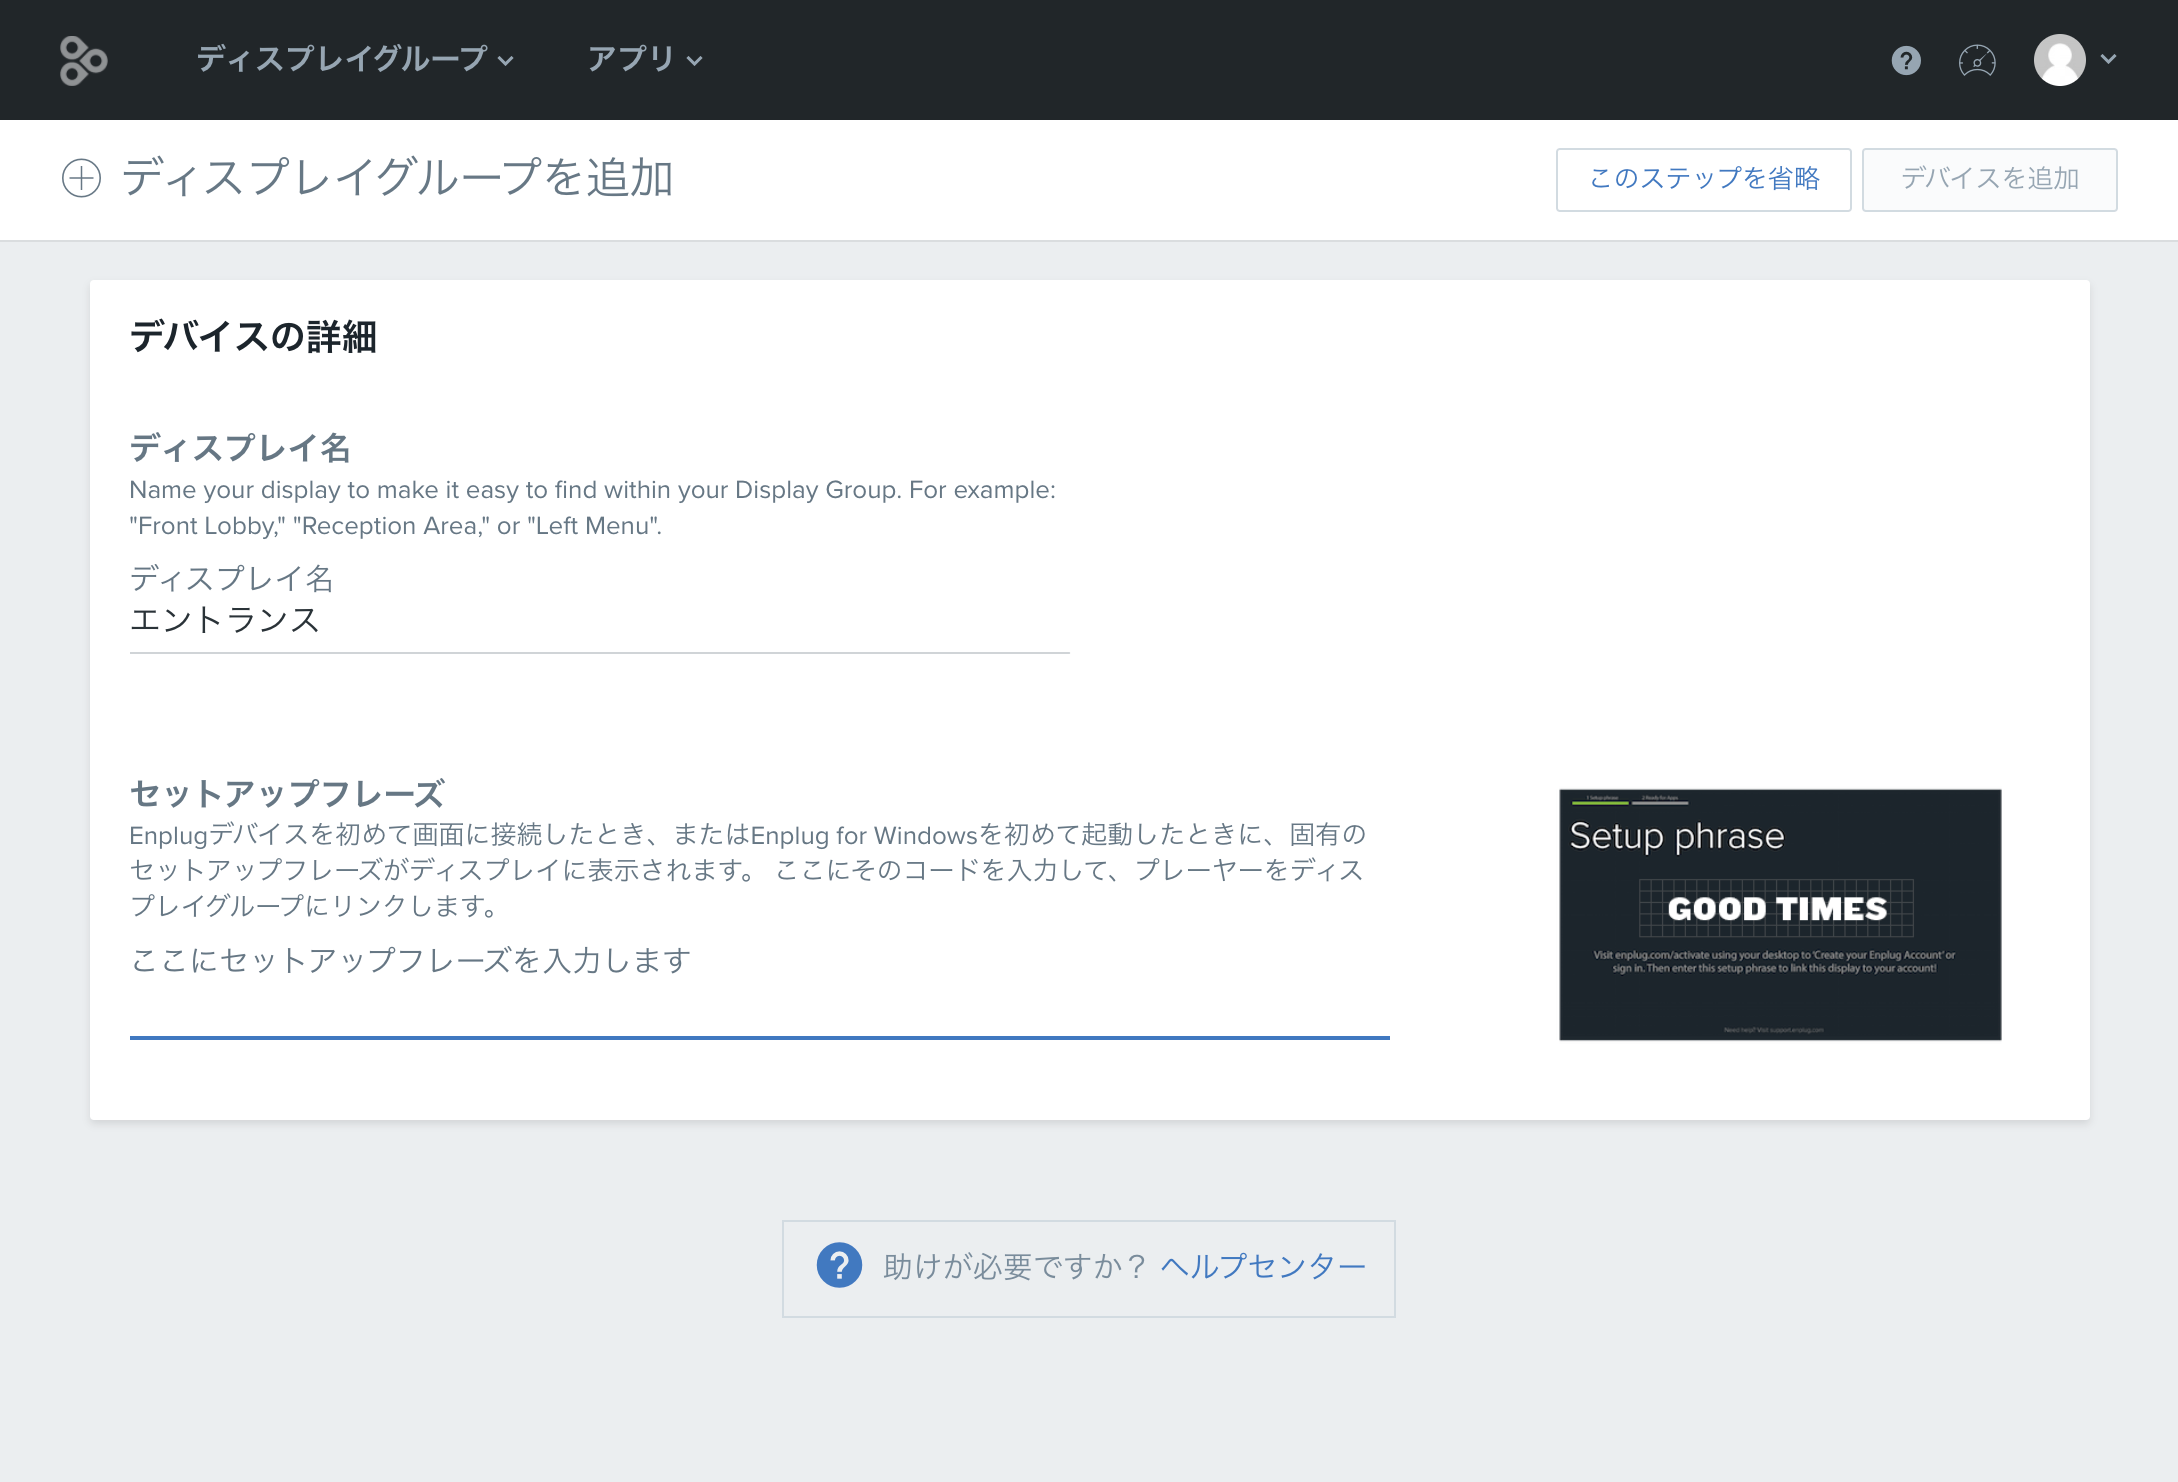
Enter the setup phrase shown on the signage screen to link the display group.

A new display group has been added.

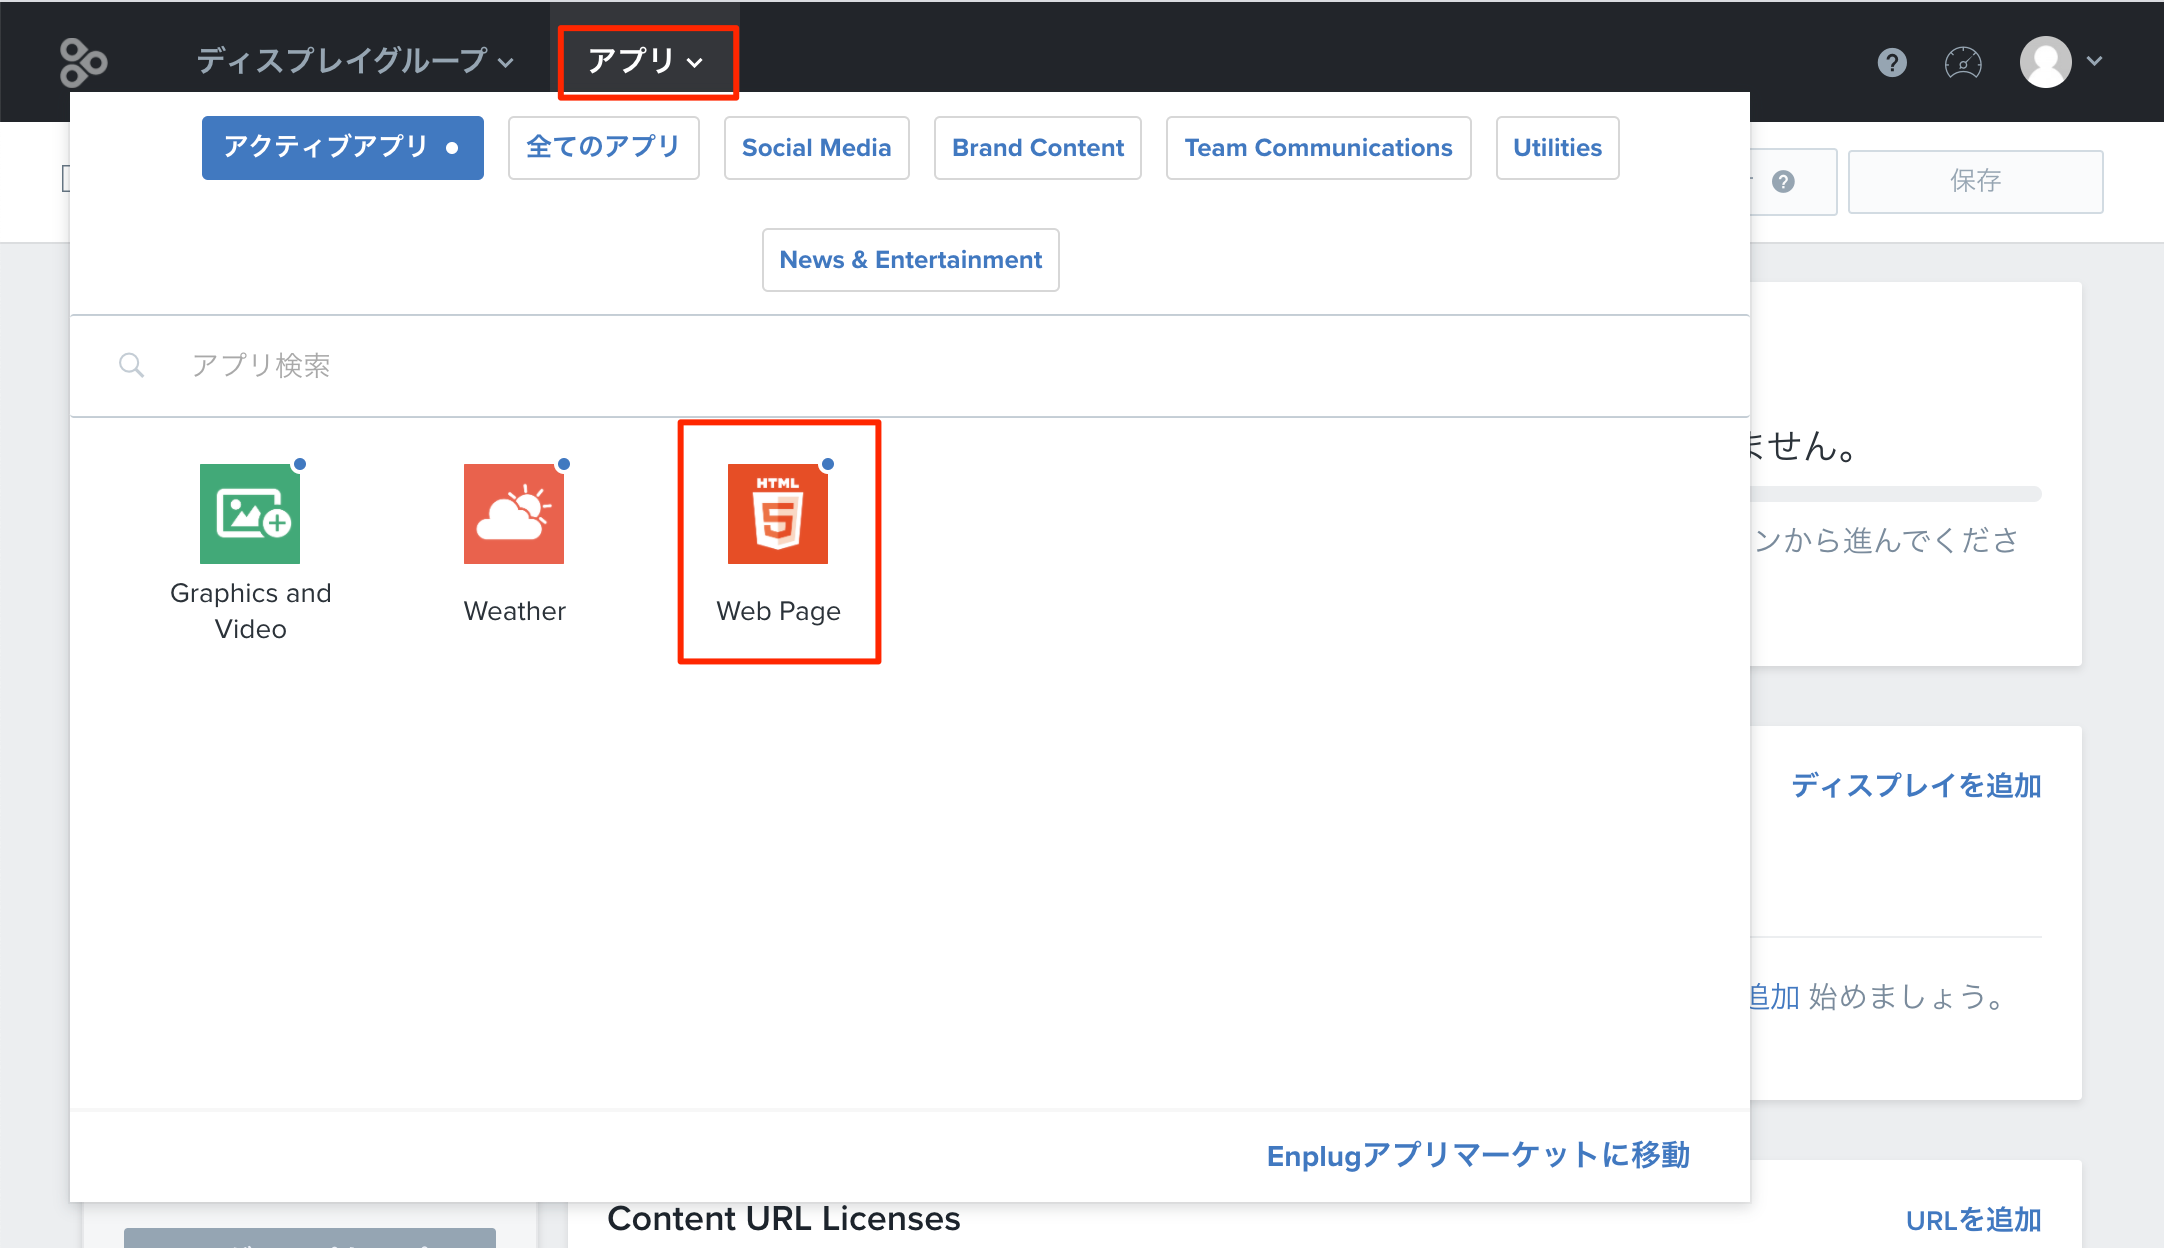
2. Display content settings
The next step is to set the display content. From the header menu, select “Apps” and then “Web Page”.
(if not already displayed, search through all apps)
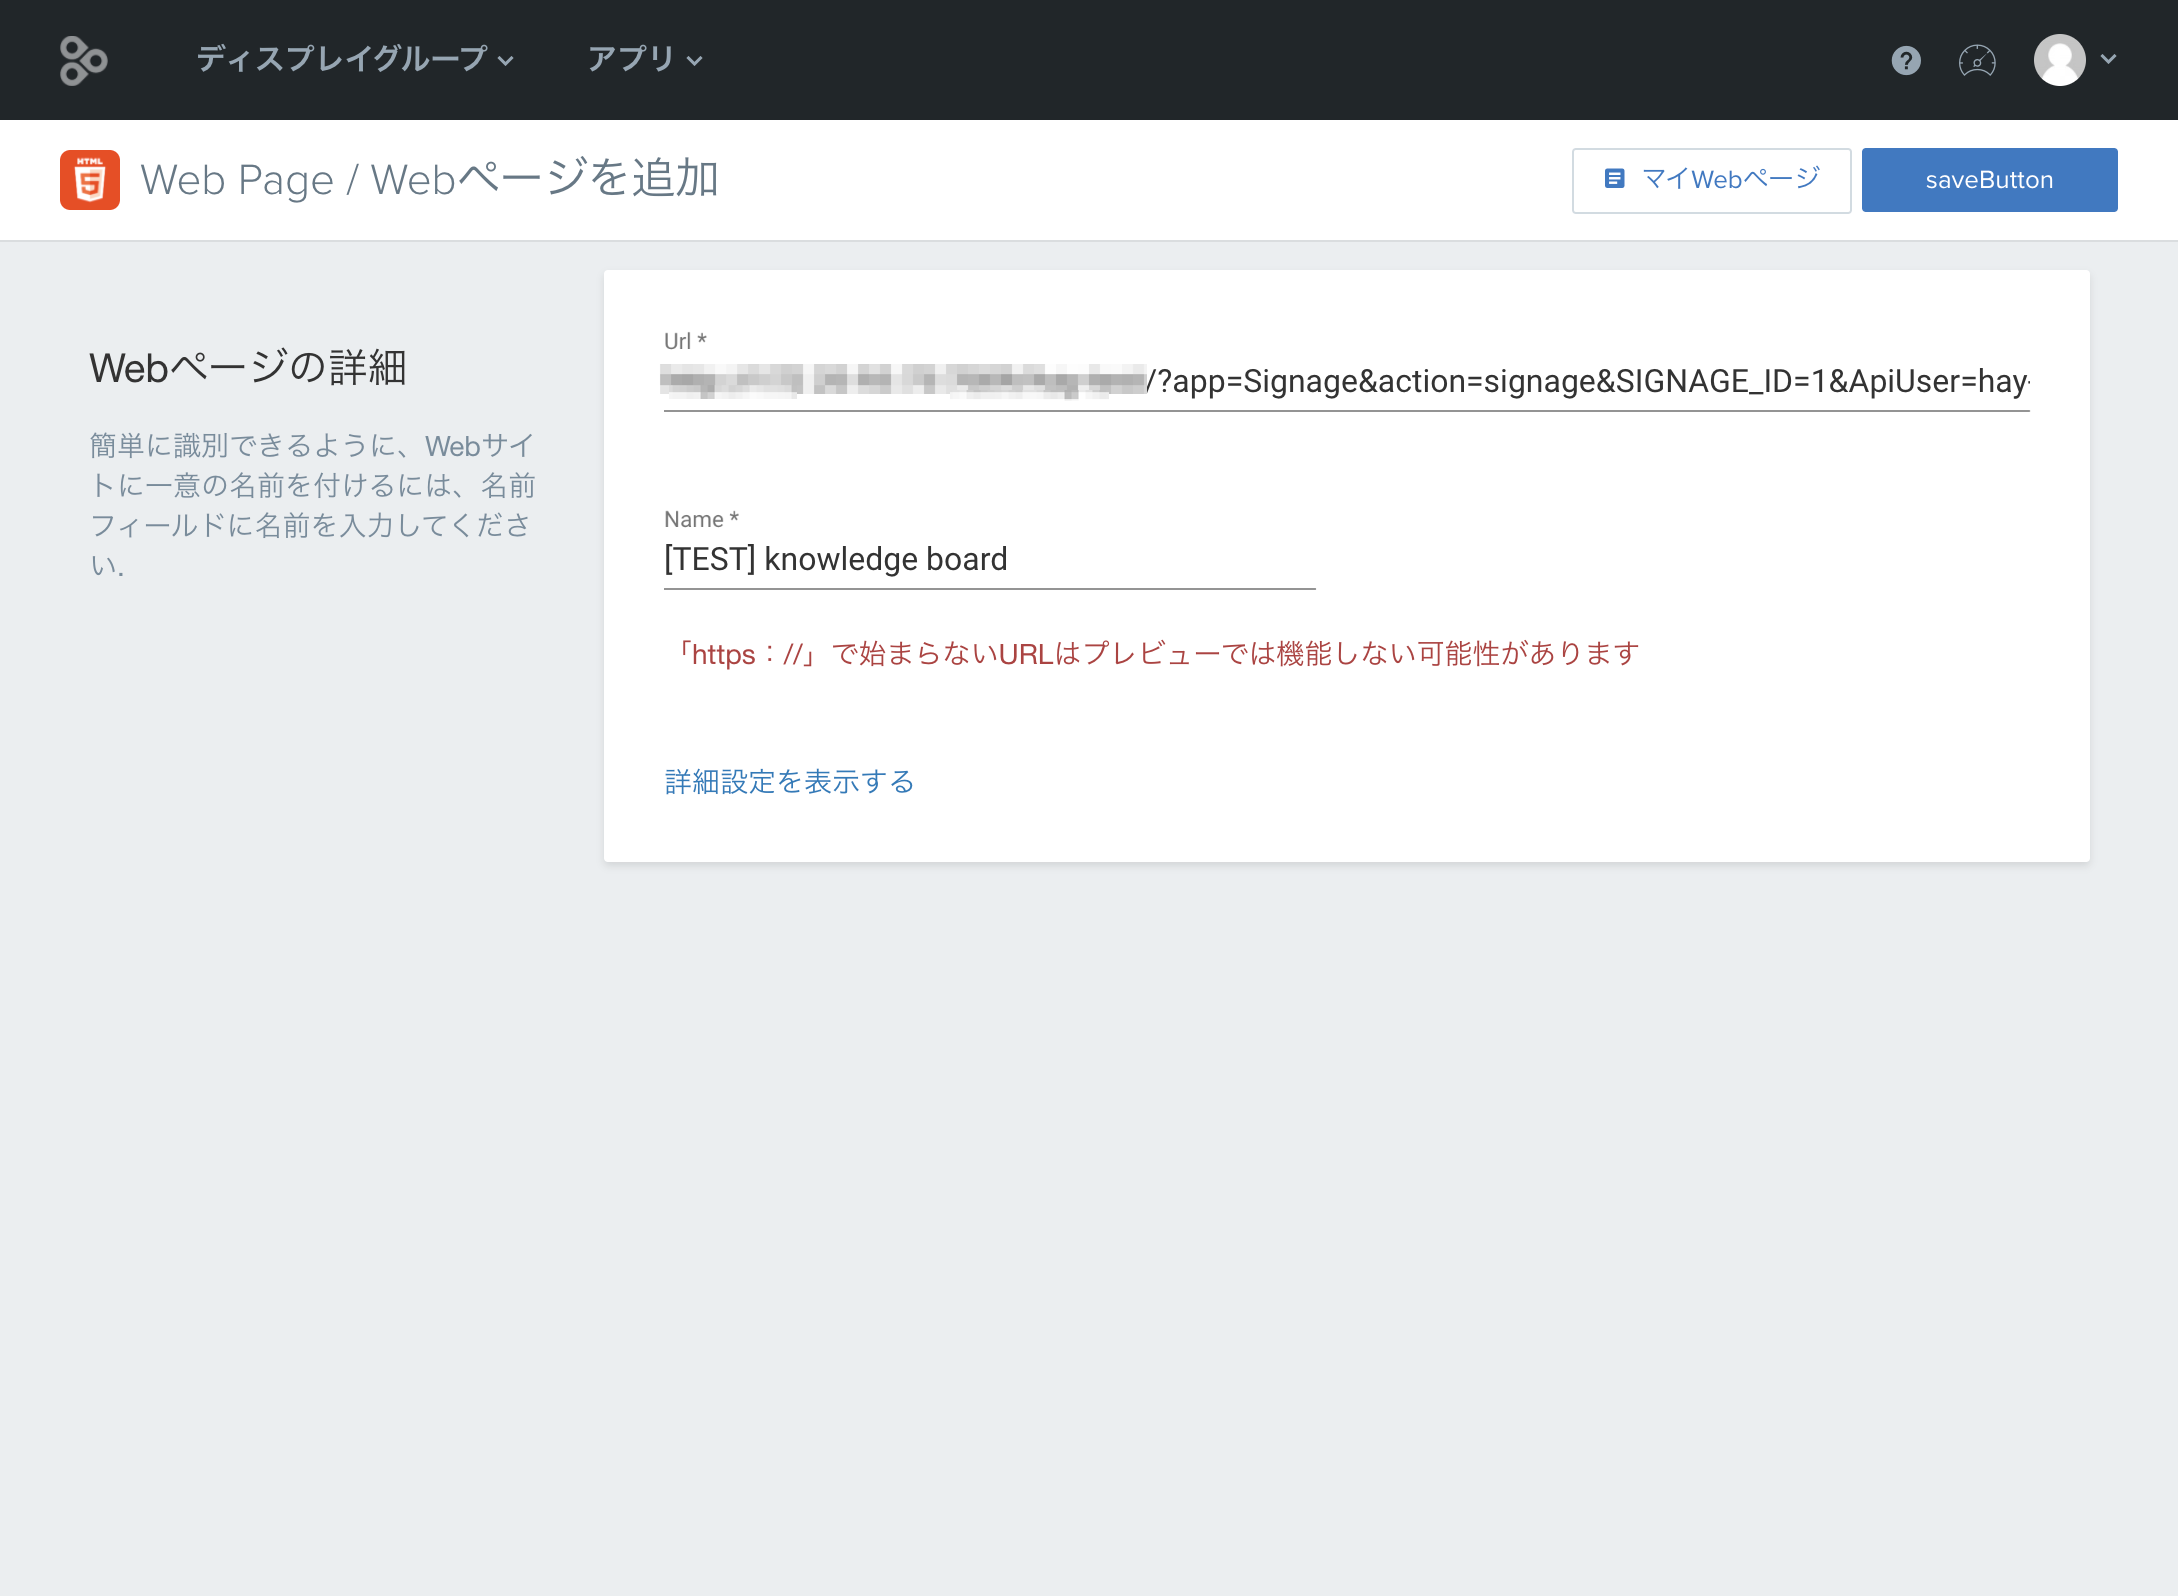
In the Url field, set the URL that you have just copied from the XBOARD.
In the Name field, set any distinguished name then click on the saveButton.
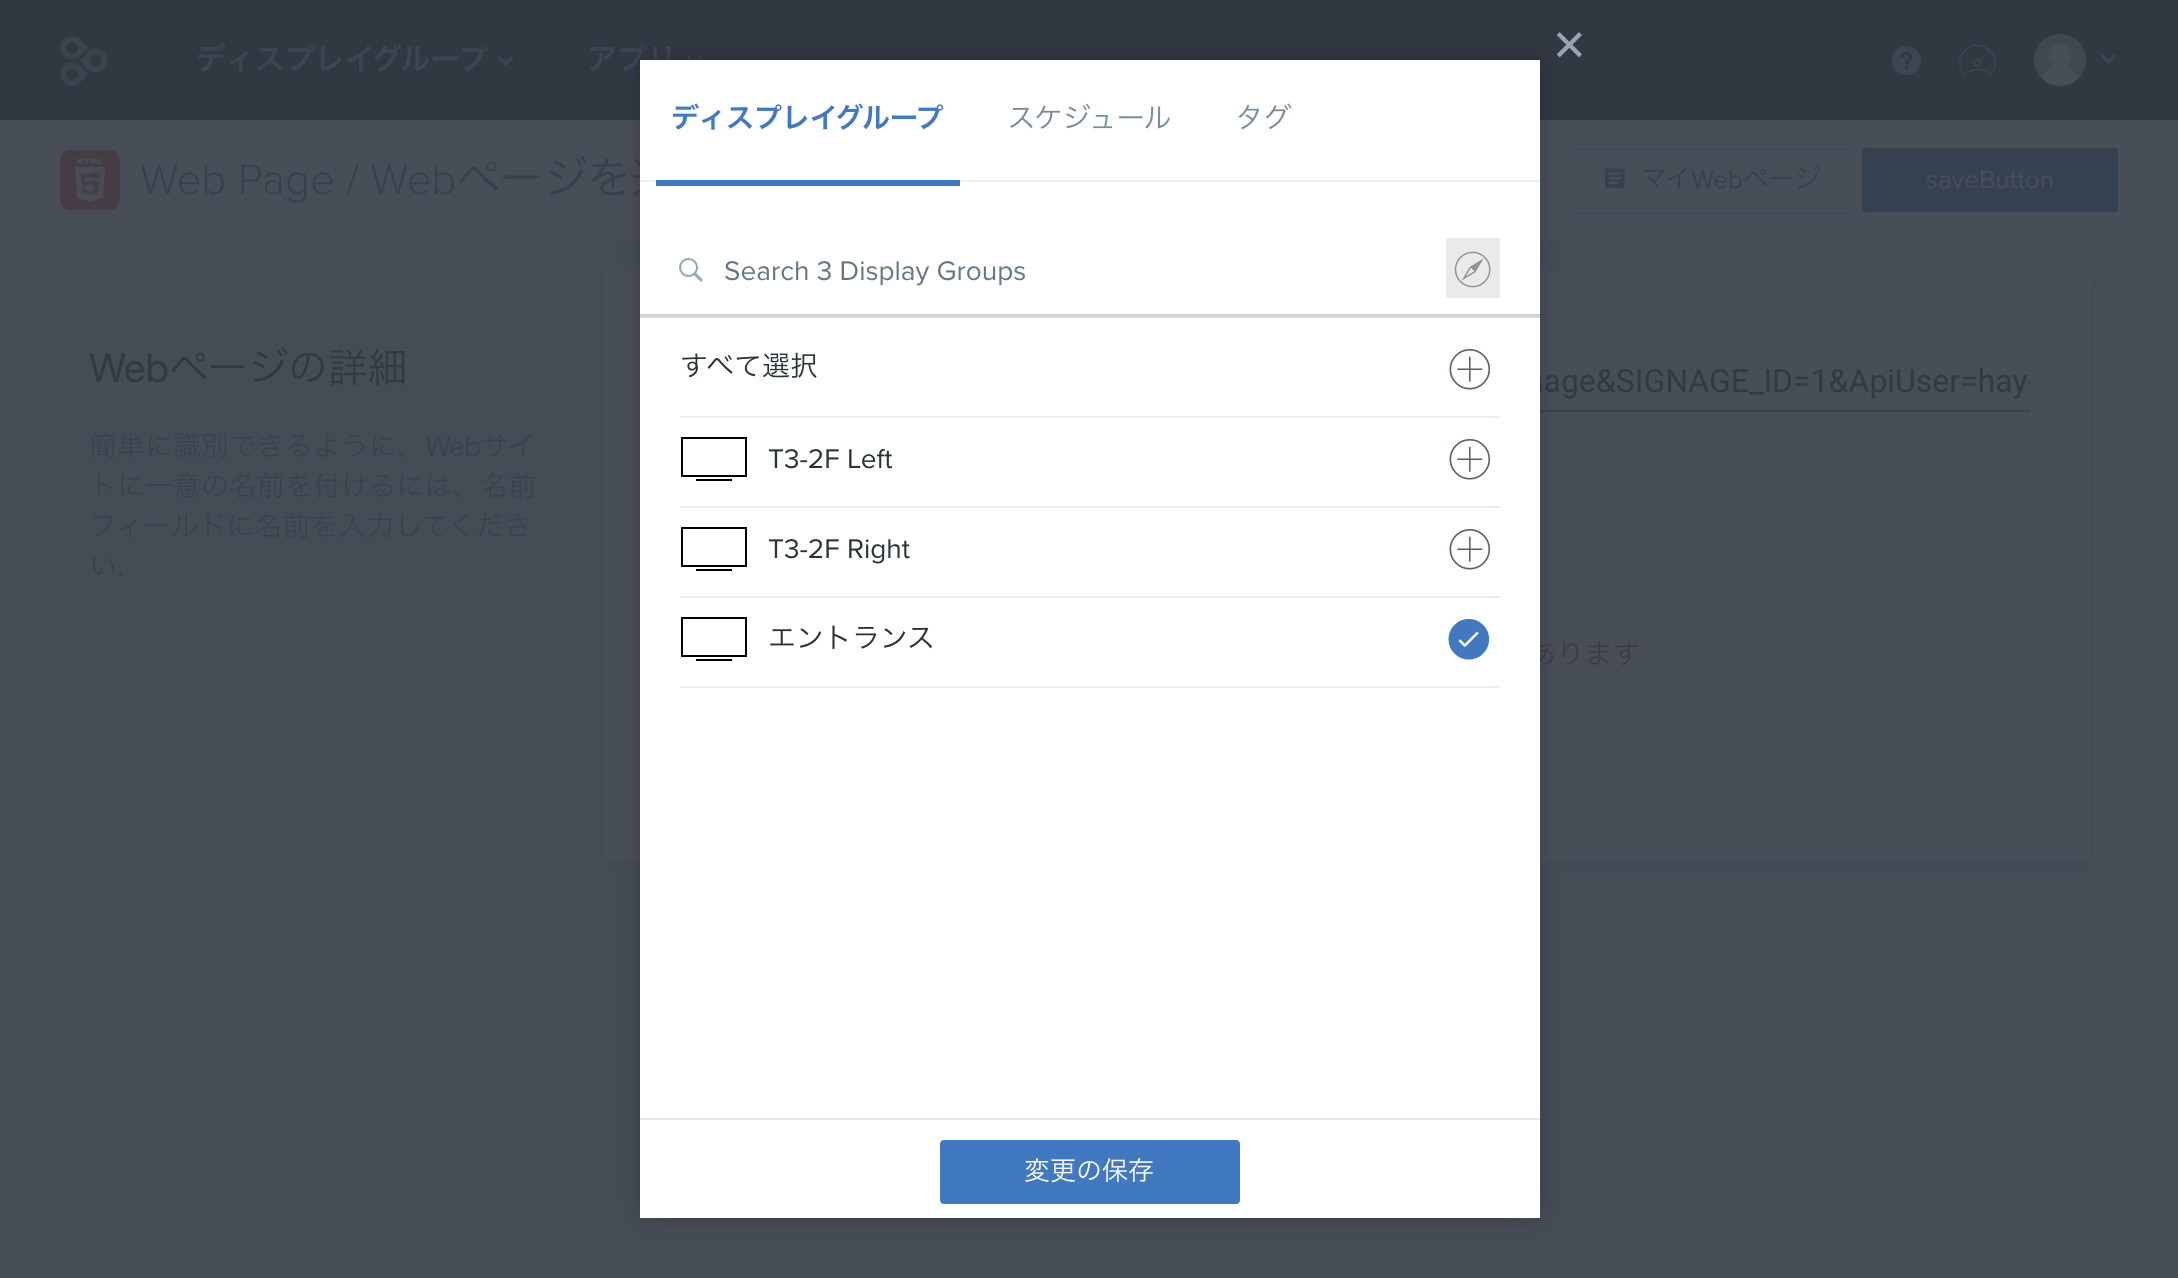
3. Linking display groups
Lastly, please select the display group. The display group you have just created will appear, so tick it and click on the save button.

Check that the content is shown on the signage display.
- Chat Service Connection
This is a function that sends a PUSH message to the chat services “Microsoft Teams”, “Slack”, and “Google Chat” with the title and URL of the article at the timing of the XBOARD article publication. Since XBOARD article publication notifications can be sent to the chat services used as communication tools, more access to the articles can be expected.How to set up in Microsoft Teams
■How to set up in Microsoft Teams
Microsoft Teams
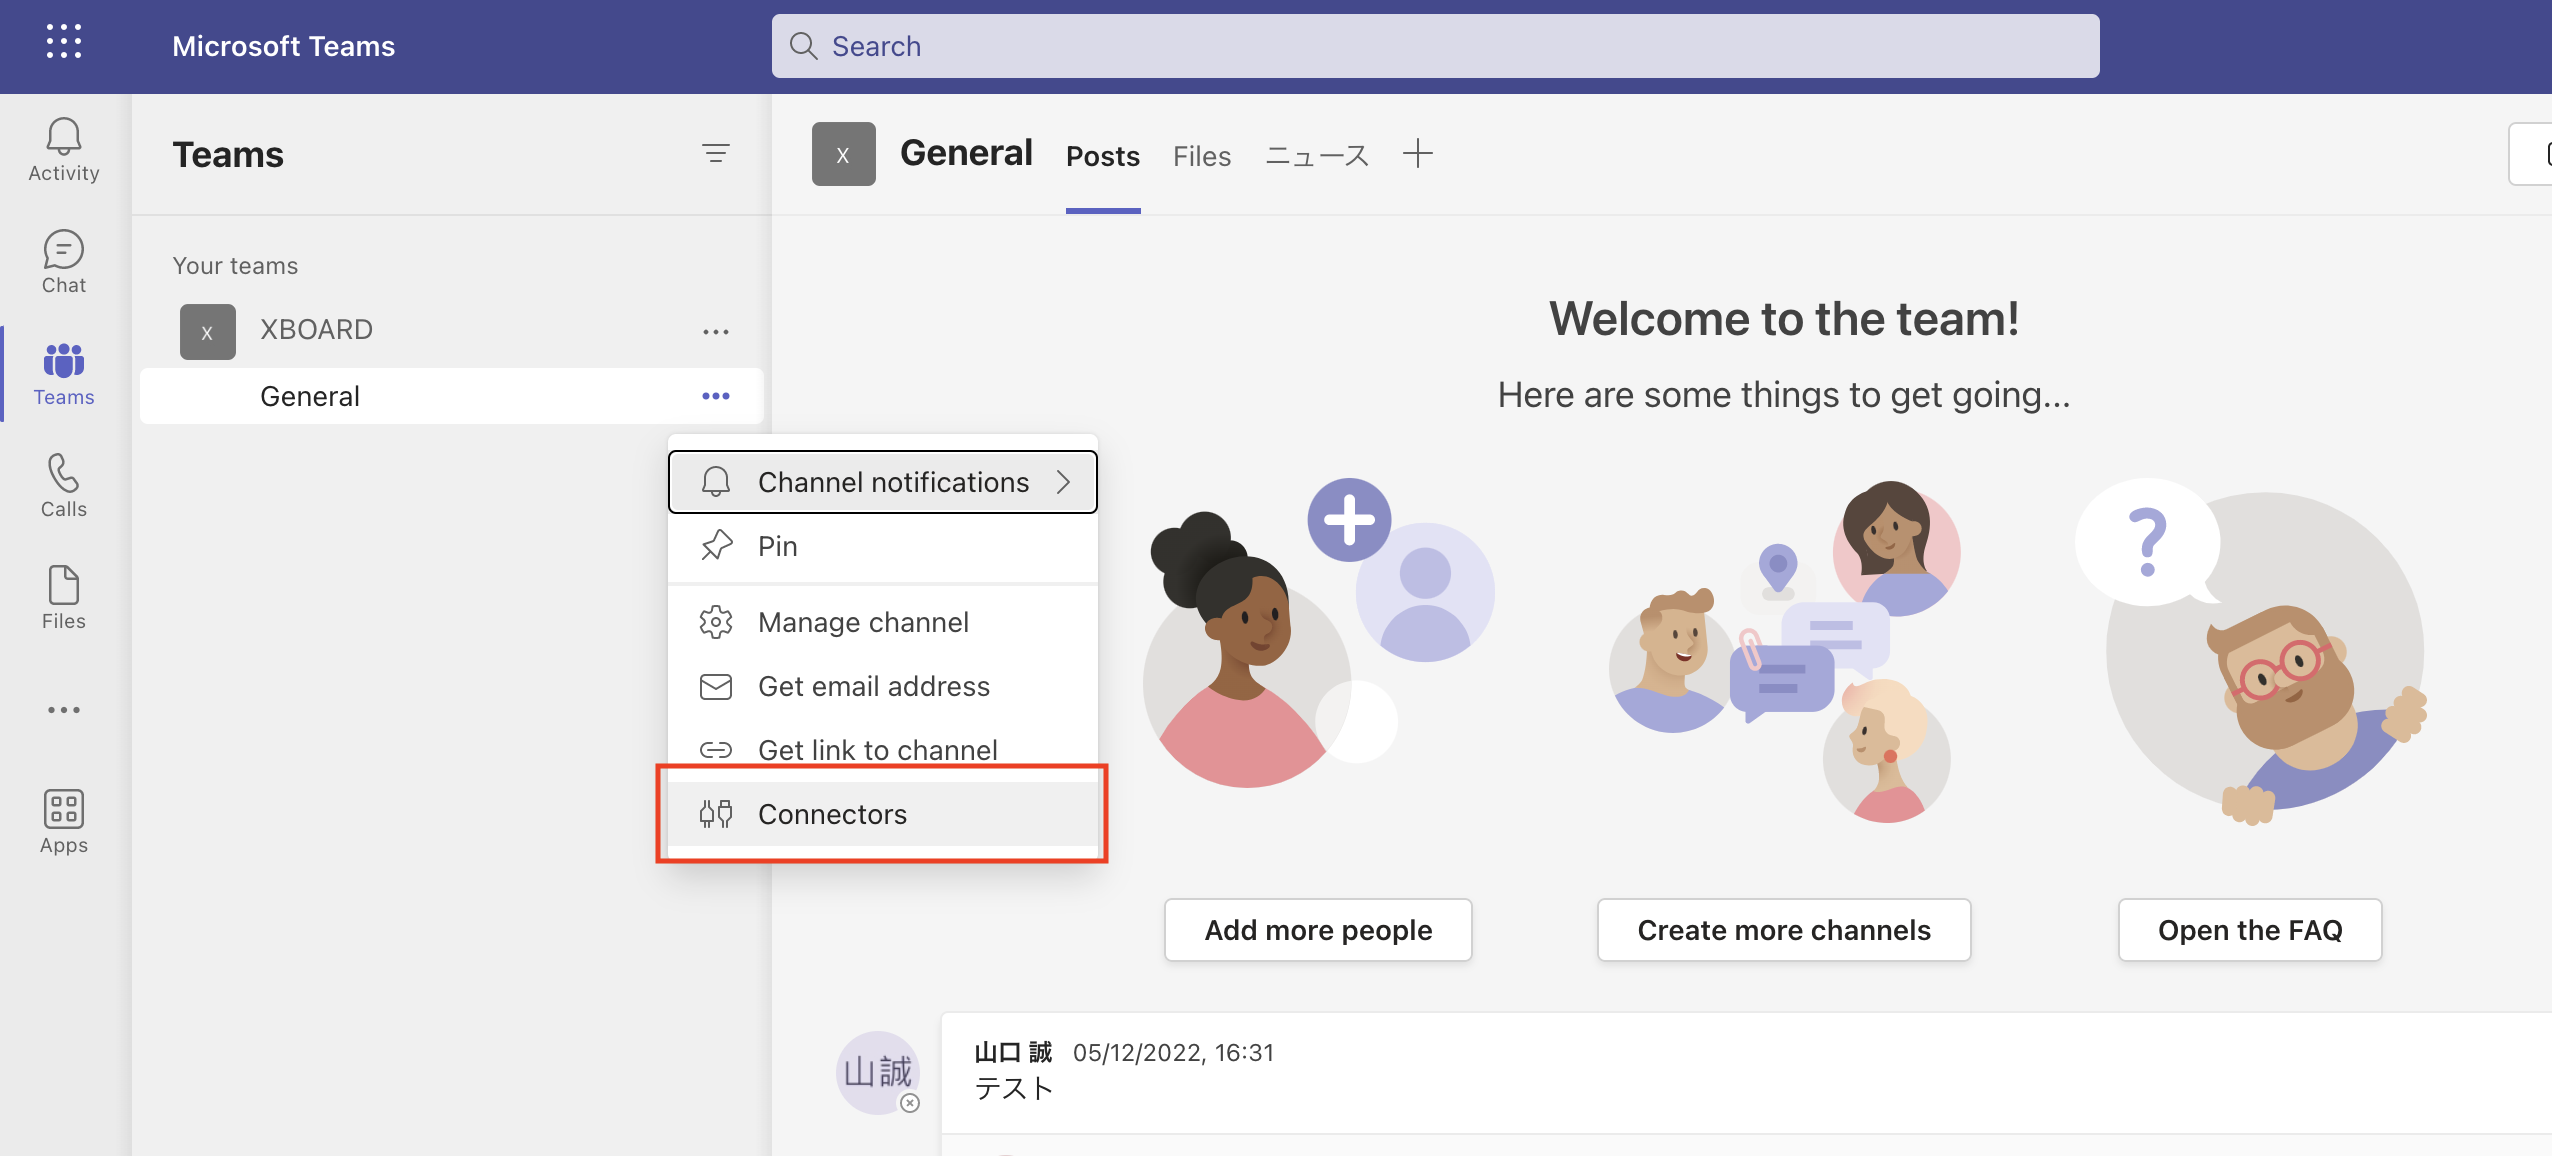
- Log in to Microsoft Teams
- From the menu of the Teams channel you want to configure, select “Connector”.

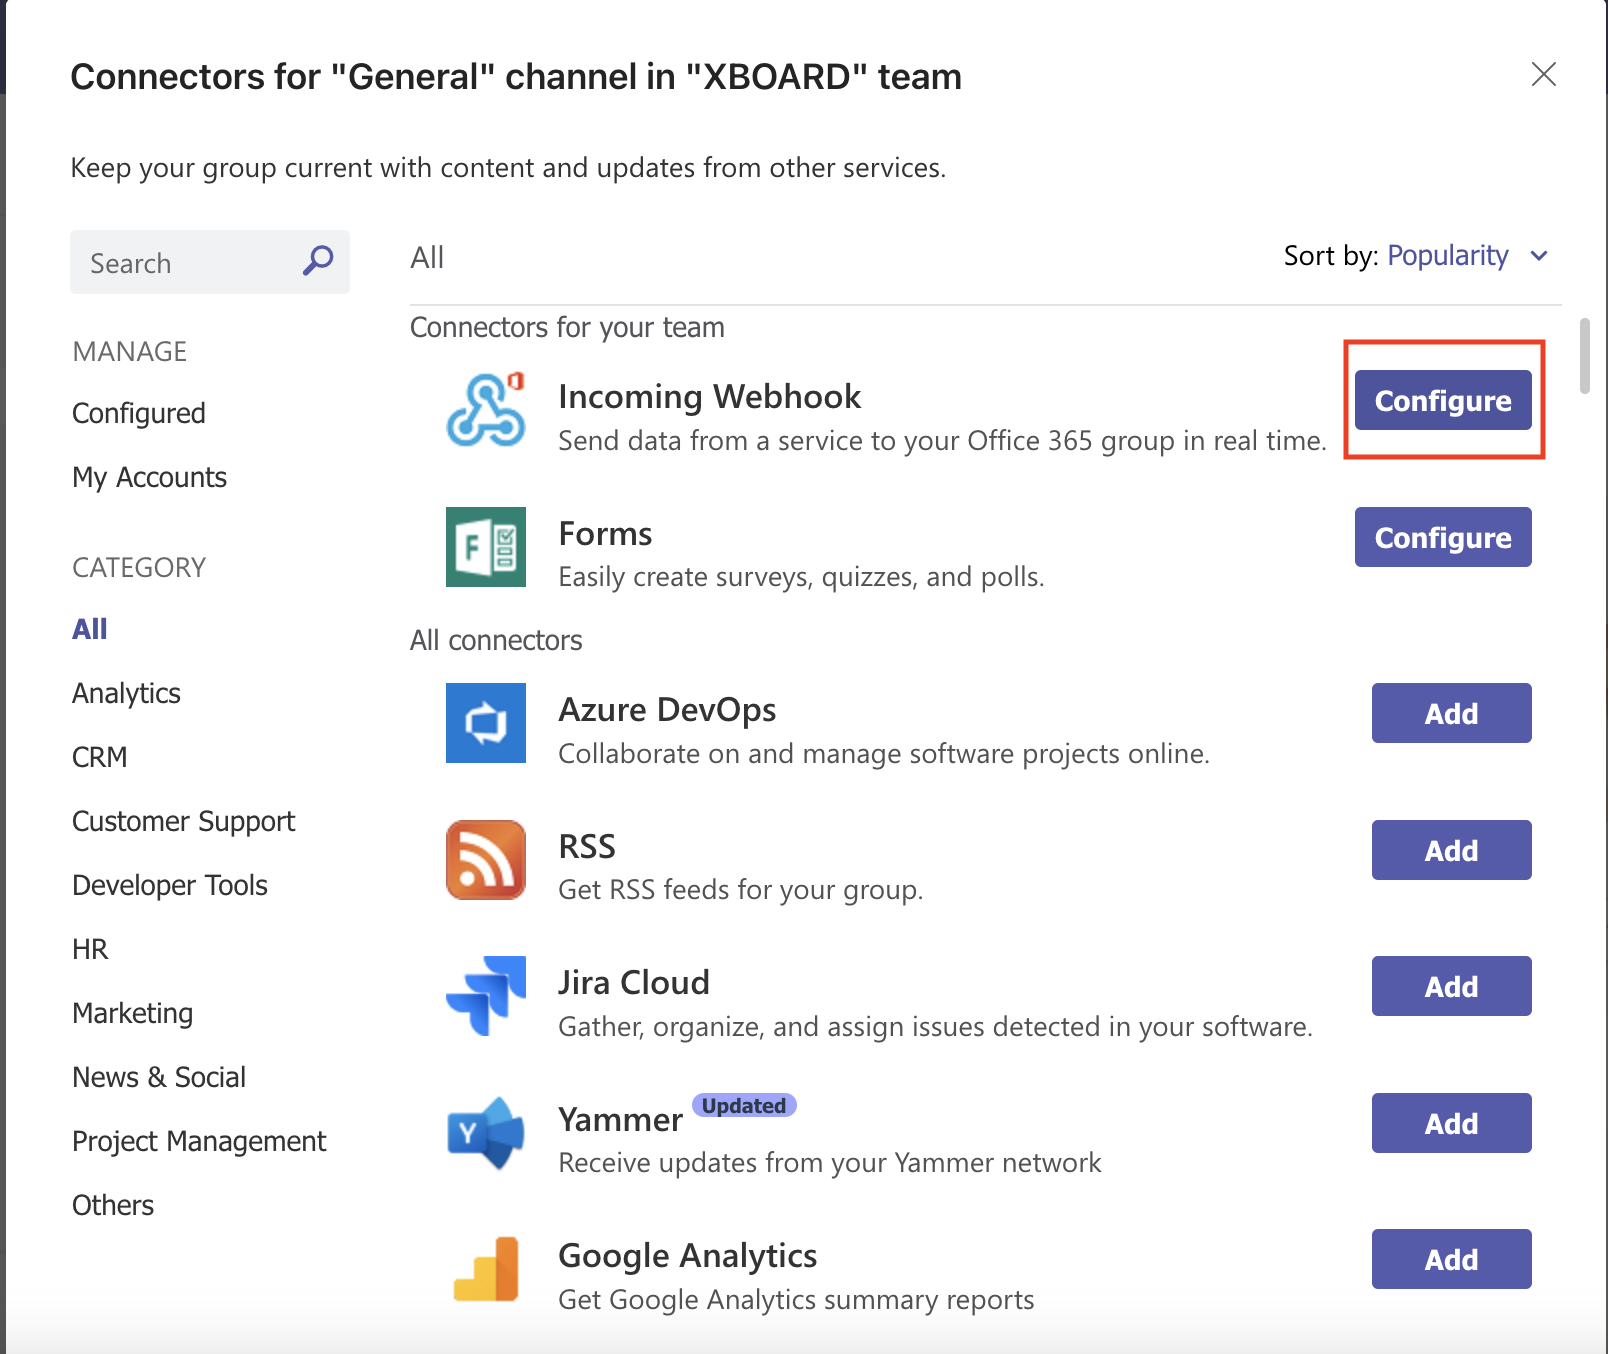
- In the connector settings, select “All” from the left menu → Select “Incoming Webhook” and then “Configure”.

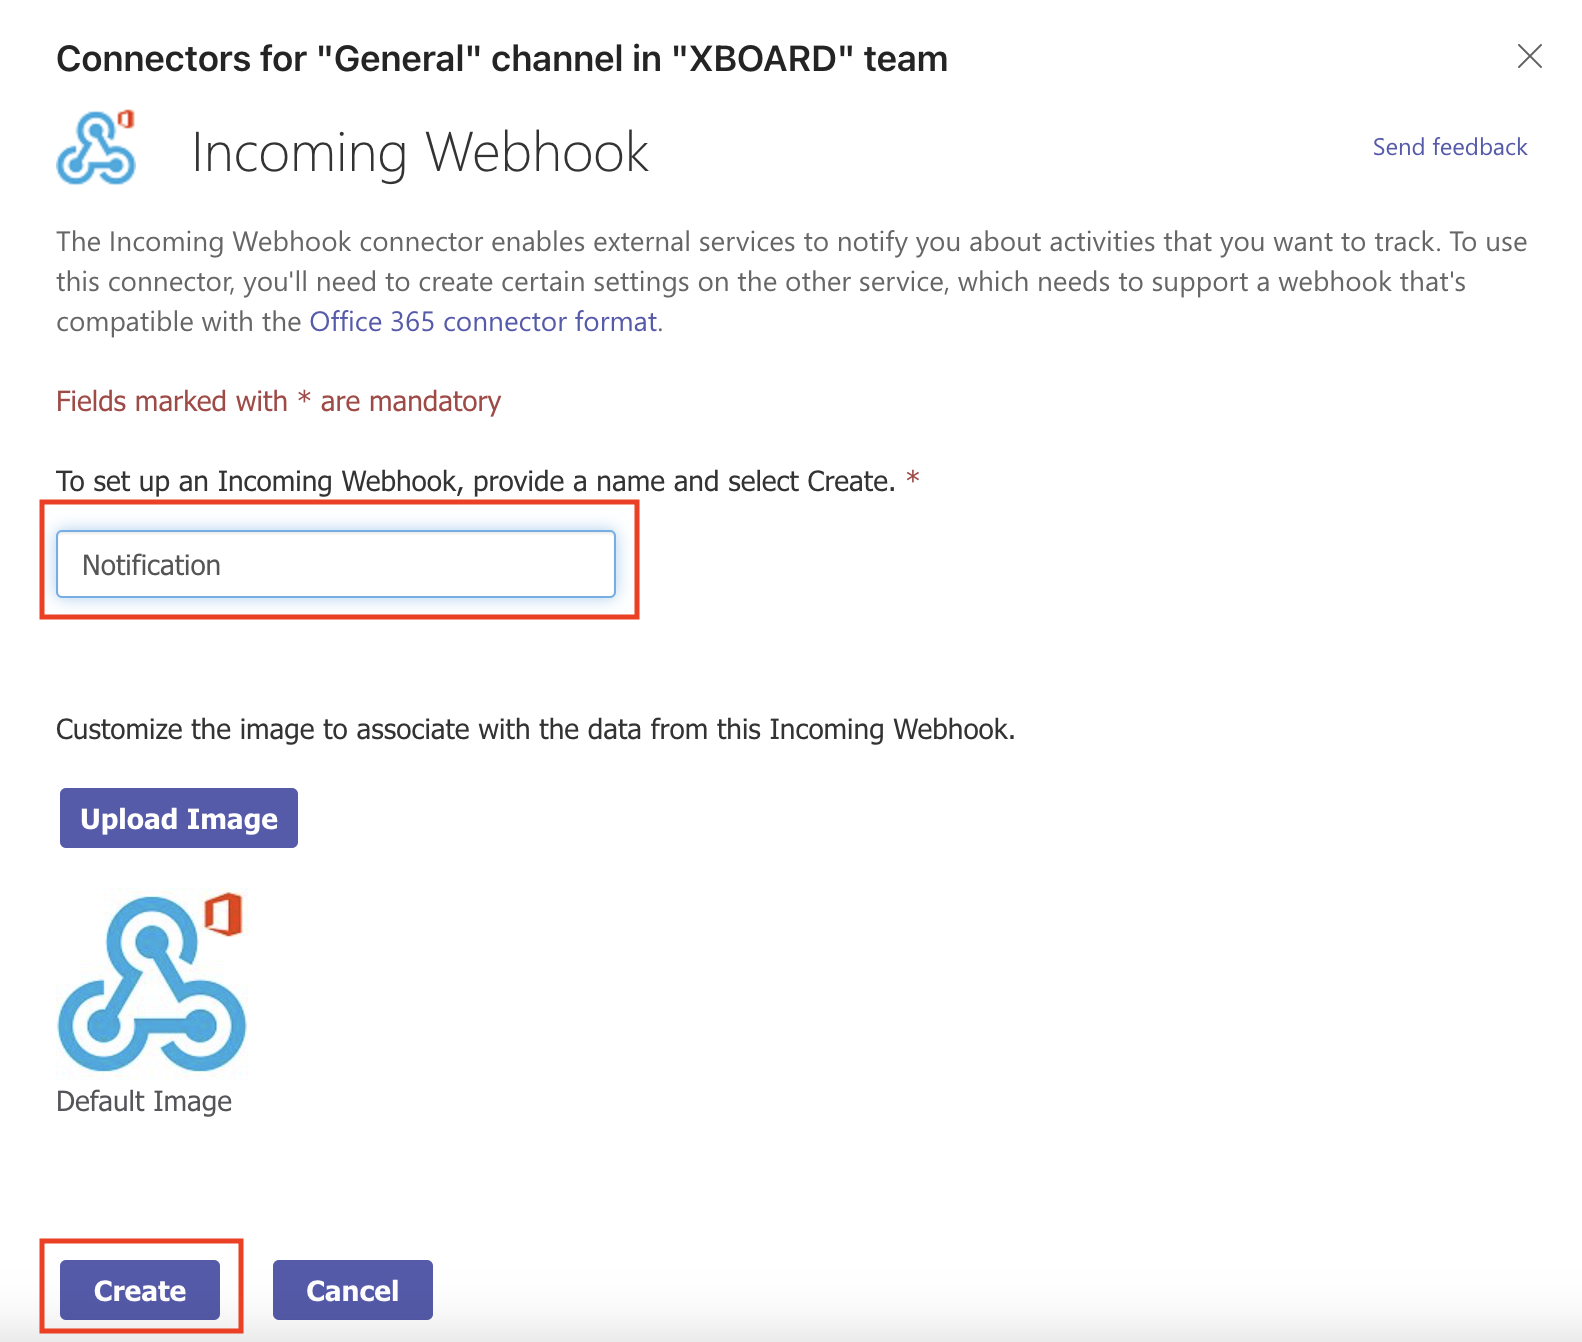
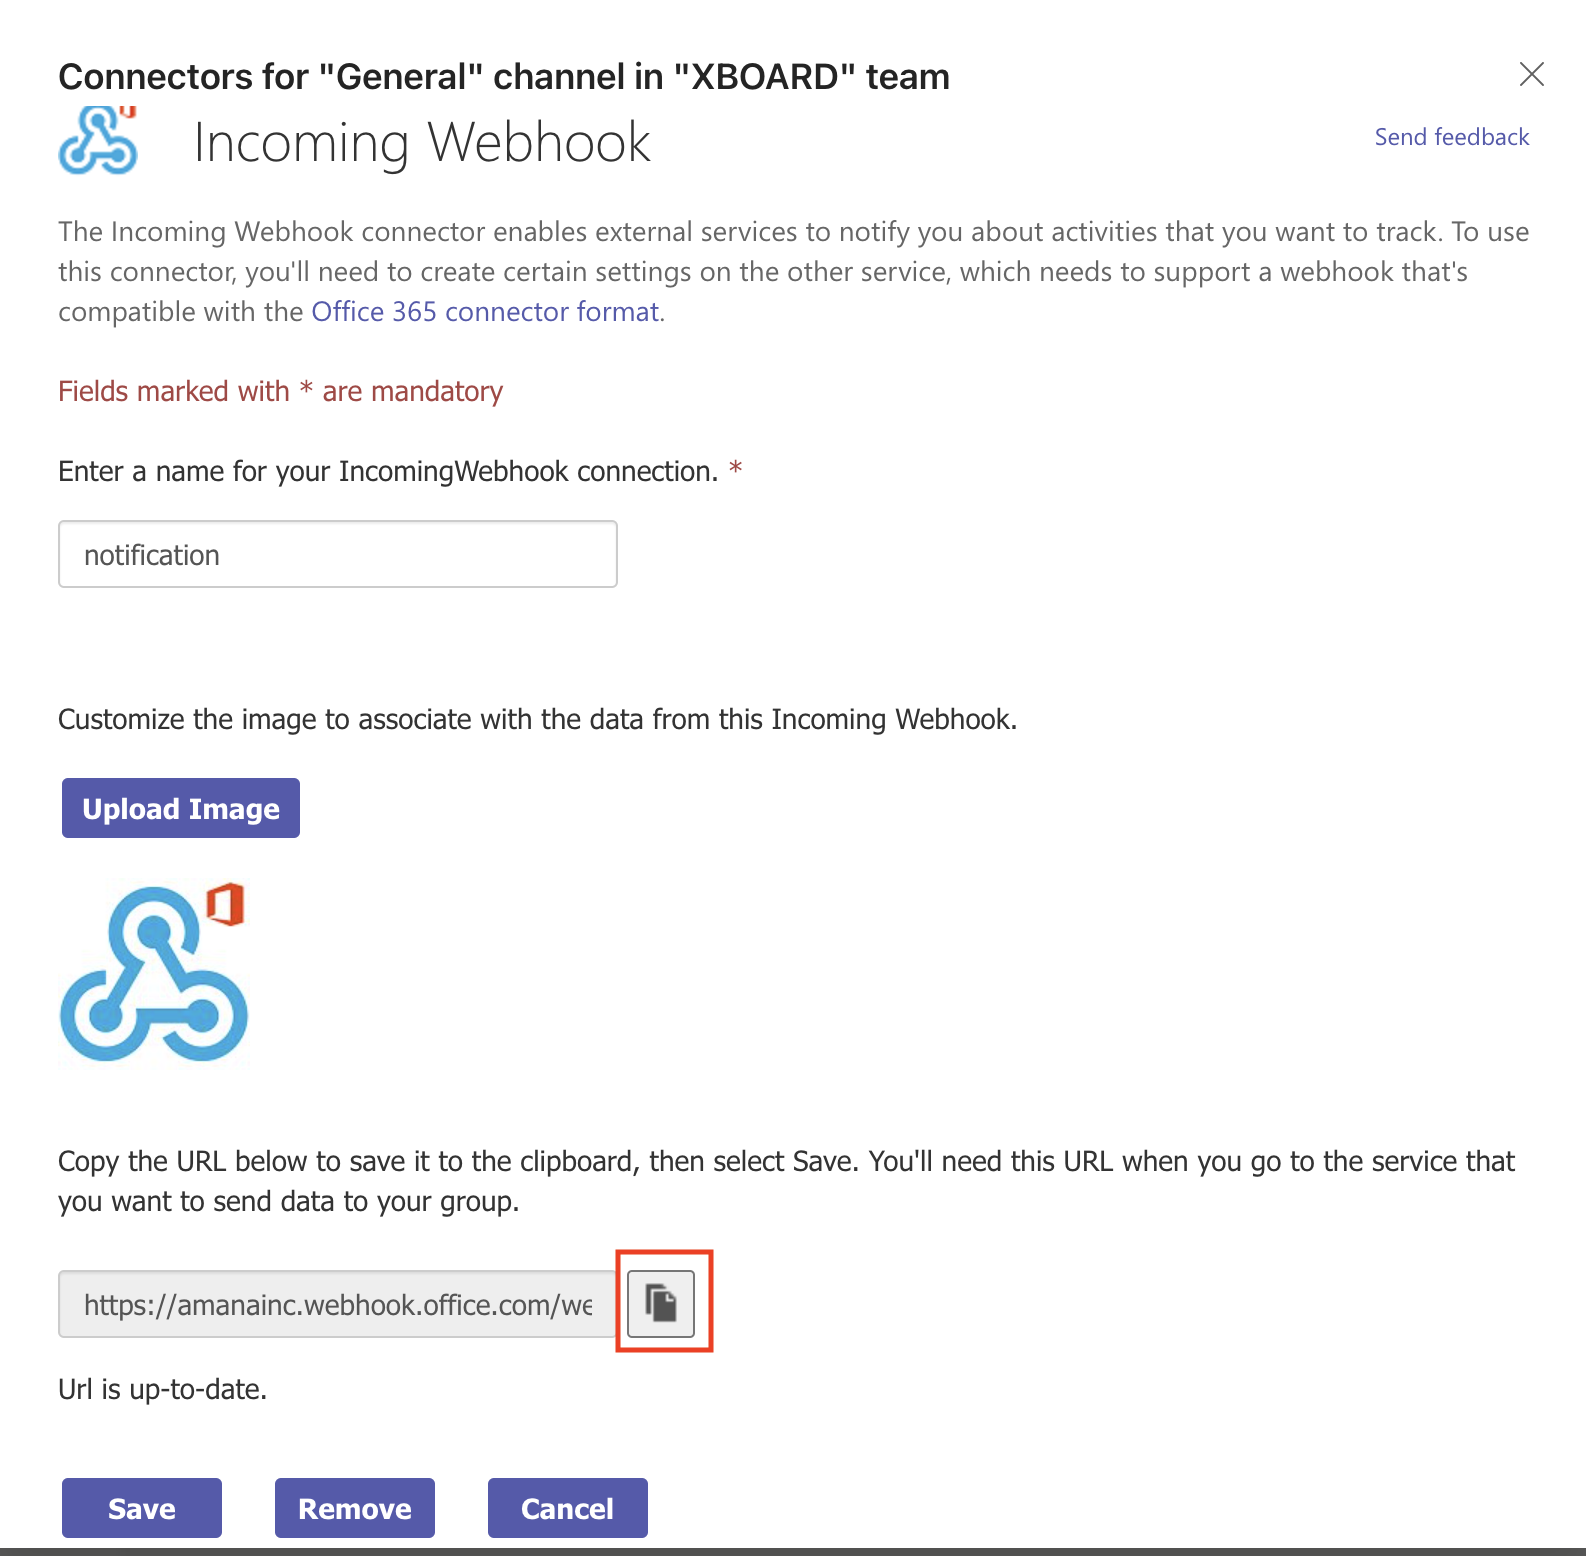
- On the Incoming WebHook screen, enter the name and click the “Create” button.
(The name will be the name of the person posting the message, and the image will be the contributor icon.)
- The Webhook URL will be issued, and copy it into the XBOARD settings section described below.
Finally, click the “Save” button.
■How to set up in Slack
Slack
- Log in to Slack.
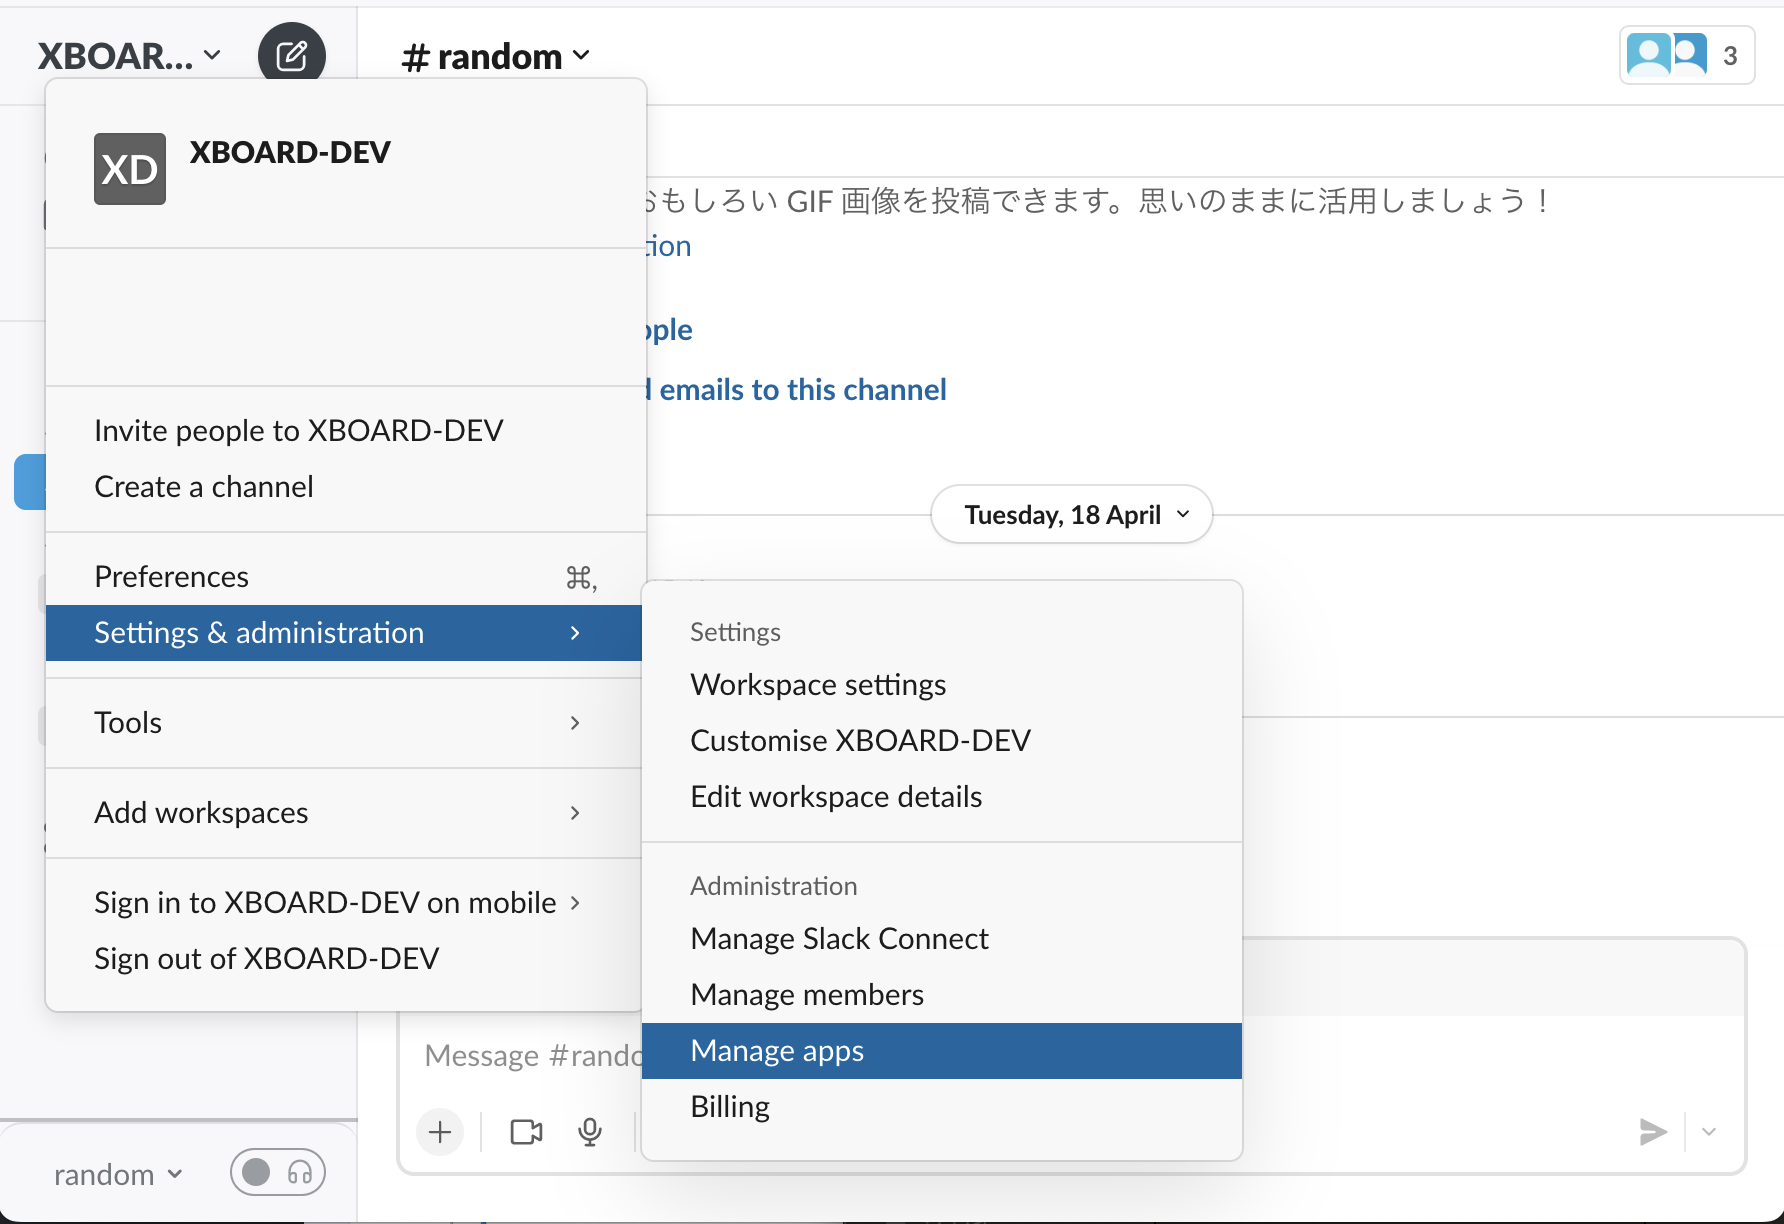
- From the menu of the Slack workspace you want to configure, select “Settings and Administration” and “Manage Apps”.

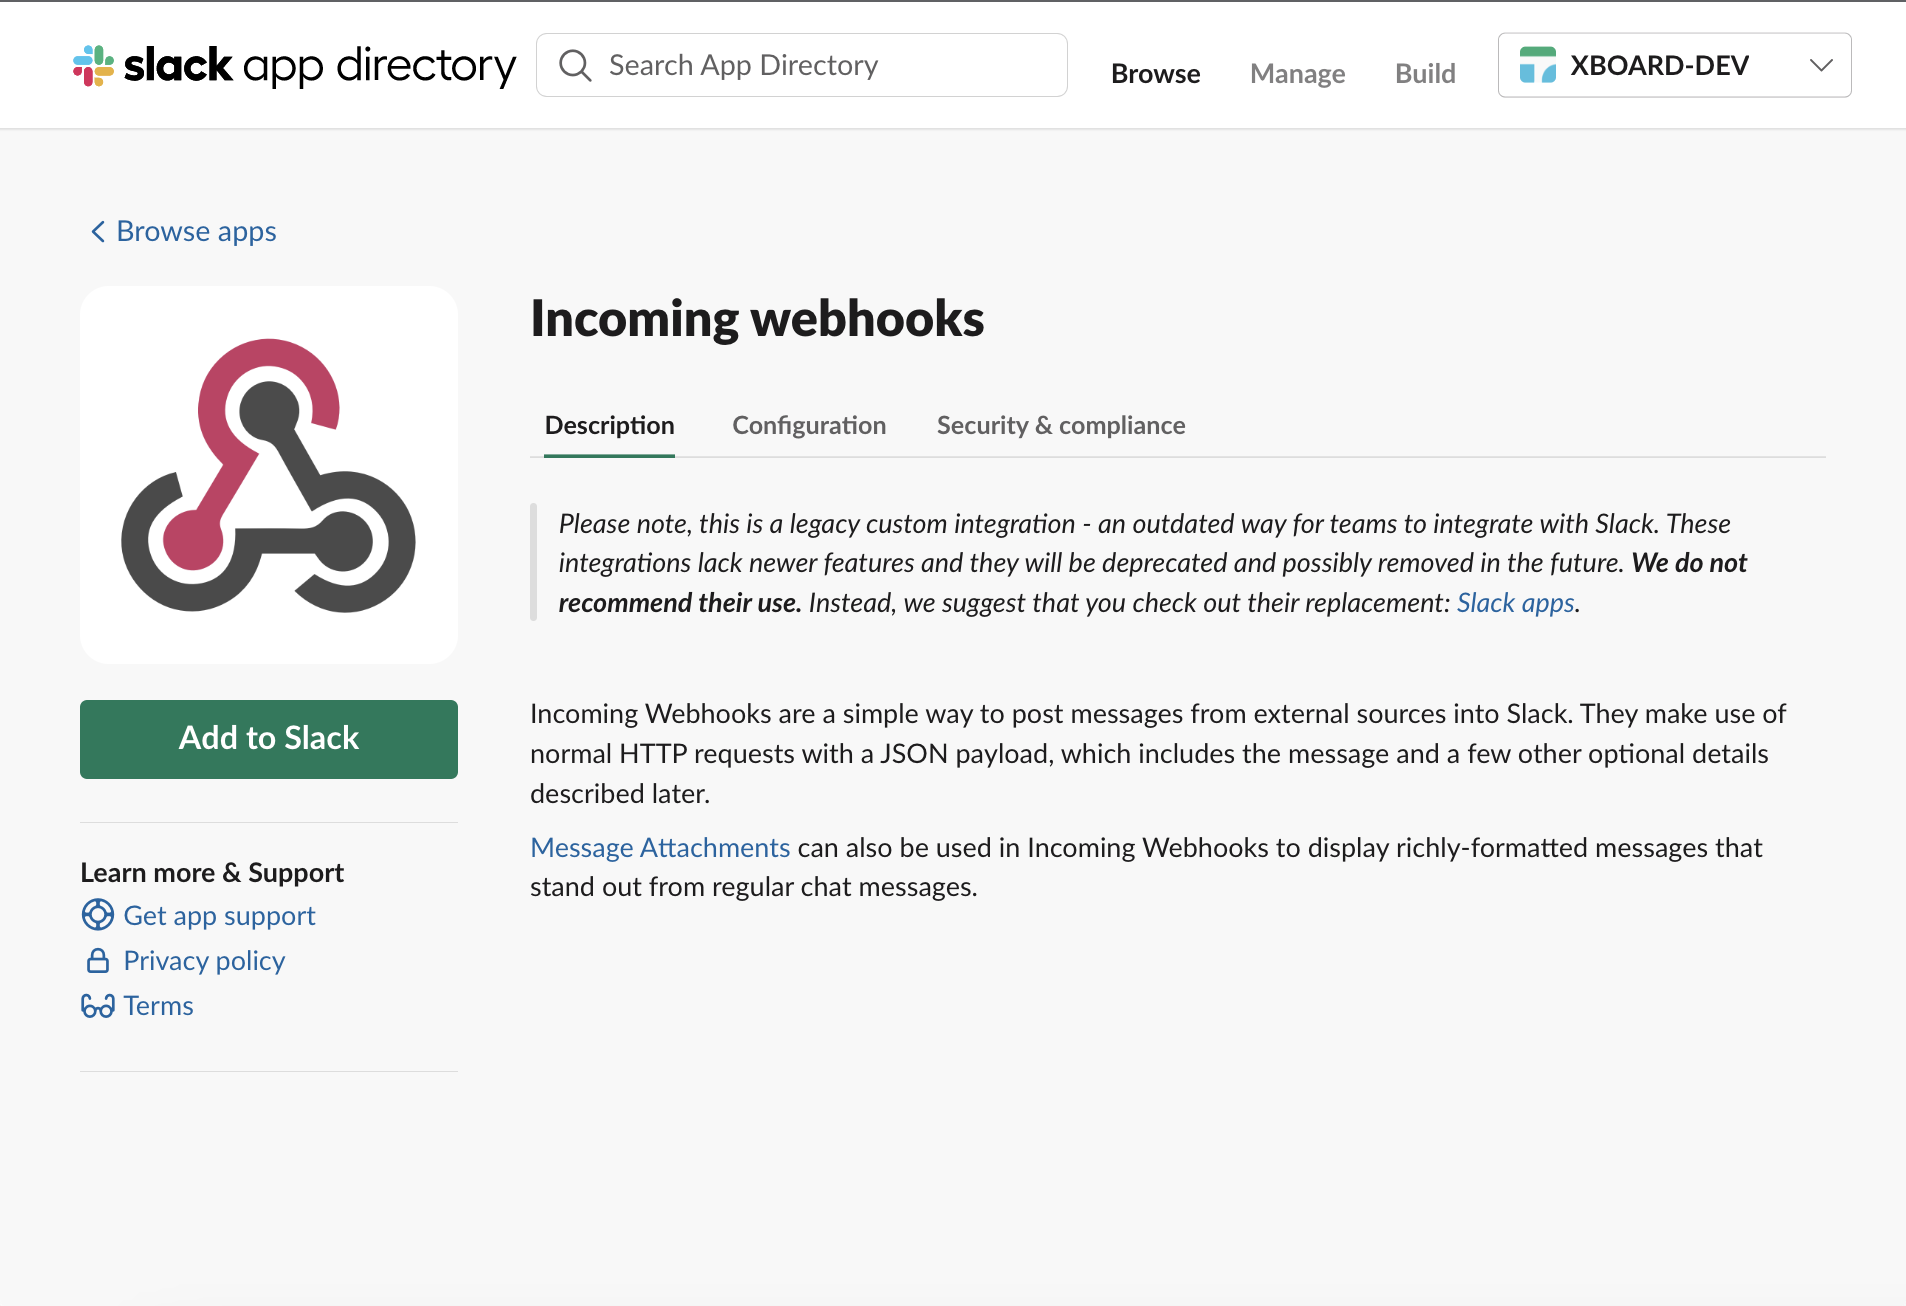
- Search for “Incoming Webhook” in the search window of the slack app directory and click the “Add to Slack” button.

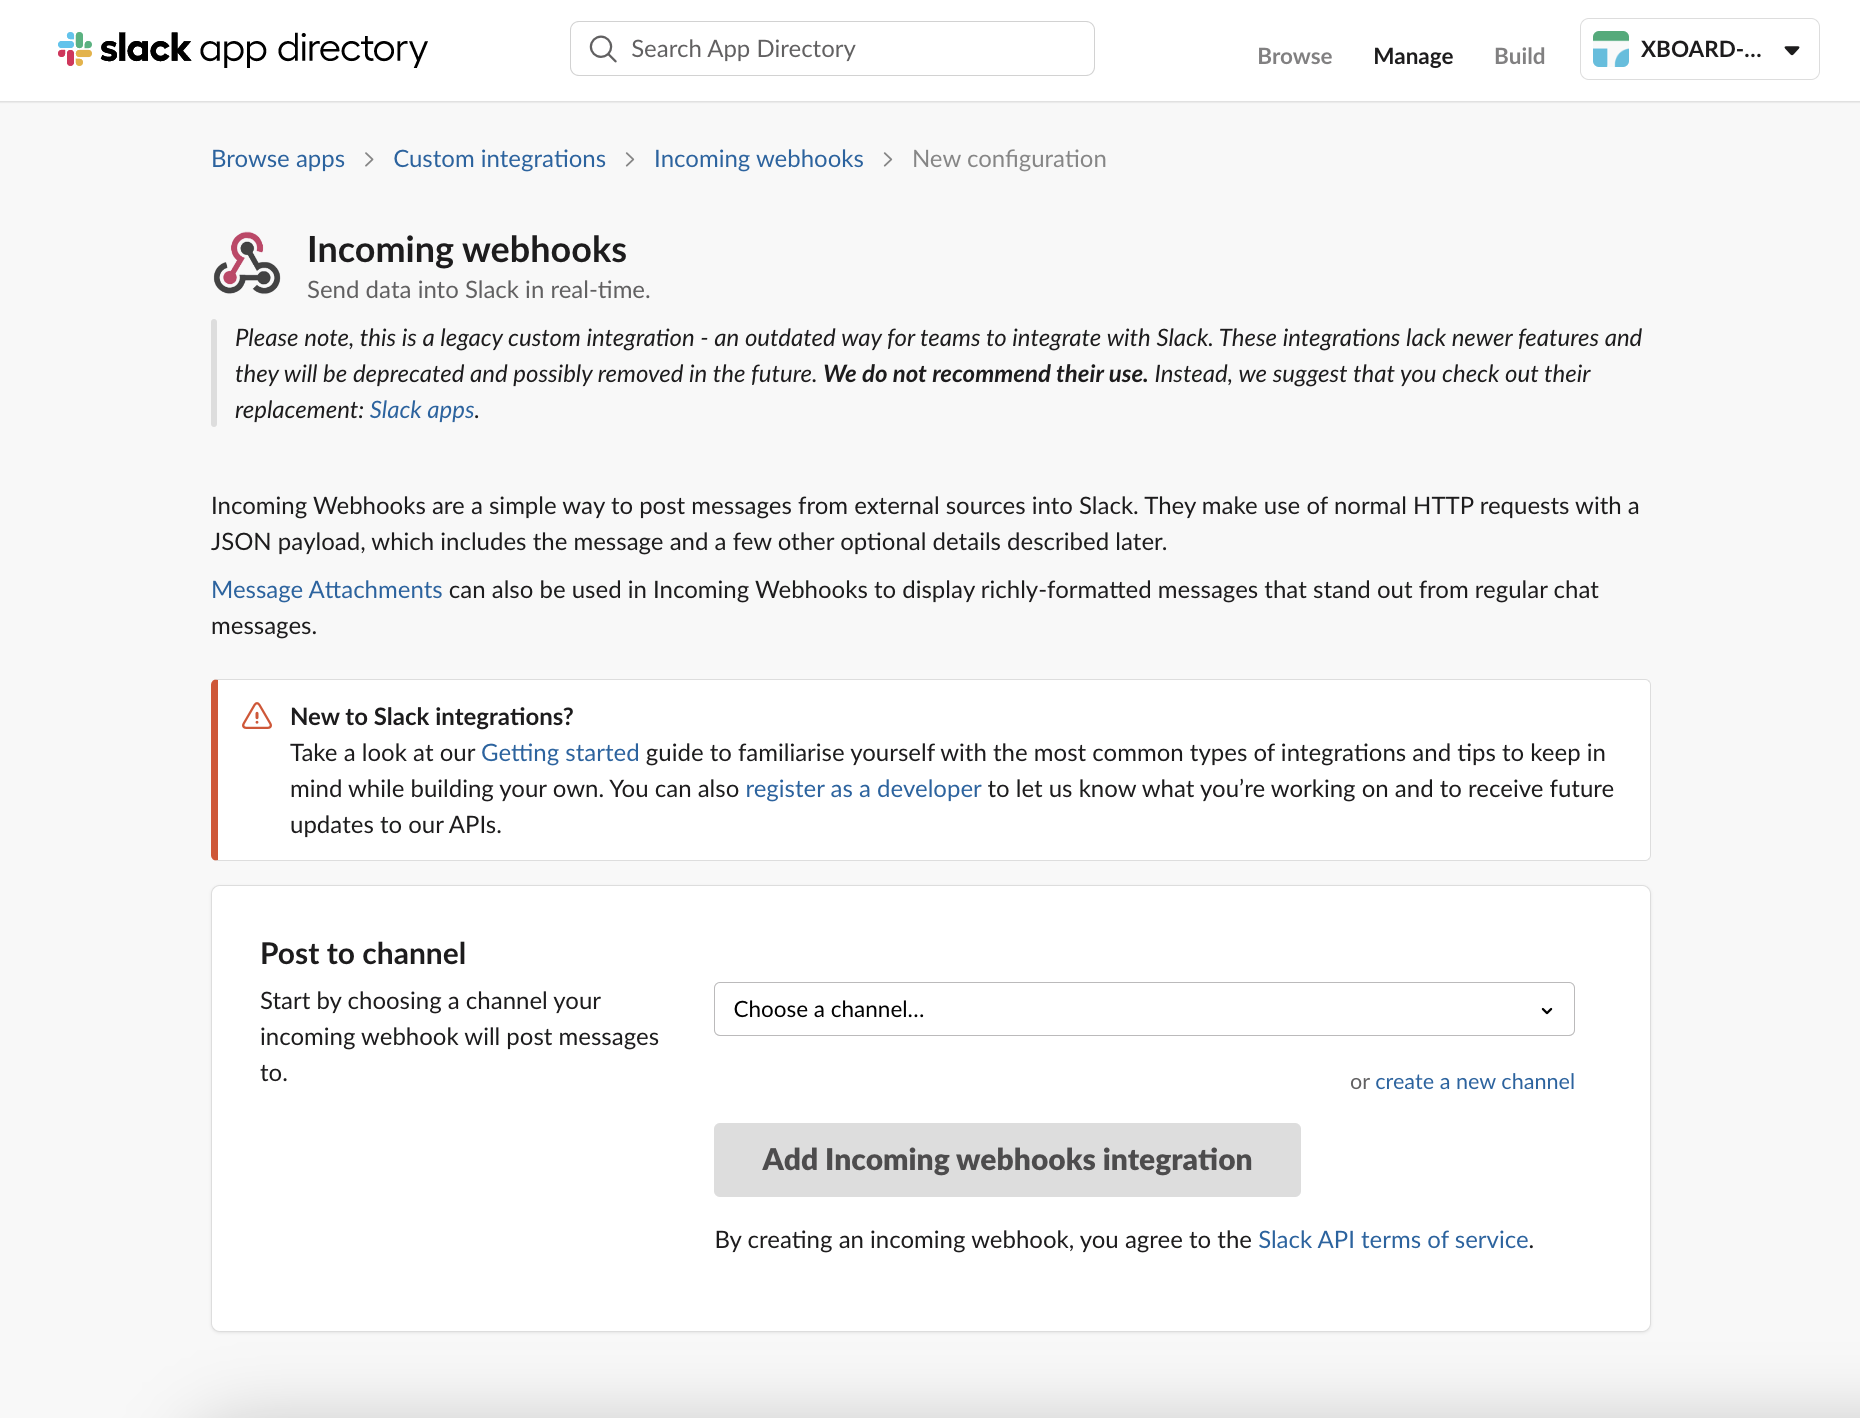
- Select the channels to be notified and press the “Add Incoming Webhook Integration” button.

- After adding, you will see the URL for submission, copy it to the XBOARD settings section described below. You can change the name and icon in the integration settings on the settings edit screen. (The name is the name of the person posting the message, and the icon is the person icon.)
■How to set up in Google Chat
Google Chat
- Log in to Google Chat.
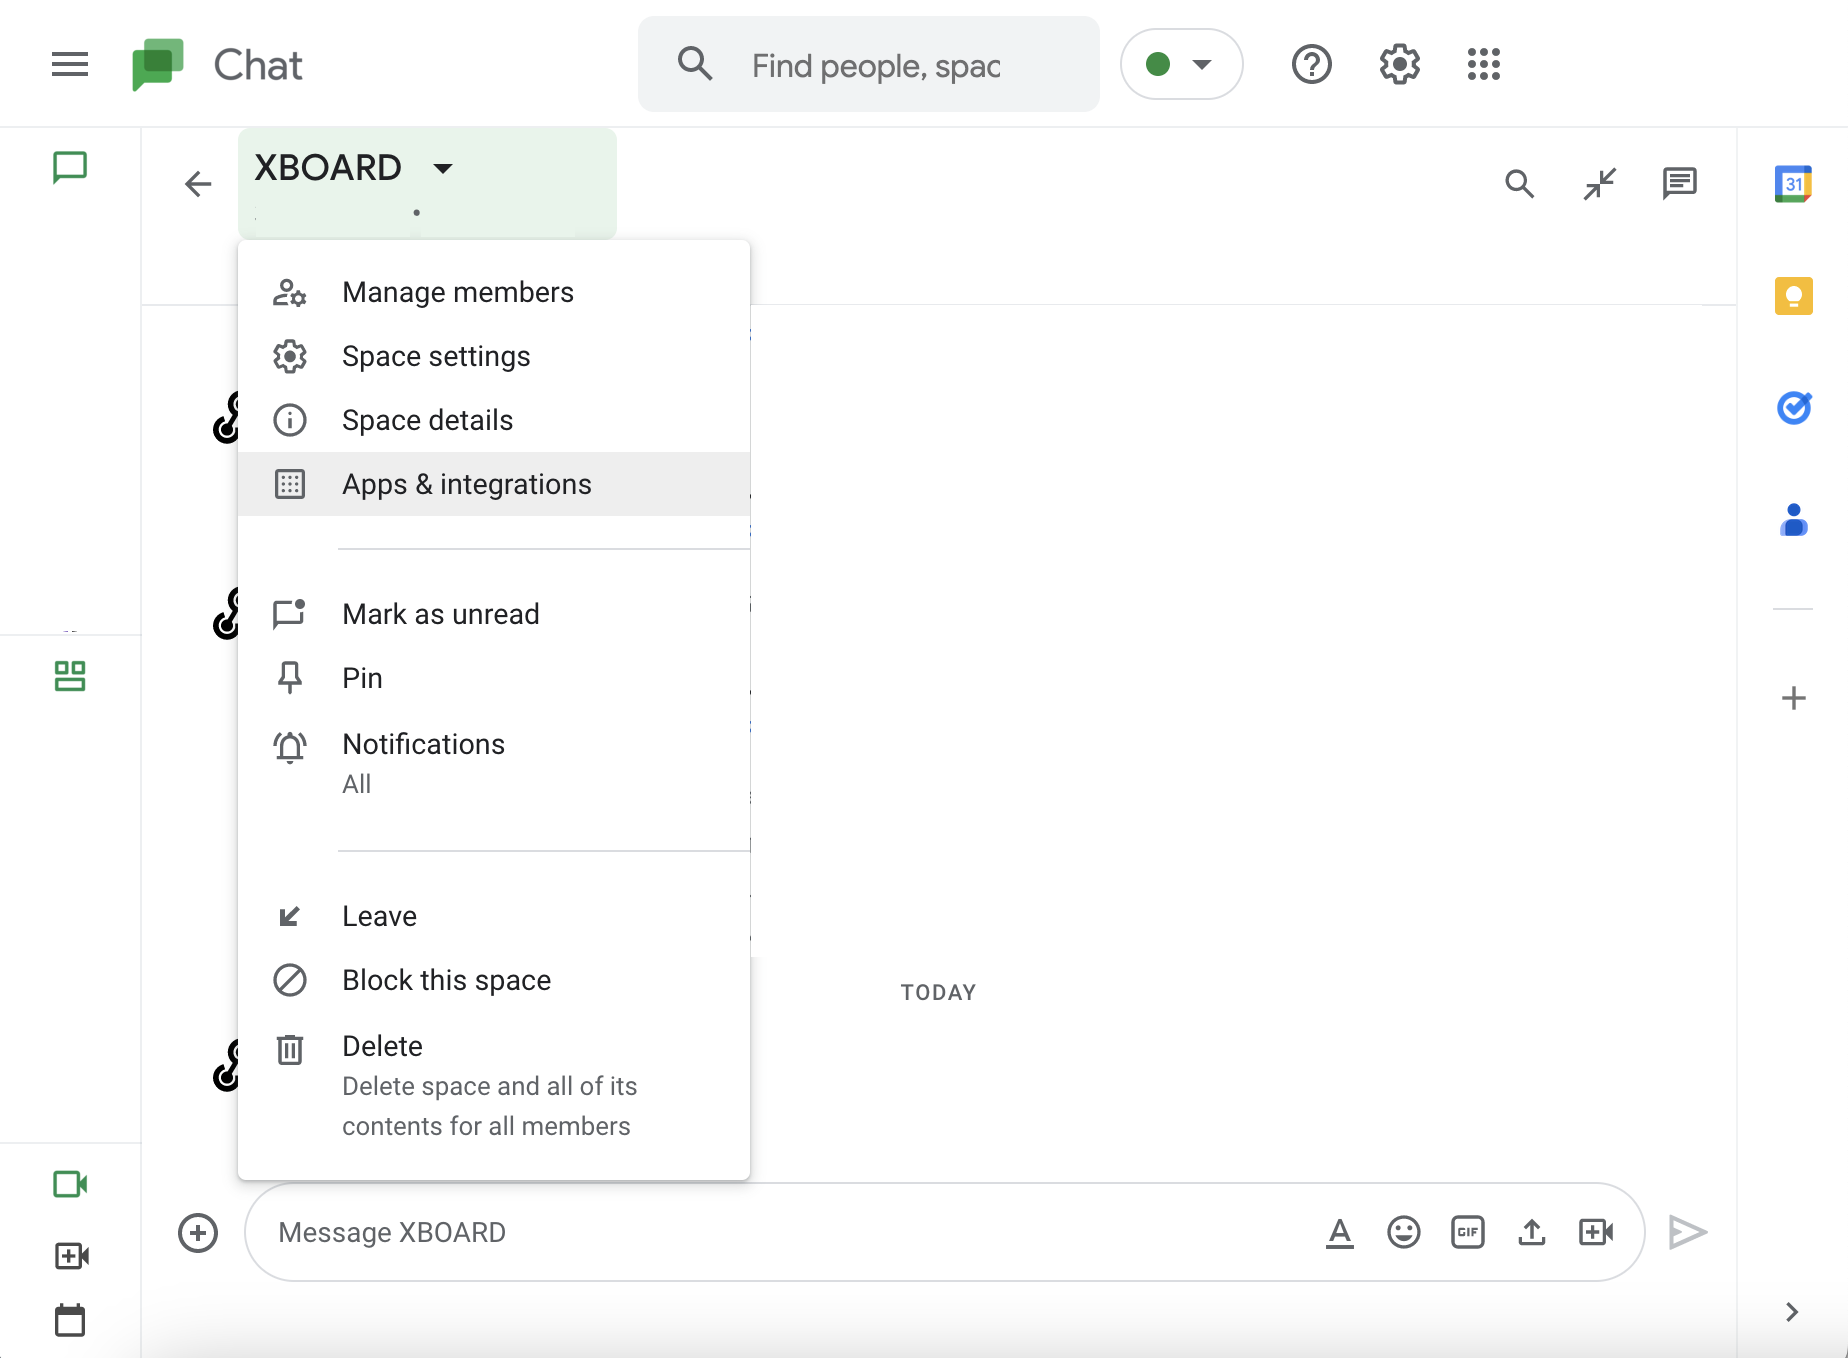
- From the menu of the Google Chat workspace you wish to set up, select “Apps and Integrations”.

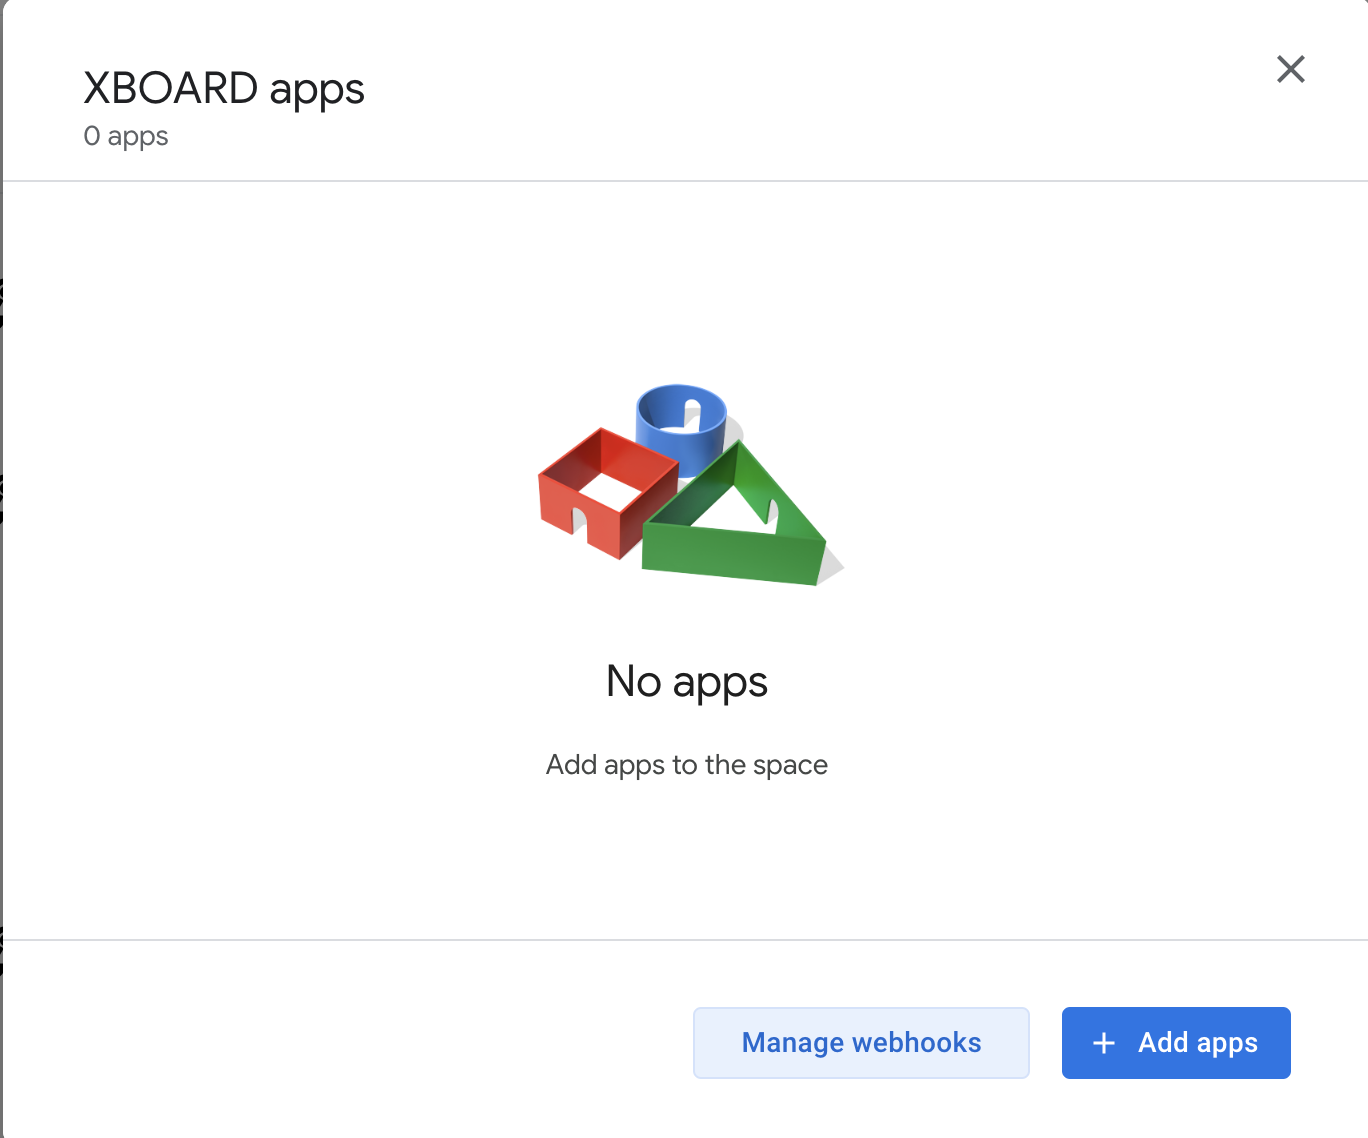
- Click the “Manage webhooks” button.

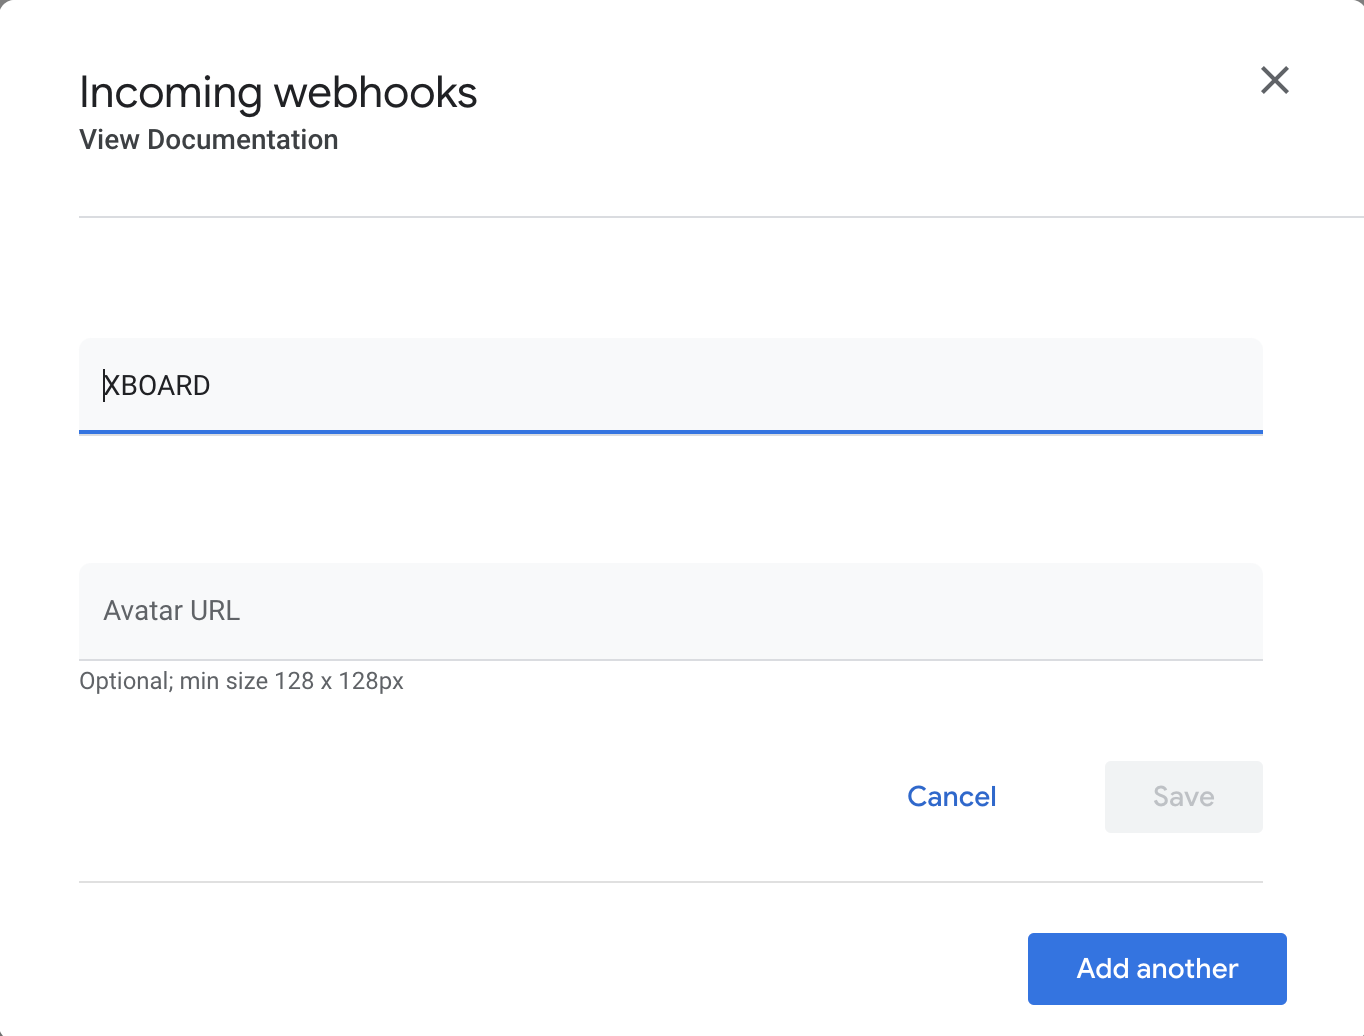
- Enter a name and click the Save button.
(The name is the name of the poster of the message, and the URL of the avatar is the poster’s icon)

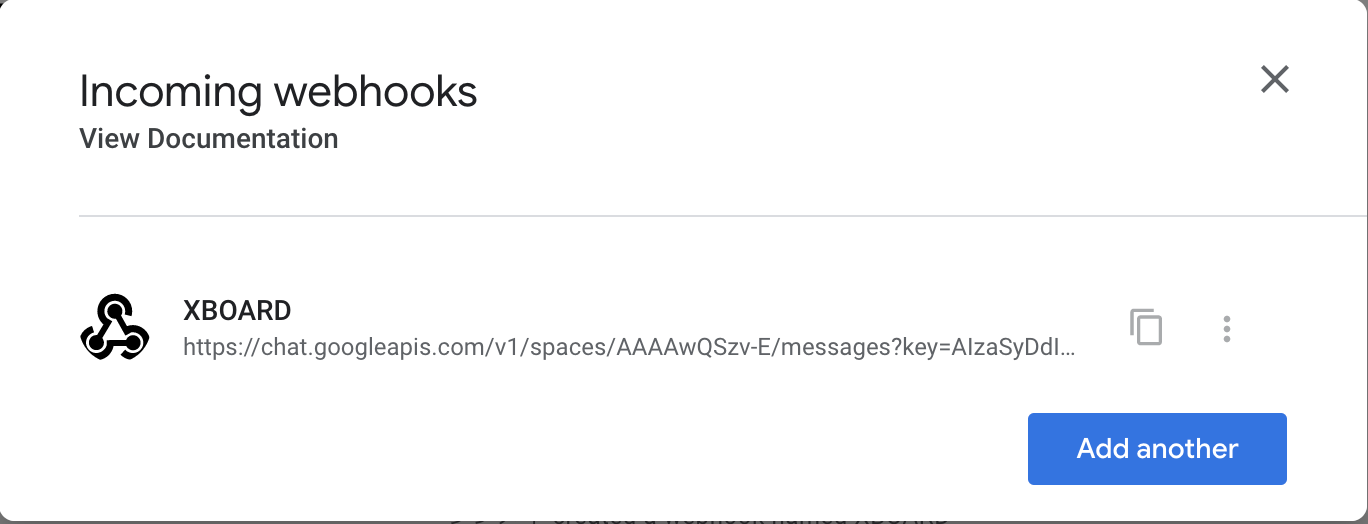
- The Webhook URL is displayed and copied to the XBOARD configuration item described below.

■How to set up in XBOARD
XBOARD
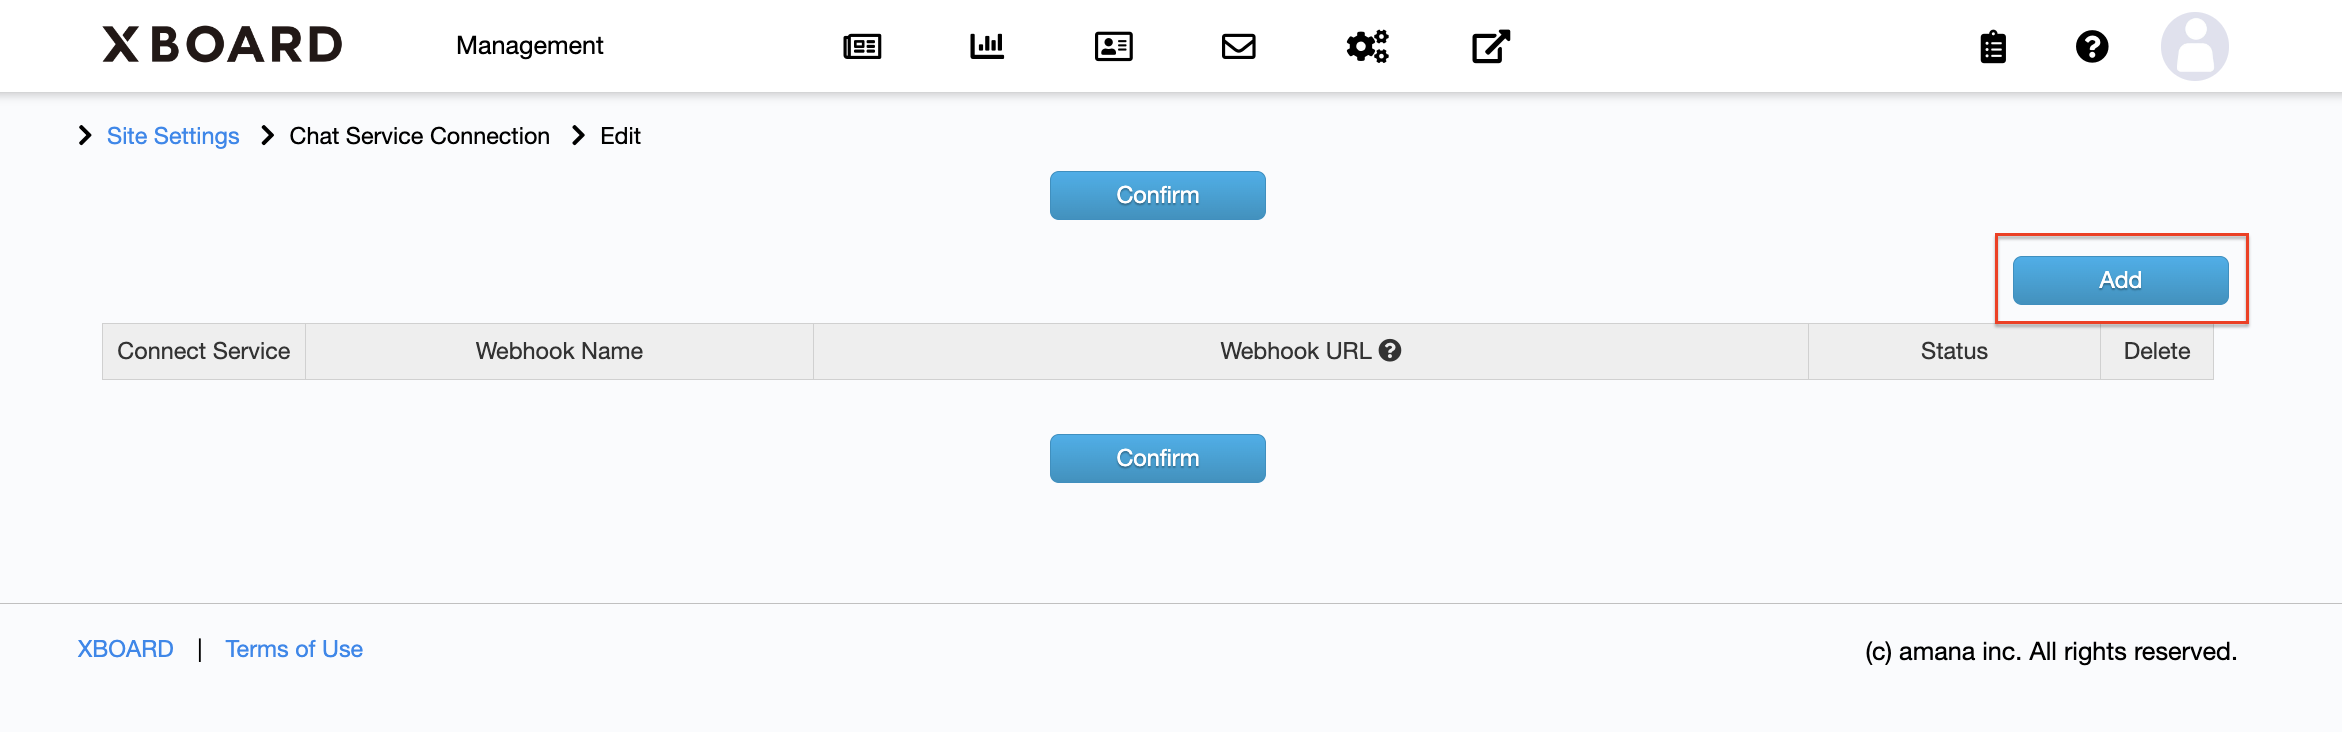
- From the XBOARD Site Settings, select “Chat Service Connection”.

- Click “Add”

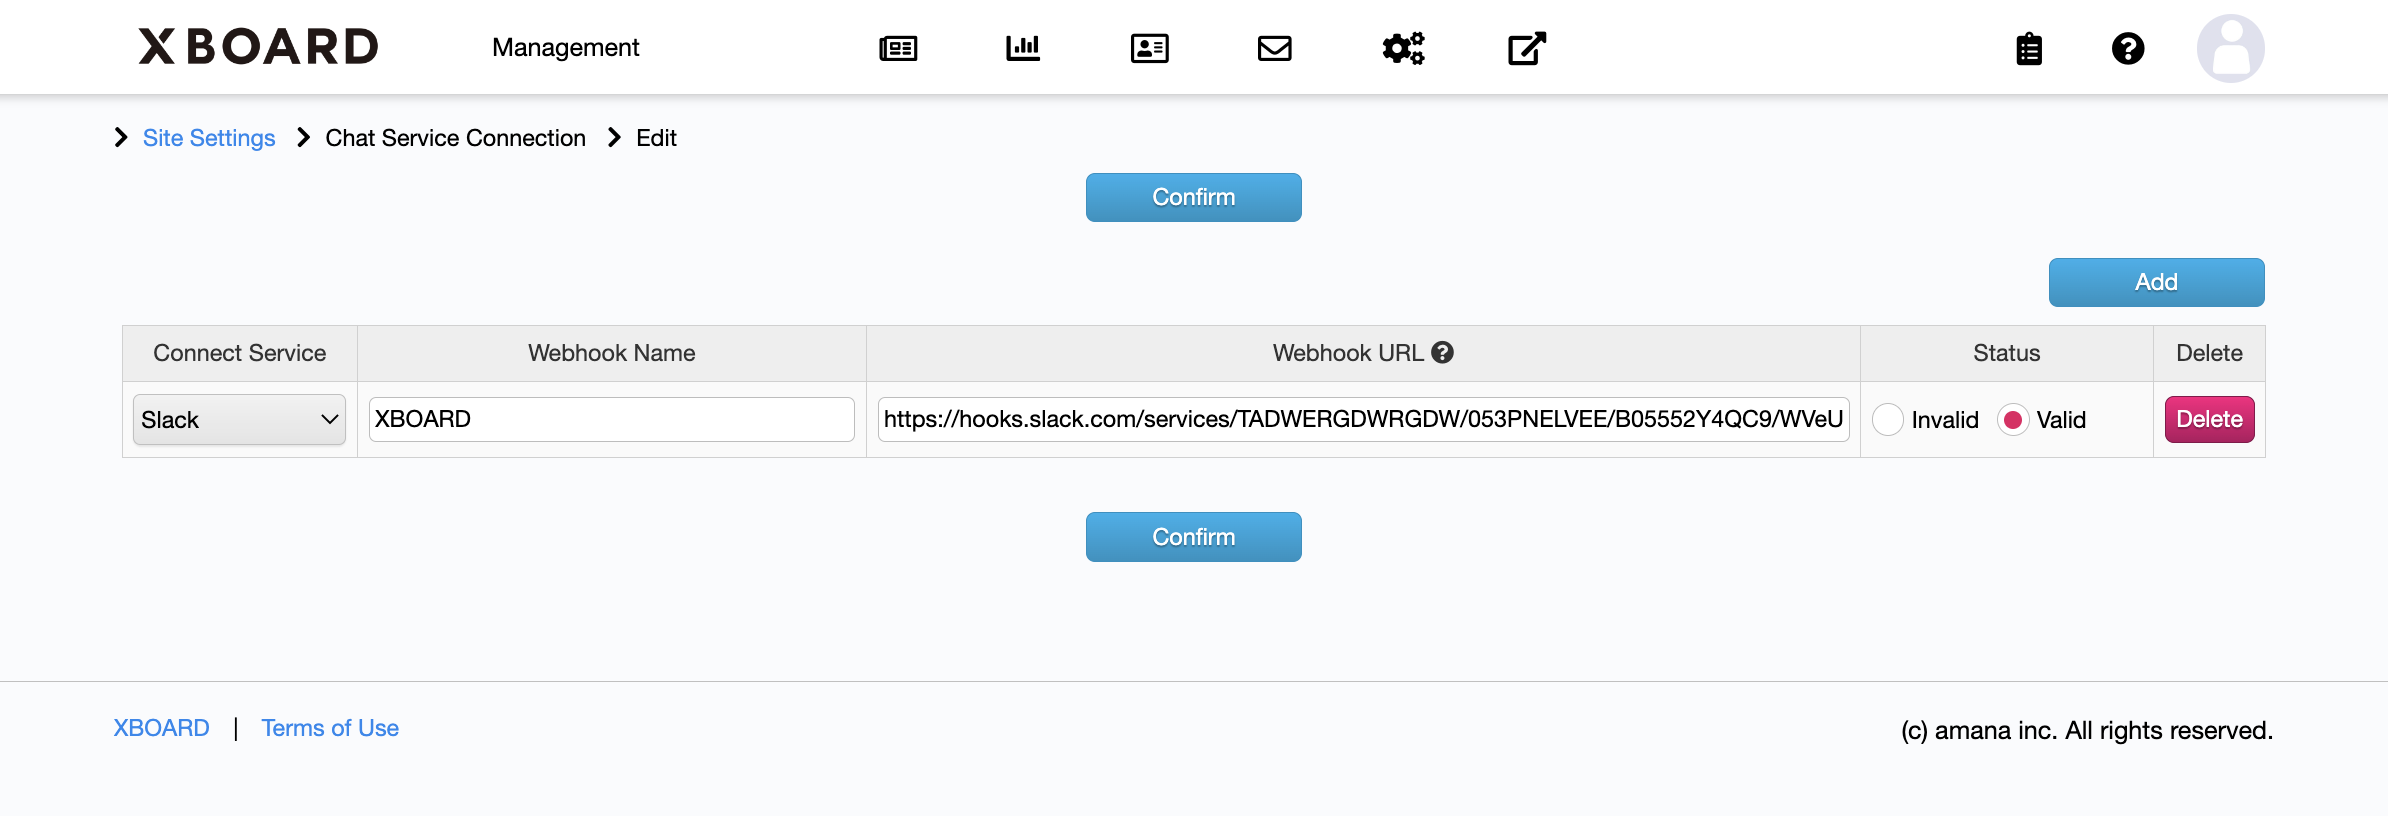
- Set the “Connect Service”, “Webhook Name” and “Webhook URL”.
Connect Service Select chat service.
Webhook Name Enter the name of the chat service webhook.
Webhook URL Paste the URL issued by the chat service webhook.
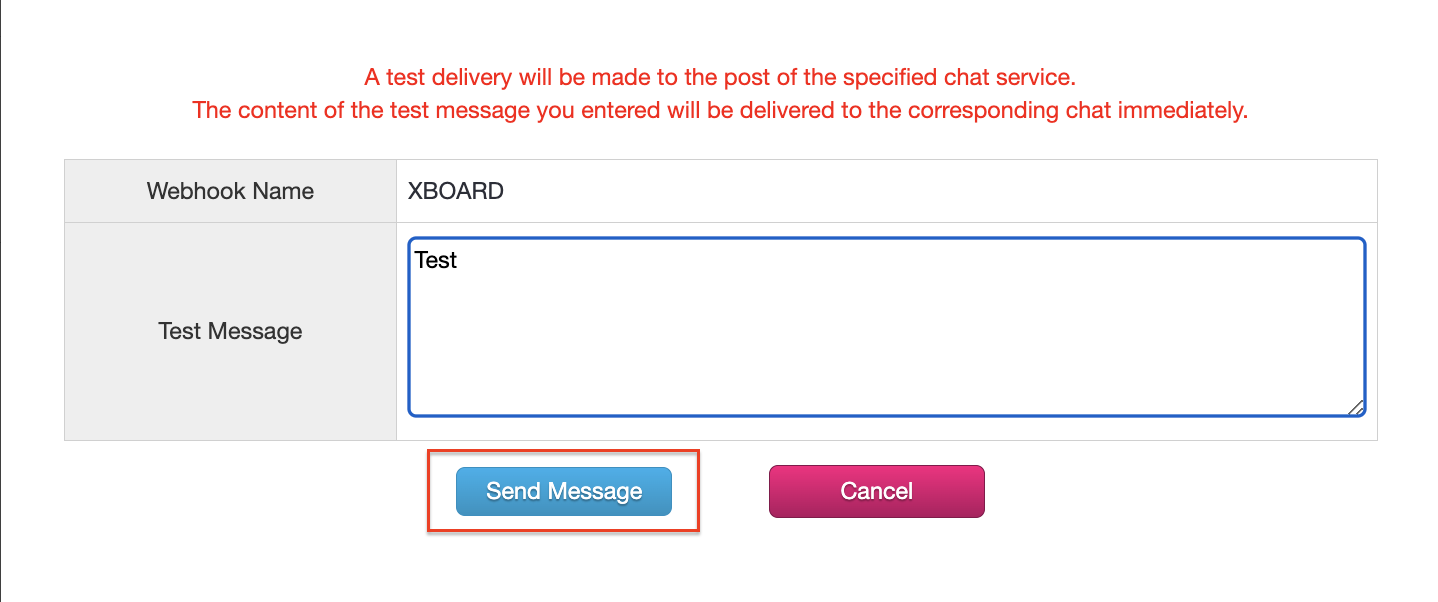
- Test Distribution
On the confirmation screen, perform a test delivery to the linked service to verify that the Webhook settings are correct.
Click the “Test” button to display the message input screen.

Enter a test message and click the “Send Message” button to have the message delivered to the designated service channel.

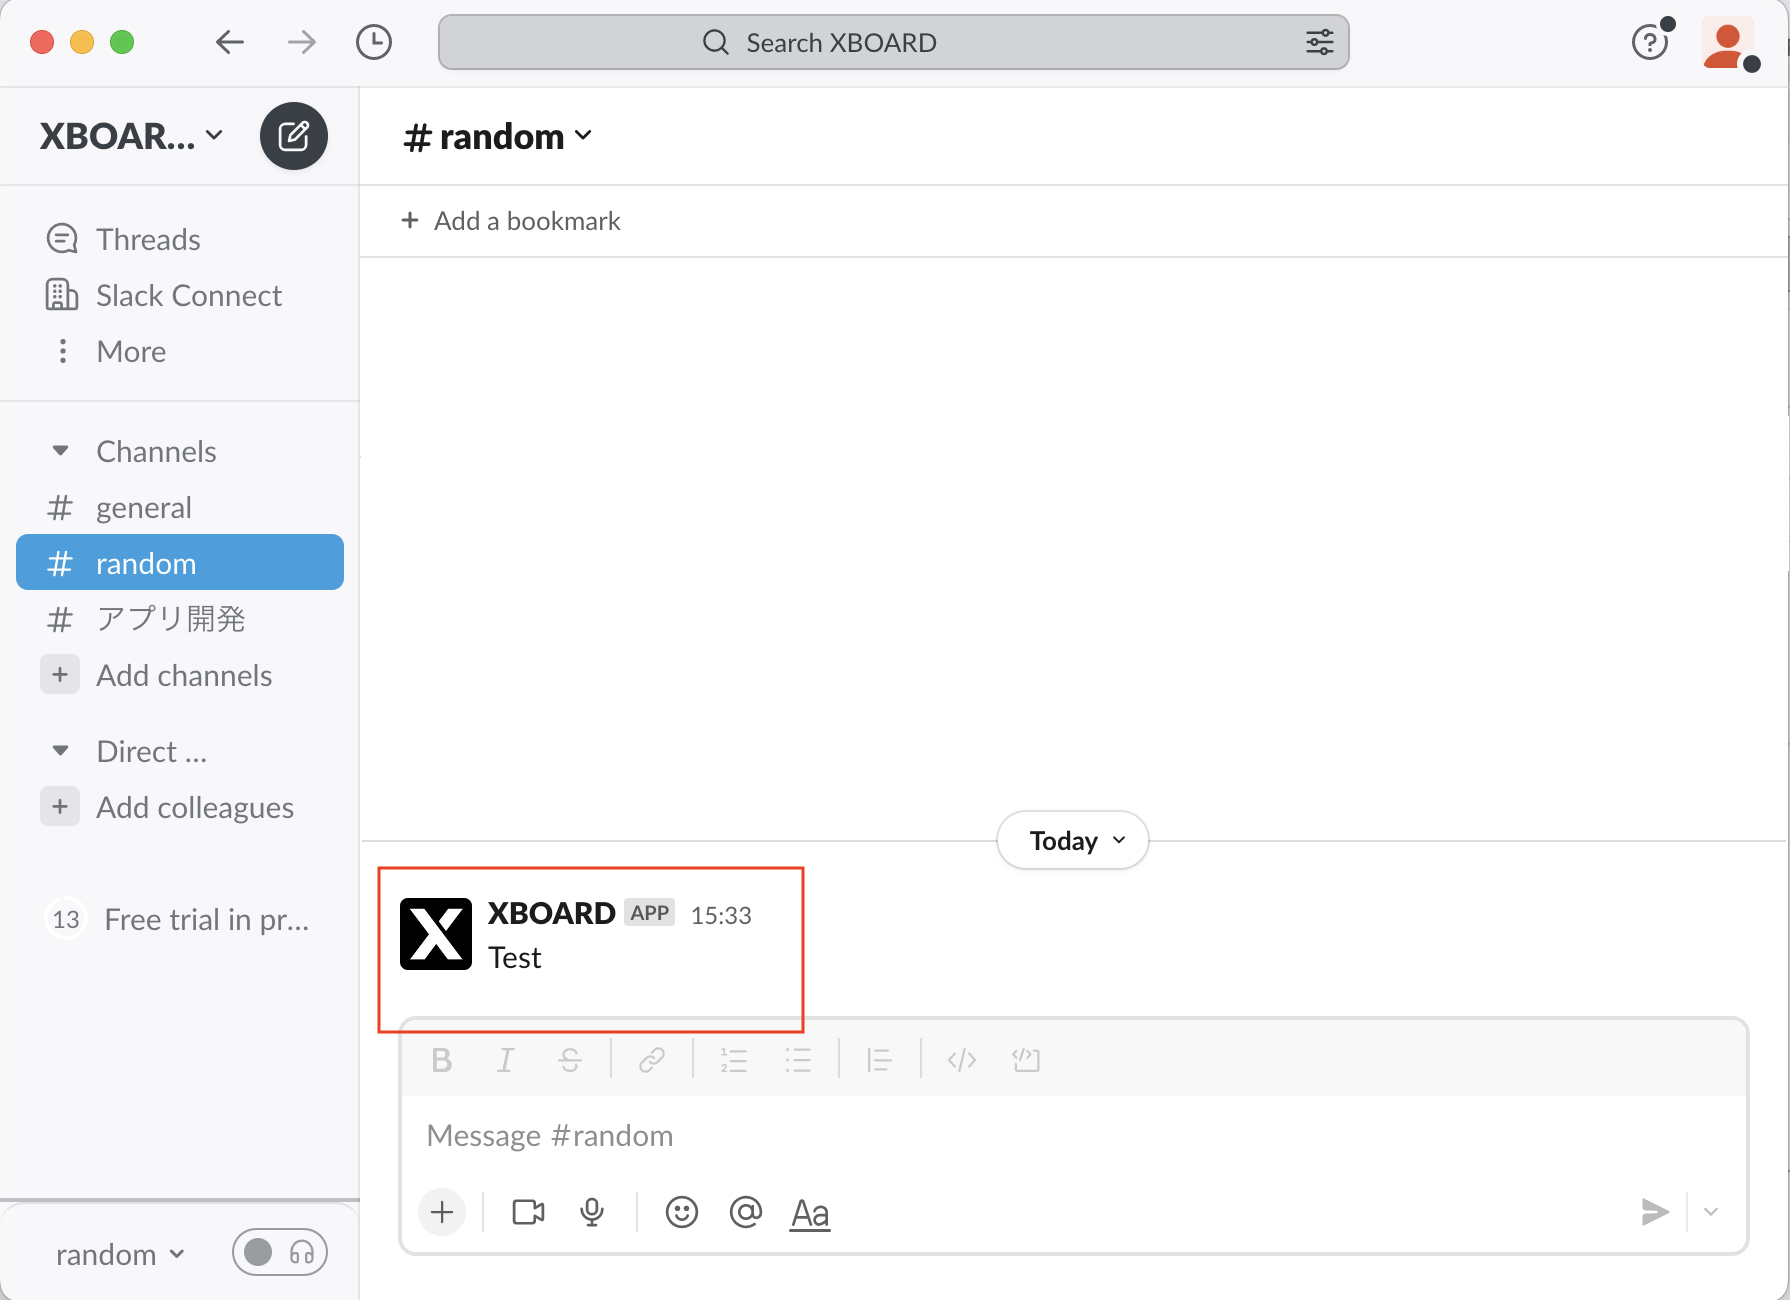
Check the sent messages in Slack.

Once you have confirmed that it was sent to Slack, register with the “Update” button.